Wednesday, February 29, 2012

Live Like You Were Dyin'

Last weekend, my husband, Dean, and I went to Dallas for a little weekend getaway.  The getaway was part Dean's Christmas gift and partly to celebrate our 27th wedding anniversary.  Many, many years ago he told me that he wanted to attend a NASCAR camp - this was on his "bucket list" and I wasn't sure that he would ever be able to do it (or afford it).  Living Social offered a special on a "NASCAR Experience" and I jumped at the chance to purchase it for Dean.  We went to the Texas Motor Speedway's NASCAR Experience which is run by Mario Andretti and his staff.


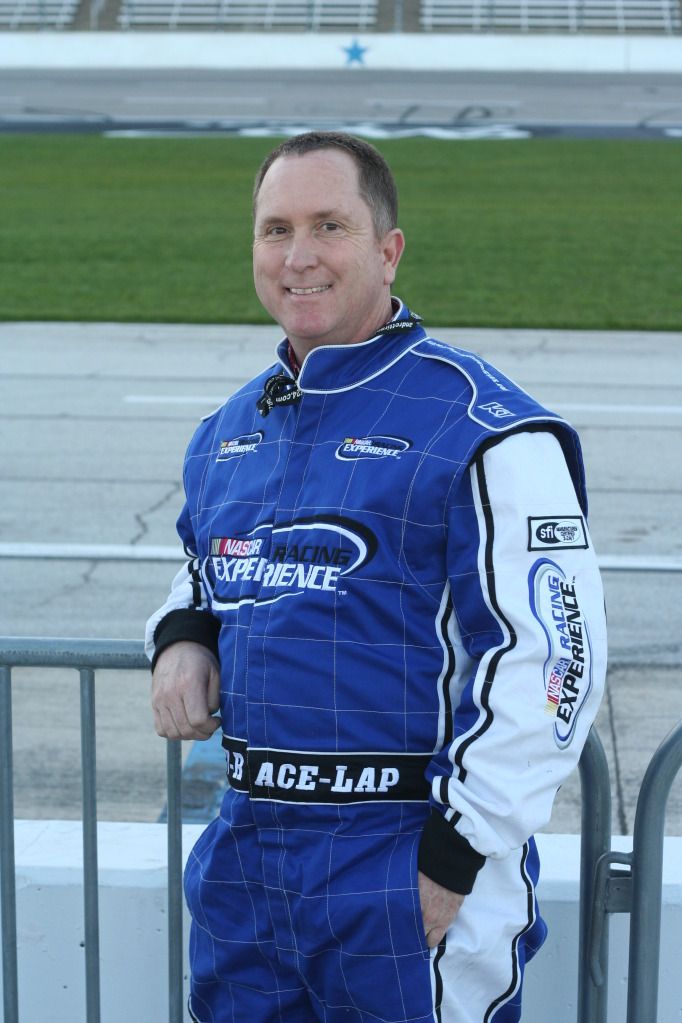
Here is my handsome husband in his fire suit!  He was so excited about driving a "proven" race car.  The car he drove was the Crown Royal car that is driven by Jamie McMurray.


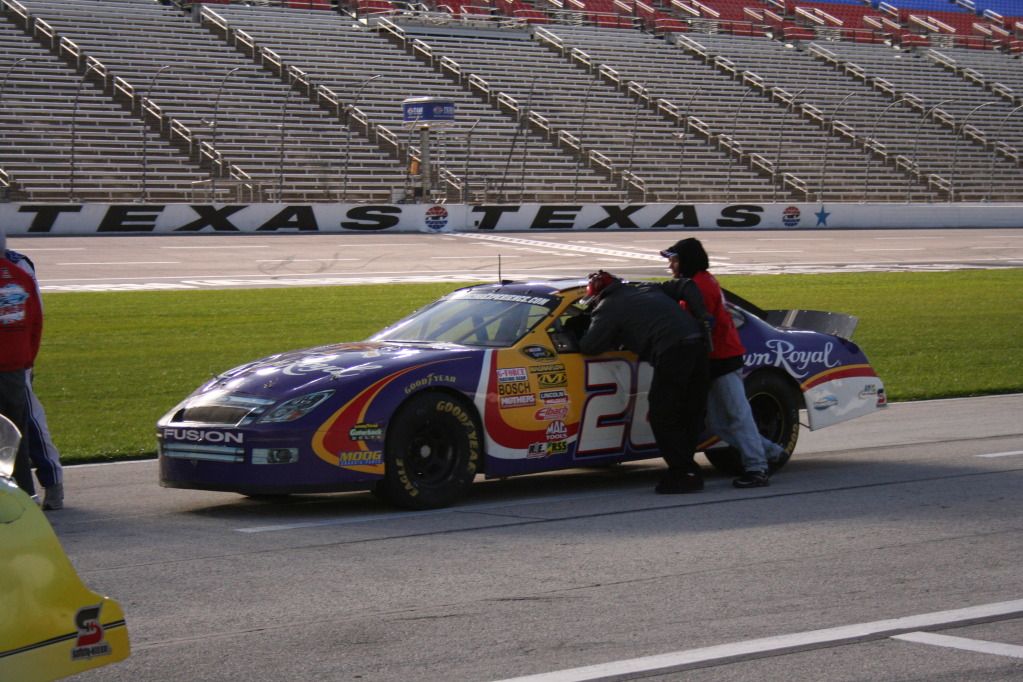
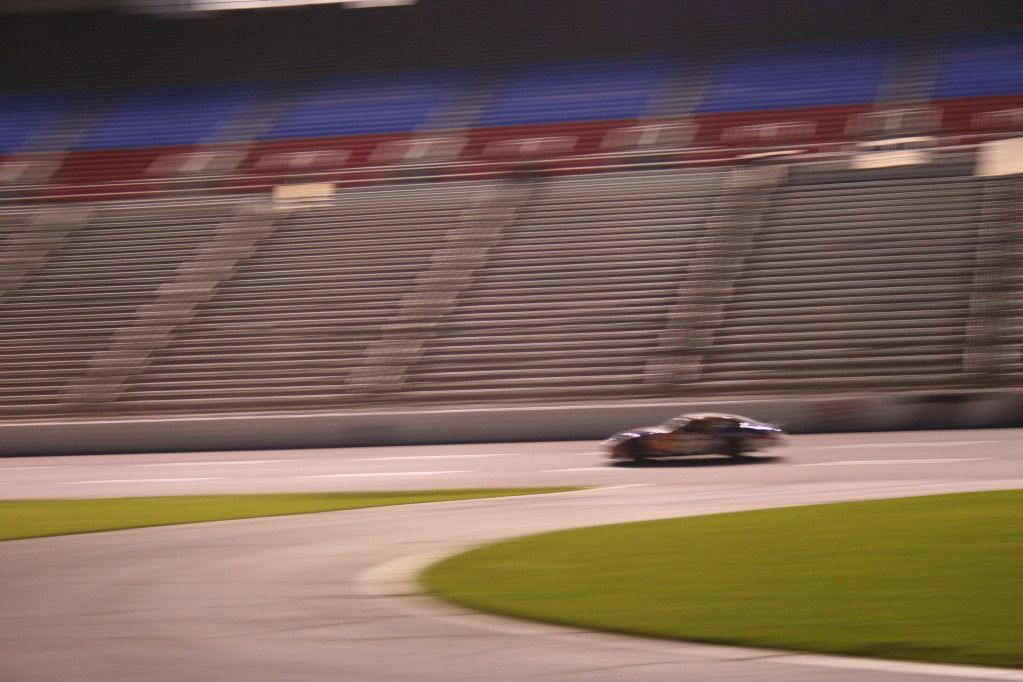
Dean was so excited when he got his statistics on his fastest lap.  He drove 154.53 mph and got to drive for 8 minutes.  His goal was to drive 150 mph and he met his goal.  I am so happy that he had the opportunity to drive and feel the power! 

The classroom trainer said that family members could purchase a ride with a professional driver and go 3 laps at top speeds.  Dean asked me if I wanted to do it and my first thought was absolutely NOT!   The next thought that went through my mind was, "What if I die tomorrow?  What if I never get a chance to do this again?"  So I marched myself up to the registration trailer and signed myself up - YES I DID!!!!  It was thrilling!  I told the driver, Kevin, that I couldn't even say a word or scream like a girl!  It was just exhilarating and I had a smile on my face for 3 straight laps!


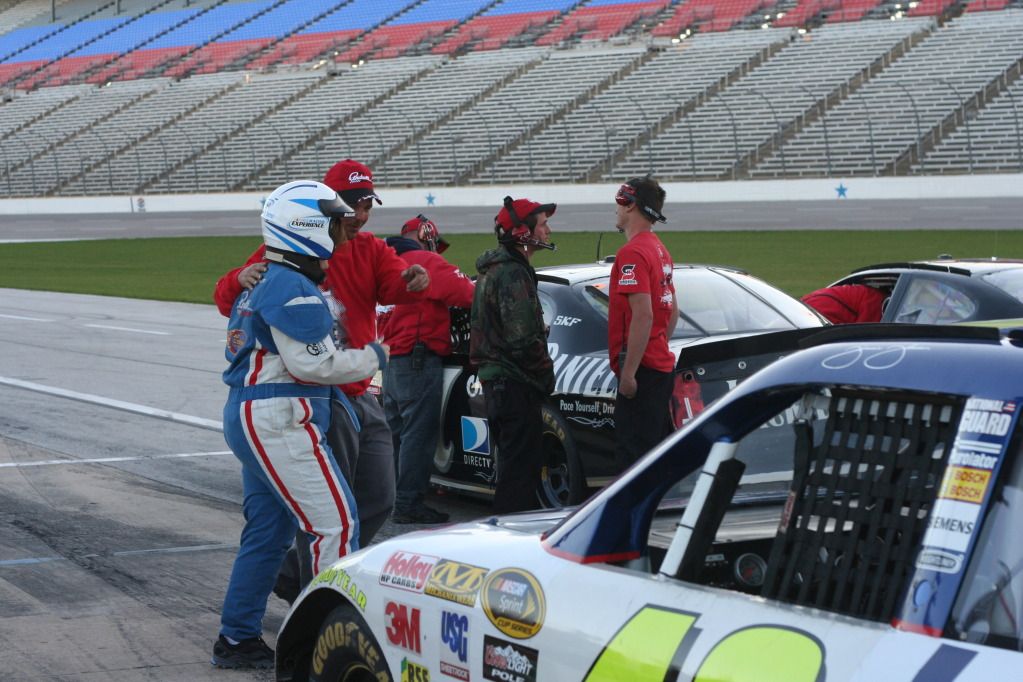
I know I don't look very cool in a fire suit but I had to wear one!


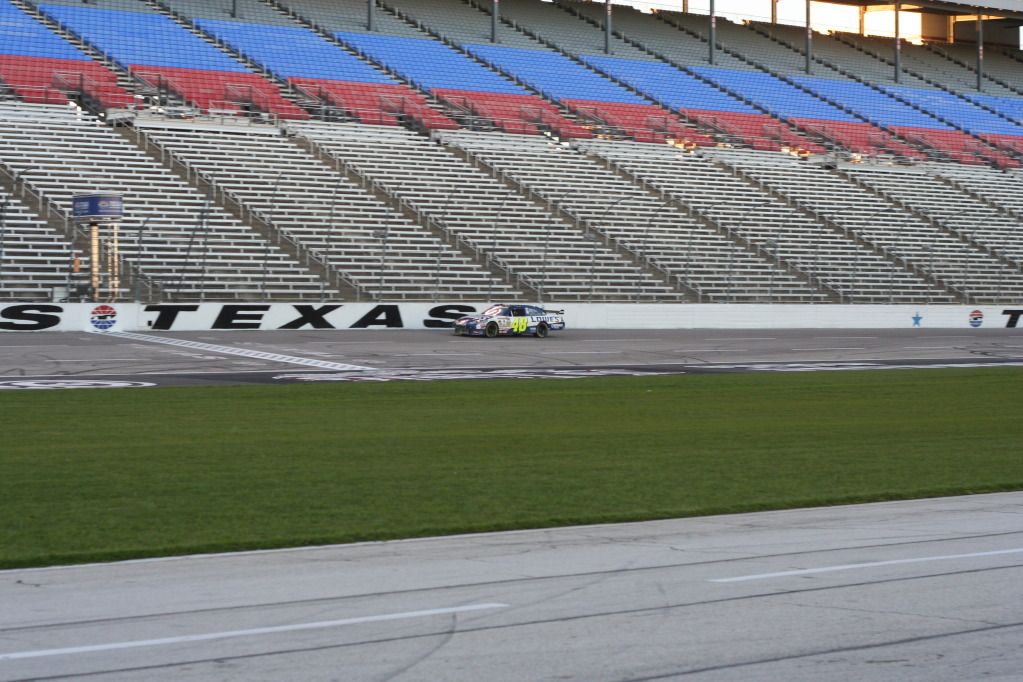
The car I rode in was Jimmie Johnson's Lowe's car and we went 180 mph!  It was exhilarating!


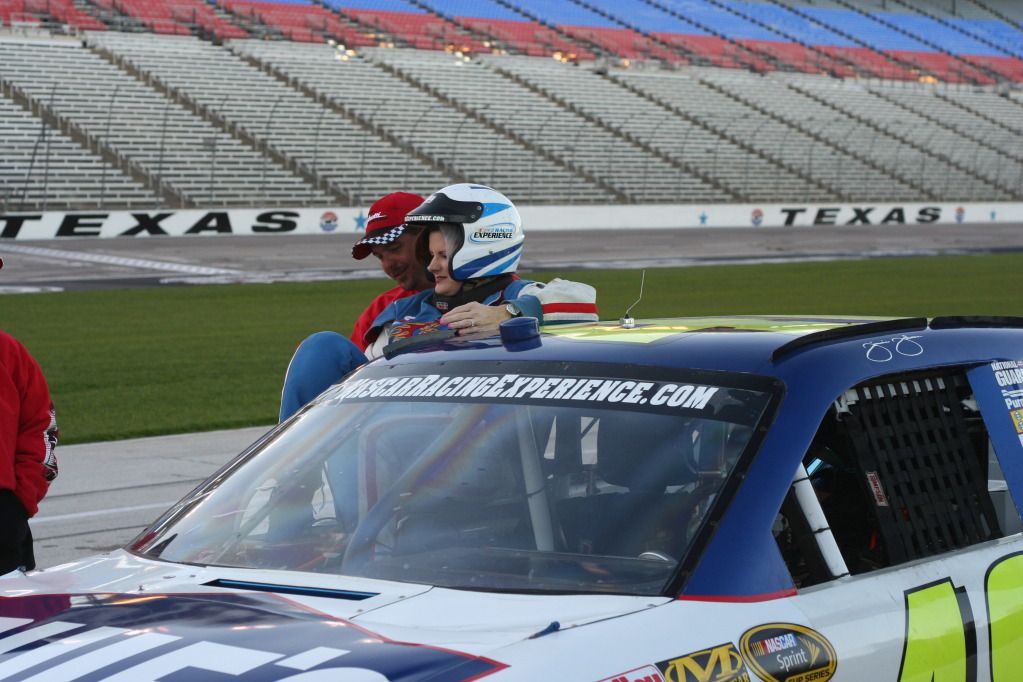
Getting in and out of those cars is a challenge!  I actually bruised my back and shoulder but it was worth it.  I told the guy helping me that he might need a hoist to get me back out!

When we got back home, we went to show my in-laws the pictures and video and they were giving us a hard time about doing it.  My mother-in-law also gave us an update on a family member who was diagnosed with cancer while we were away (she is in her early 50's)  and my husband and I both said, "That is why we rode and drove NASCARs!"    You never know what tomorrow holds!  Now, you need to go Live Like You Were Dyin'!


Thursday, February 23, 2012

"God Moments" Prayer Journal


This past weekend, the Women of Westminster had a Women's Retreat called "God Moments".  Since my mom just had surgery, she nor I were able to attend...I know very sad! 

 However, many, many months ago the committee asked me if I would teach a group craft project (for 55),  as last year we made thank you cards with the ladies.  I was thrilled they asked me again, and after thinking about it for a week or so, I suggested that we make prayer journals to one of the committee members.  She didn't  relay that to the committee chair that week, but the next week they met with the retreat speaker and she told them that she really emphasizes journaling.  Well, I don't know about you, but I took that as a sign that God meant for us to make those journals to record their "God Moment" in. 

The above journal is what we made.  I used the Elemental Paper packet and miscellaneous ribbons from my stash.  I cut the scalloped border, leaves and flowers on the Cricut and stamped them with the Hooray Bouquet stamp set.  We used liquid glass to adhere the pebbles to the center of the flowers. 

 Everyone loved their creations...many of them don't scrapbook or make cards and told me that it made them feel really "crafty"!  Those are the days that I love my job!

PS - Thank you to my last minute helpers!  My mom, Aaron Brown, Aunt Barbara, Nancy, and Jackie helped me,  as the committee split everyone up into groups - and there aren't 6 of me (thank goodness)!

Wednesday, February 22, 2012

Congratulations Card


This Pemberly card was cut out on the Cricut (you just have to love that Cricut AP Cartridge!).   I used the Card Word Puzzle to stamp the flowers, leaves and "congratulations."   I stamped the flowers and the leaves with Brown StazOn ink and then water colored the flowers with  Buttercup ink and the leaves with Desert Sand.  I stamped the flourish with the Love Life stamp set.

The butterflies are from the Color Ready Accents assortment and I sponged Honey ink over them.  I embellished the card with Bronze Glitz Glitter Gel, Pearl Opaques, and ribbon from my stash. 

Tuesday, February 21, 2012

Treasure Life Pemberly Card


This card features Pemberly paper and "A Tweet" stamp set.  It is one of those A-size stamp sets that are only $6.95!  It is not a new stamp, but one of my favorites.    I cut the flower on the Cricut and used a border punch to make the ruffles at the bottom of the card.  The blue button assortment is a perfect coordinating embellishment for the Pemberly paper packet.

**Tips - To stamp the dimensional bird, I used the Kiss and Twist technique.  I stamped the bird with Outdoor Denim ink and then kissed a dry stamp (the flower) over inked the bird (directly on the stamp) and gave it a little twist which creates the look of the feathers.  This is a great technique to use on solid stamps - flowers, butterflies, etc.  I cut the bird out; distressed the edges with Desert Sand; and popped it up with 3D Foam Tape.  I used a Mocha Pearl Opaque for the bird's eye.

Saturday, February 18, 2012

You and Me Tall Card


This card also features the Pemberly Paper packet and I made the card base with Buttercup Cardstock.  I used the Cricut AP Cartridge to cut the rectangles and butterfly.  The butterfly and "You & Me" were stamped with the Love Clusters stamp set.  I used the blue button assortment and the Bouquet Assortment to embellish the card.


The Bouquet Assortment includes 20 resin flowers and have adhesive on the back.  They are very convenient to use for your cardmaking and scrapbooking projects.


Friday, February 17, 2012

Pemberly Sympathy Card


Our new Pemberly Paper is perfect for many themes.  This is a sympathy card that I made using the Cricut AP Cartridge, A Blossom stamp set, Love Life stamp set, Pearl Opaques and ribbon.  I cut the floral scalloped circle, the sentiment piece and the rose with the cricut. I also corner rounded the upper right and the lower left corners of the card base.   

The "A Blossom" stamp set is one of our new $6.95 stamp sets.  There are many of them in the new catalog and I call them the "Deal of the Day" because you get a lot of bang for your buck! 

Tuesday, February 14, 2012

Valentine's Day - Heart Frame


I bought this frame at Michael's several months ago because I thought it would be the perfect Valentine's Day gift for my sweet husband, Dean.  

I painted the frame with pink acrylic paint and set aside to dry.  The flowers were cut from Roxie Plaid B&T and Tulip Cardstock with the Cricut AP Cartridge.  I sponged the edges of the flowers with Cocoa ink prior to rolling them up.  I used the Instant Memories stamp set to stamp the flourishes with Timber Brown StazOn ink.  Seam binding makes a fluffy little bow and a Designer Rhinestone Brad finishes it off.  Large sparkles were added to the center of each flower and Bitty Sparkles were added to the flourishes.

**Tip - Use Liquid Glass to adhere the flowers together and to adhere them to the frame. 

Monday, February 13, 2012

Spread Your Wings and Fly


This is one of my favorite Stella cards.  I used the Color Ready Accents - Bird and Branch.  I sponged the branch with Olive ink and the bird with Lagoon ink.  I used one of the flower petal stamps from the Just For You stamp set to make the bird's wing.  I rock 'n rolled the wing with Lagoon and Olive ink; cut it out; and popped it up with 3D Foam Tape.  

The buttons are from the Bohemian Assortment.  I glue dotted the small green button into the center of the brass button.  A mocha opaque and Natural Hemp were used to embellish as well.  I used the Princess Wings stamp set for the sentiment.     

Saturday, February 11, 2012

A Note for You... 3x3 Card


This card features Stella paper, Cocoa ribbon, Opaques, Green Button Assortment, and our new Bohemian Assortment(doilies).  I used the Cricut AP Cartridge to cut the square and the leaves.  I distressed the square with the Black Stubble Tool.

Friday, February 10, 2012

Tailor Made Card #2


I copied this card from one of the cards we made at Stamp Camp.  The reason that I am posting a similar card, is that in the Stella paper packet there are 2 sheets of paper that have sewing patterns on them (look like the tissue patterns that you cut out for making garments).  When I saw this paper, I knew that I had to use the Tailor Made stamp set with it. 

I used the wax paper technique  (with Sunset, Tulip and Lagoon stamp pads) that I detailed in the original Tailor Made post.   I used Color Ready Seam Binding and Opaques to embellish this card.  I also used one of the flowers from the Color Ready Accents (sponging it with Tulip ink). 

Thursday, February 9, 2012


We made this little composition book at  $10 Month Club Playgroups earlier this month.  I bought the mini composition books at Target (when they had the school supplies out in August).  We used the Stella paper packet, Color Ready Seam Binding, and a button from the Red Button Assortment.  The stamp set is one of my favorites!  It is called Quick Cards - Butterfly and it is ONLY $6.95!  It is a great deal for a beautiful stamp!  We have lots of new "Quick Cards" stamps in the catalog.

**Tips - The technique that I taught at Playgroups was
"Rock 'n Roll".  We stamped the butterfly in Sunset ink and the Rock 'n Rolled it in Tulip ink around the outer edges.  We also used the Black Stubble Tool to distress the background of the butterfly piece. 

Wednesday, February 8, 2012

A Note for You...Flower Card


This card features some of my favorite new products in the Spring/Summer catalog.  I used the Stella paper packet.  I love it because it is very colorful and cheery, and it is appropriate for many different themes. The flowers are from our new Color Ready Accents package.  They can be "colored" with a sponge and ink, acrylic paint, etc.   I also used our new Tapestry Velvet Rub-Ons.  The Velvet Rub-Ons come in  Black and Dark Chocolate (Dark Chocolate was used on this card).  Buttons and button brads from the Olive Mini Medley round this card out.


This is a close-up of the flower.  I used Sunset and Tulip Ink on the Color Ready Accent flowers (I applied the ink with daubers).   I popped the flowers up with 3D Foam Tape.  I stamped the leaves and the "a note for you..." with  Just For You Stamp Set which is a new stamp set that is pictured in the catalog with the Stella kit. 


Tuesday, February 7, 2012

Love Who You Are Card


This card features lots of new products from the new Spring/Summer catalog!  I used the Stella paper packet, Fashionista Stamp Set, Sparkles Flourishes, Pewter Badge Buttons, and Paradise Paper Flowers.  The card base is one of our new Colonial White Die-Cut cards.  These card bases come in a set of 10 with the envelopes.

Monday, February 6, 2012

Wonderland Workshop on the Go Cards


These cards are from the Wonderland Workshops on the Go that were held last week.  The kit included the Wonderland Paper,Wonderland Stamp Set, Pin Clips, Sparkles, and the Wonderland Workshop Guide.  I created these cards and the  instructions for the workshops.


Grey Flannel is not my favorite color in our 60 exclusive colors, however, I do love this card.  It looks icy and wintry.  I am still hoping for some winter weather in Texas!  


This ended up being my favorite card.  I used the rock 'n roll technique with 1st and 2nd generation Twilight ink and Chocolate for the word stamp.  And, who doesn't love a cappuccino, hot chocolate, or cup of hot tea!

Thursday, February 2, 2012

You're Invited Card


Here is another card that I created for the Cricut class last week.  The card base is on the <shape1>.  I used a chipboard shape from the Cricut bundle and the coordinating stamp set to create this "Tea Party Invitation".  You could use this stamp for any type of party - it is very versatile!  I cut a flower on the Cricut and used sparkles to embellish the flower  and the chipboard shape.  Instant Memories was used to stamp the flourishes.

Wednesday, February 1, 2012

Have a Day Filled with Love Card


This card was also a card that I created for the Cricut class.  It is one of the cards on the <shape1> key on page 26.  I used the stamp set in the Cricut bundle to stamp the two hearts on outside edges of the card as well as for the sentiments.  The center hearts were cut from the <shape1> key and layered with foam tape.  I used Instant Memories to stamp the beautiful flourishes on the corners of the card.  Sparkles add the perfect amount of bling to this card!