Wednesday, December 28, 2011

John Deere Floor Puzzle


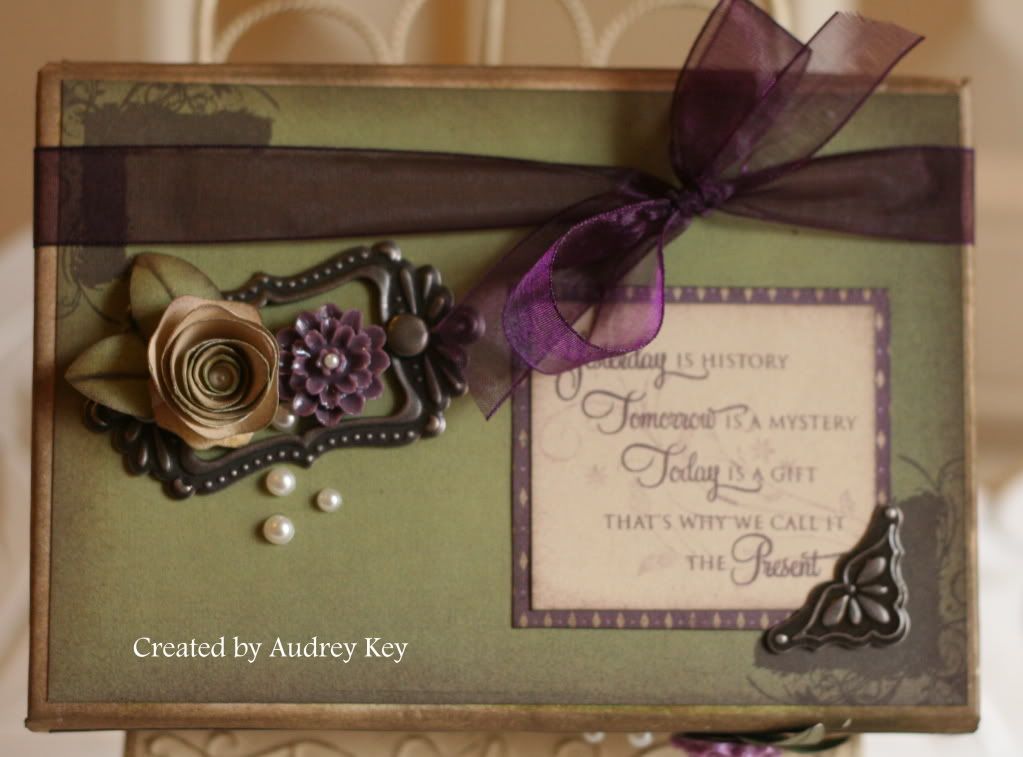
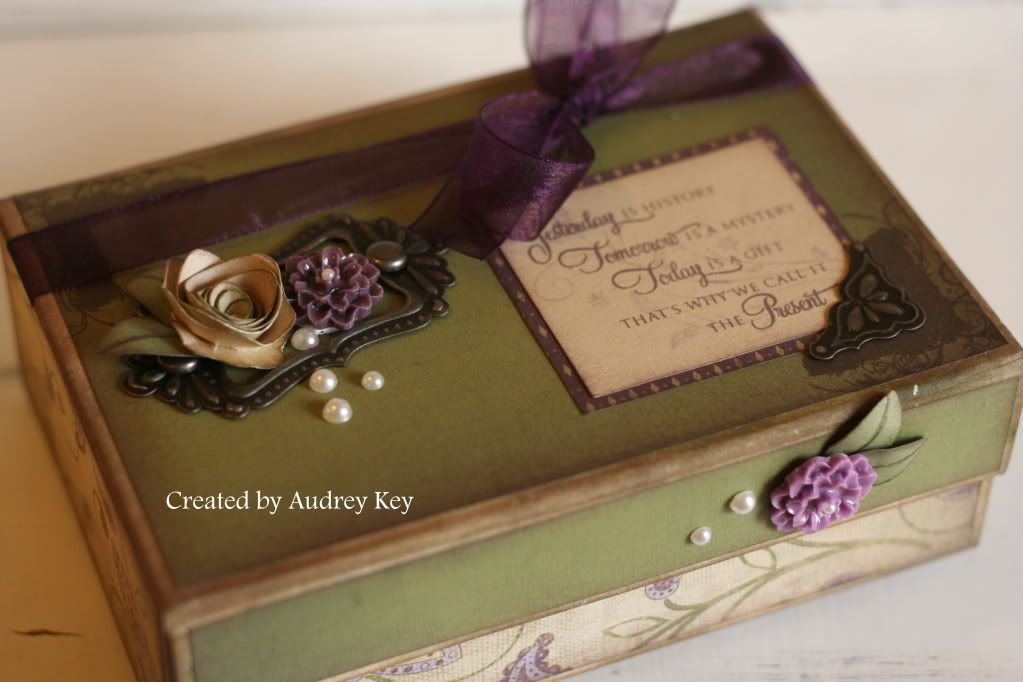
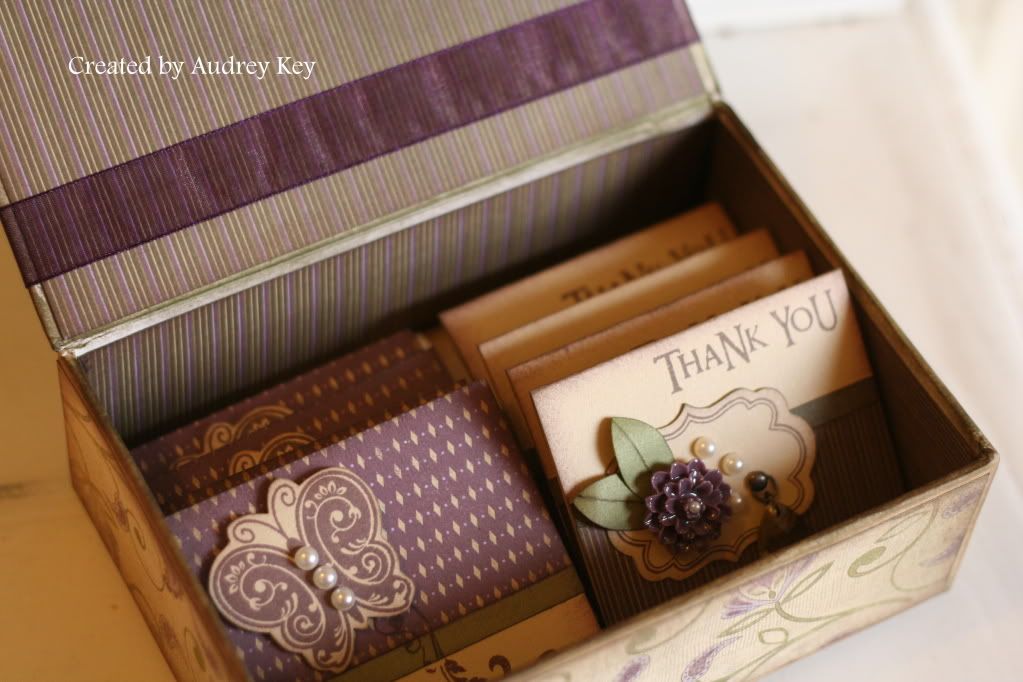
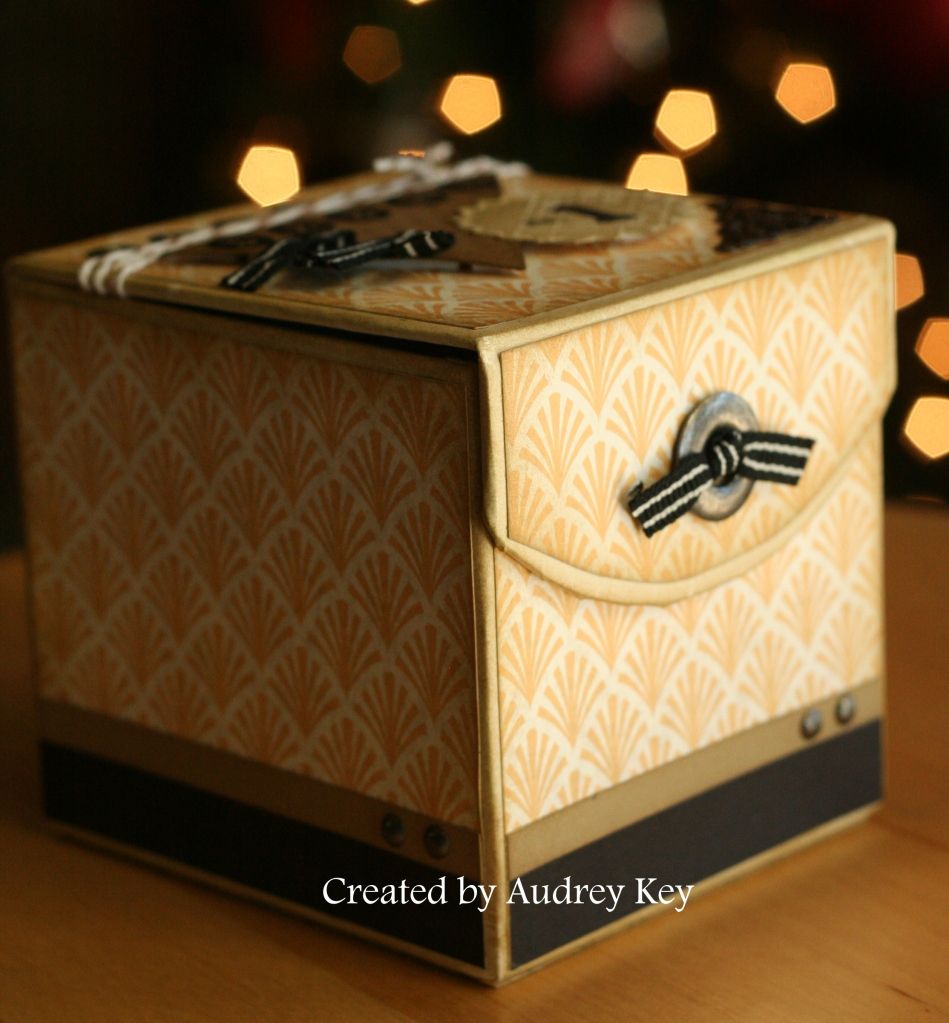
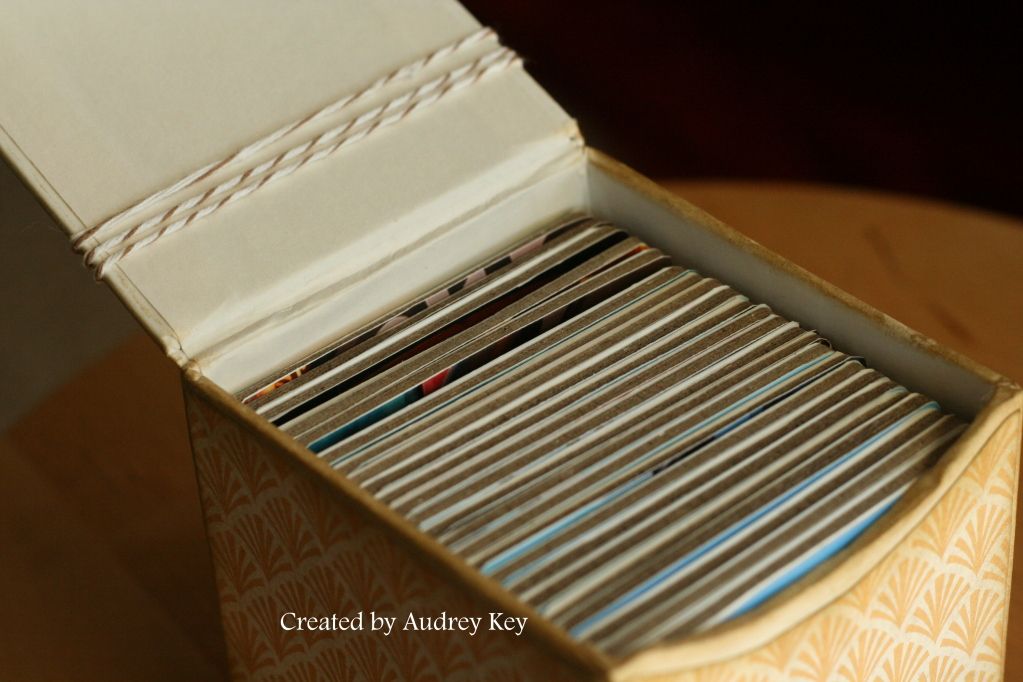
Here is a cute gift that I made for Brayden for Christmas (it was supposed to be wrapped and under the Christmas tree but I just finished it today).  I used our My Creations Memory Box for this project.  It is the box with a magnetic closure and it has 24 - 3"x3" chipboard squares inside.


I used the Creme' Brulee' B&T from the Elemental Level 2 paper packet along with Black and Desert Sand cardstock.


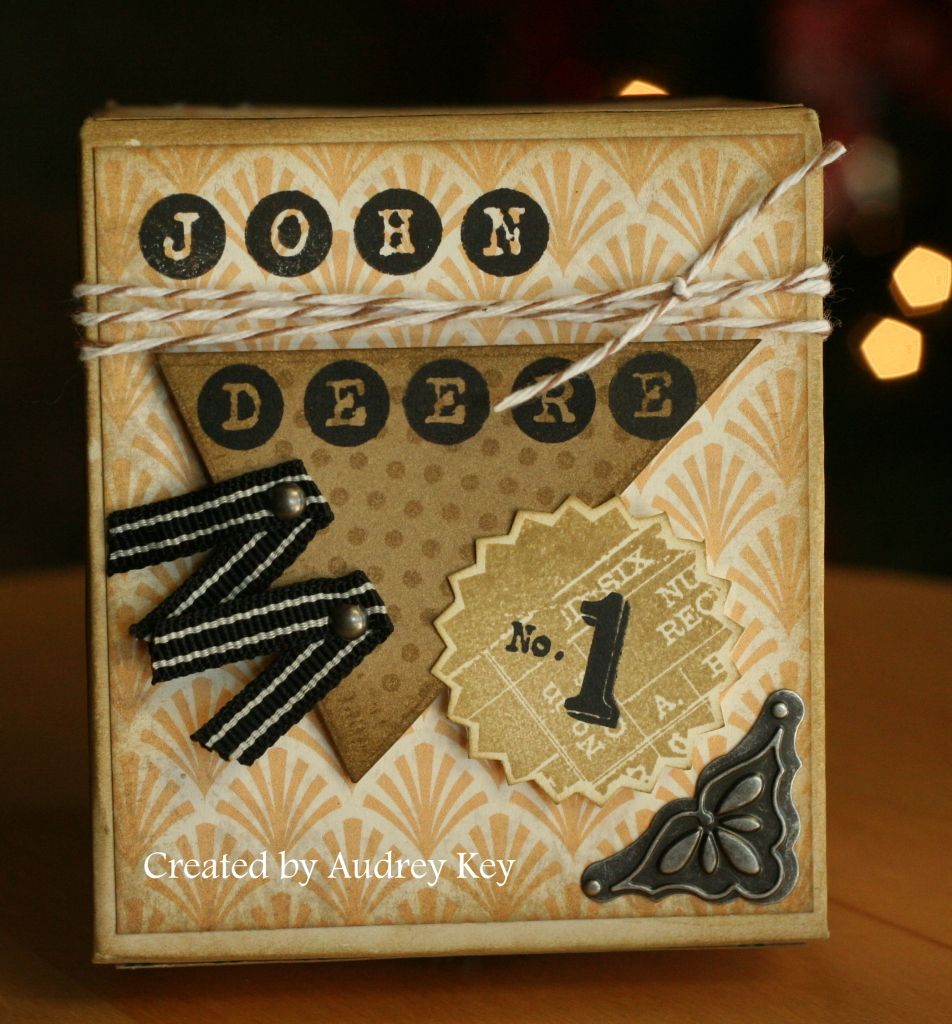
In our family, John Deere is #1!  Dean has worked for our Texas/Oklahoma industrial John Deere dealership for 27 years so we are "eat up with John Deere!"  Our kids and grandson learned at an early age that "John Deere is #1".  That is the saying around our house, so that is what I decided to put on the lid of Brayden's John Deere Puzzle. 

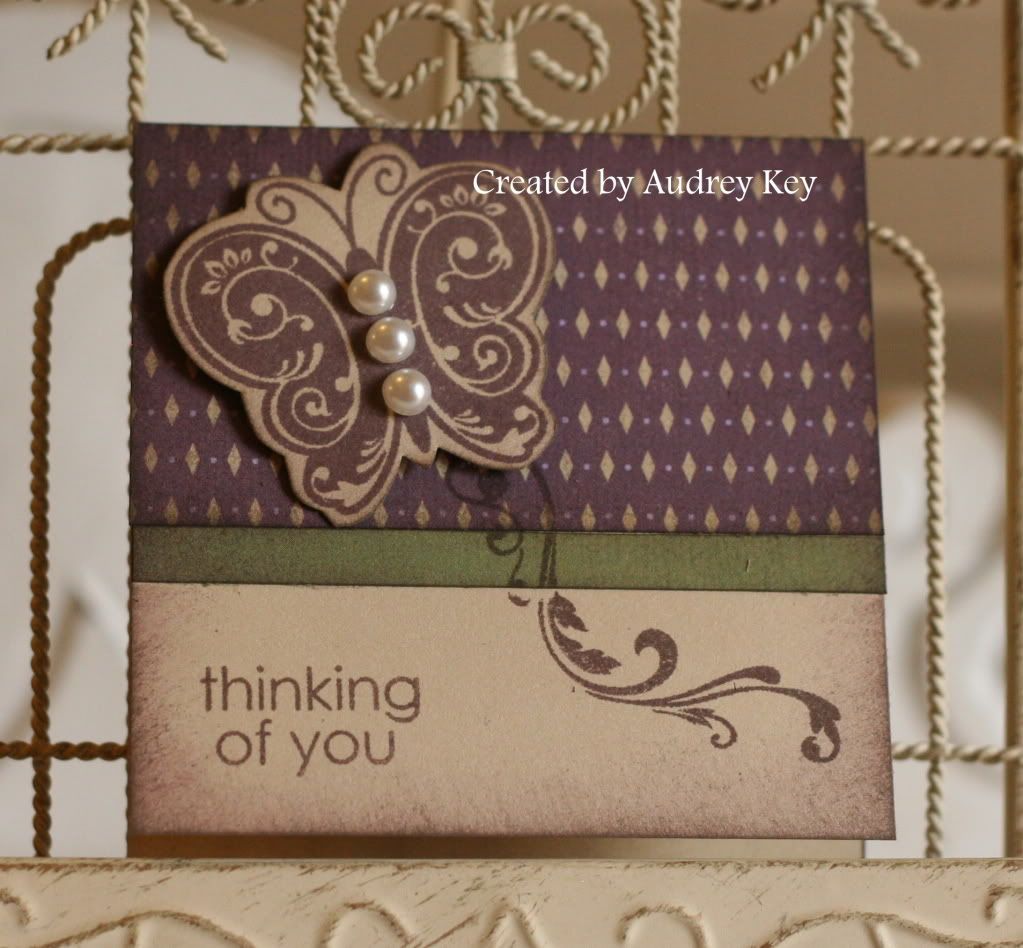
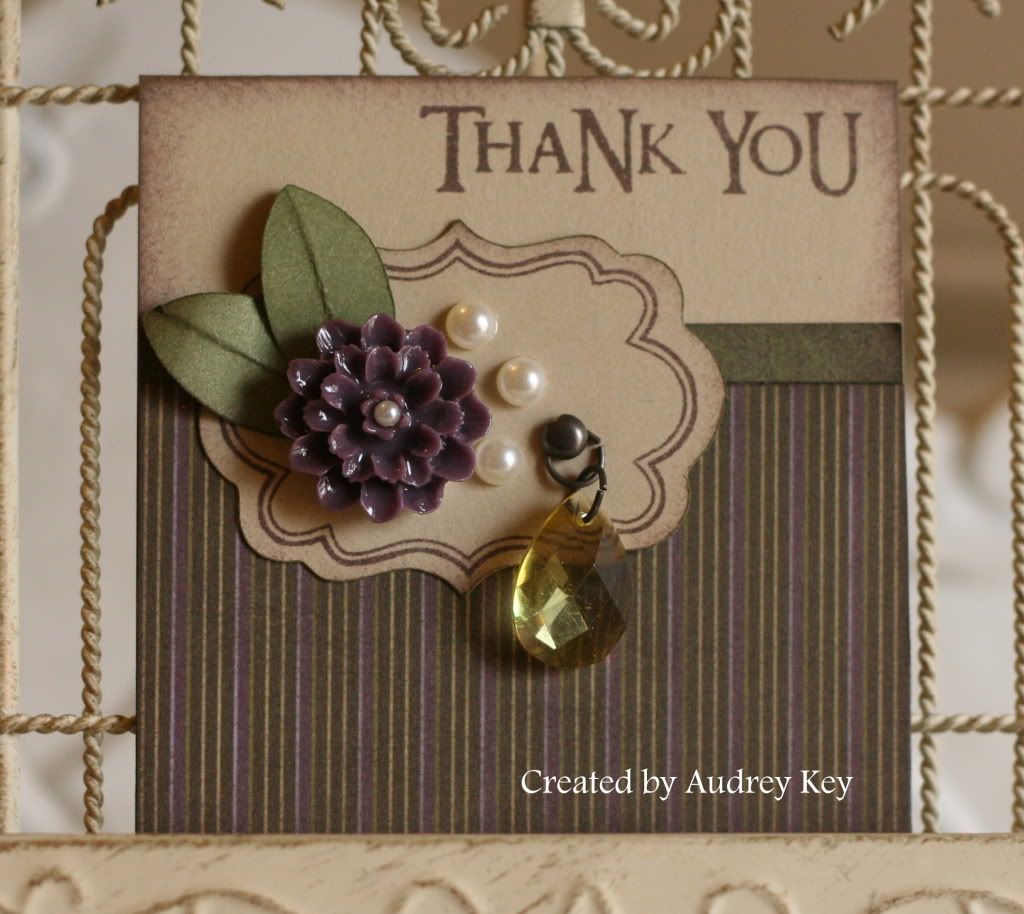
I used embellishments from the Black Mini Medley and the Pewter Mini Medley assortments.  I used the Vintage Type stamp set and the Blue Ribbon stamp set.  My mom gave me the cute twine that I tied around the lid (it was in my stocking). 


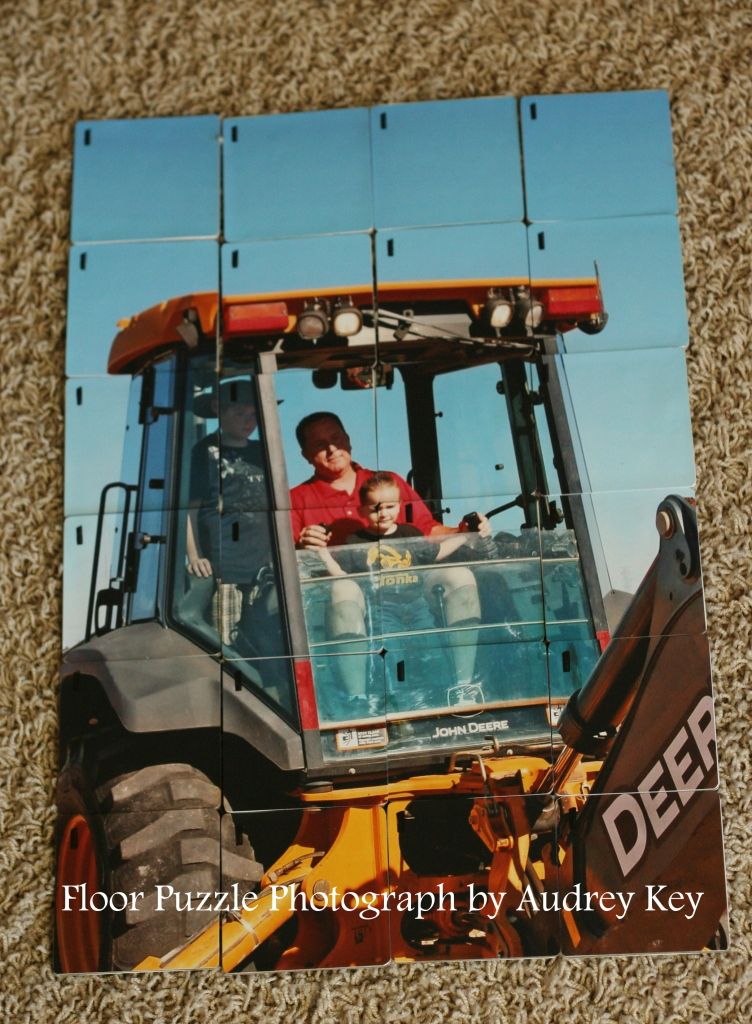
Side one of the floor puzzle is a backhoe that Brayden, Connor and Dean drove a year ago in September.  They dug a big hole with it; stood in it; and then covered it back up.  Brayden and Connor each took turns with the controls!


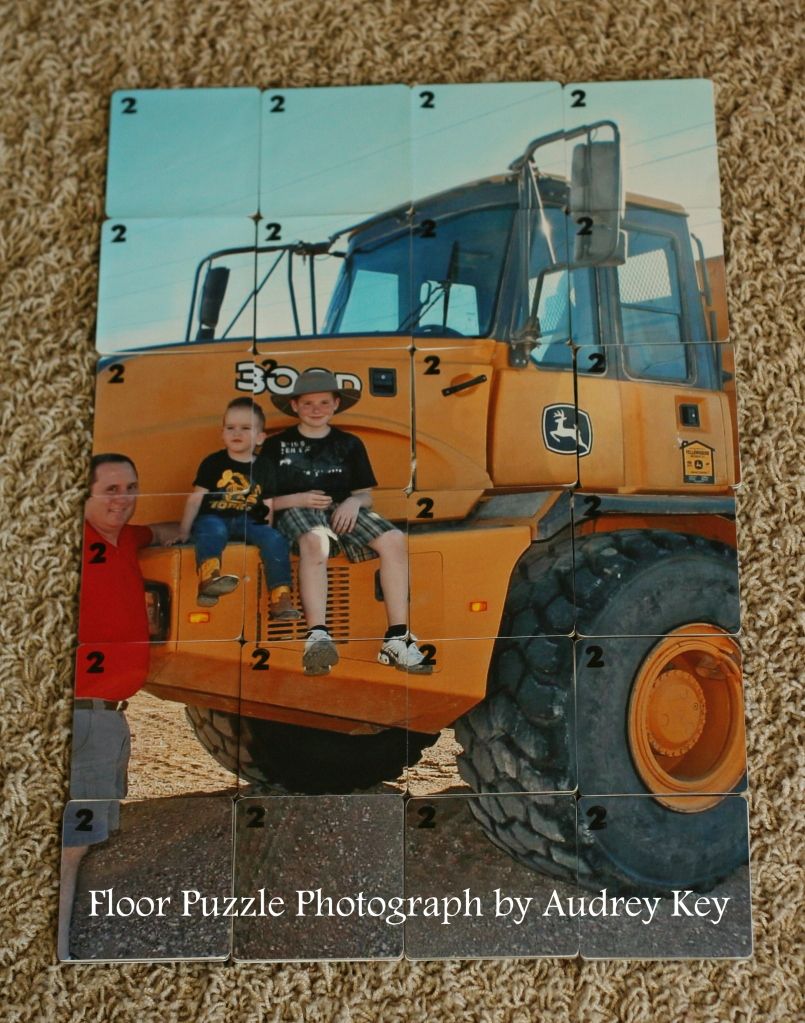
Side two is a photo of them sitting on an Articulated Dump Truck.  They didn't get to drive it but had a fun
time climbing on it.

To help Brayden out a little, I stamped a "1" on the side one pieces and a "2" on side two pieces.  I used StazOn ink and the Countdown stamp set.


Friday, December 23, 2011

Wishing You a Very Happy Holiday Card


This 4 1/2" square card is from the Cricut Class last week.  The card base; red and striped background pieces; holly leaves; and the focal point piece were all cut on the Cricut.  If you are interested in which keys were used, please email me and I will give you that information.  I used  "A Holiday" and  "Holiday Cheer" stamp sets.  I embellished the card with Red Sparkles and checked ribbon. 

Thursday, December 22, 2011

The Best Thing About Being a Close To My Heart Consultant

When I was a new consultant (over 10 1/2  years ago), I attended a "Regional Celebration" in Dallas that the CTMH corporate staff planned.  Many top consultants spoke at that event, as they do at all of our events.  At the time, it seemed foreign to me that the consultants would say...."The CTMH family is the best thing about being a consultant."  At that time, I did not have any downline yet and I hadn't been a consultant a year.  I remember thinking that
I  might never feel that way. 

Many things began to happen in my CTMH life.  I did begin recruiting downline; I attended convention in Dallas (and now I will never miss that event! - unless a grand baby decides to come the same week!); I amped up the amount I was working/teaching classes/holding home gatherings and I met so many wonderful customers and made life long friends;  I served on the CTMH Advisory Board; I began earning CTMH incentive trips (and have gone on some fabulous vacations!); the list goes on and on!  Many of you, Corporate staff included, have seen me through many
challenging times and now I can say.....

"The BEST thing about being a Close To My Heart Consultant
is the "FAMILY" that it creates."  My life wouldn't
be complete without all of you!

On Sunday, our All Keyed Up Consultants celebrated Christmas with a casual get together at Vicki Witt's home (which is beautiful by the way!).  We each brought a Christmas treat along with the recipe.  We exchanged ornaments; which were each beautiful and unique.  Here is the picture of the lovely consultants that were able to attend.


Left to Right:  Aaron Brown, myself, Tiffany Owens,
Jeana Culbert, and Vicki Witt

To those of you who weren't there, we missed you!  To those who were, it was great catching up and meeting some new faces!  I pray that you all have a very Merry Christmas and that you are richly blessed in the New Year!

Monday, December 19, 2011

Santa's Treat Pocket


This cute little treat pocket was originally created by Lisa Stenz who is also a CTMH Consultant.  I thought it was so cute, that I made one to show at my Cricut Class last week. 

The heart pocket is on the <shape1> key
on page 27 in the cricut booklet. 

1.  The combination of keys is:  Font Layer; Shift;
<shape1>.  I cut my pocket at 11". 

2.   I creased all of the folds for the pocket
(don't adhere yet) and then added two strips of
White Daisy Cardstock that were 3/4" each. 

3.  I also cut a "belt" from Black Cardstock that was 1/2".   The belt buckle is on the <square1> key
(keys:  Tag; <square 1>.  I cut the buckle at 1").

4.  I used 2 button brads from the Black Mini
Medley Assortment for the buttons on the "coat".

5.  I used a piece of Cranberry checked ribbon as the
hanger and attached it with 2 small
black brads on the sides.

6.  The final step is to adhere the pocket together
at the side.  I used Terrifically Tacky Tape for that. 
TTT is a very permanent bond which is what you
want on all of the little treat boxes!

7.  The last step is to fill the pocket.  I put Christmas
candy and a Sonic gift card in my pocket!

Thursday, December 15, 2011

Turning Over a New Leaf

Well, I had an epiphany last week!  My son said that it is very meaningful to him, when he "creates" something, that his Granny's "play" with him and try out his creations.  He has been watching You Tube for weeks and learning how to make paper guns, ammo, swords, and knives....your typical boy things.   

After he said that, it started my thinking about his comments.  I don't know about you and your situation, but I am home with my son and grandson to raise them, teach them things about life, and help mold them into decent, responsible human beings that will eventually contribute to society in big ways! 

With all of my memories recently of MY grandmothers, I realized that they stopped and took time to play - play games, teach us crafts, teach us to cook, make root beer floats, etc.  They didn't work the entire time we visited and spent the night with them.  THEY TOOK TIME -- to love us, hold us, teach us things about life, and help to mold us into the adults we are today (the "we" is my brother, Stacy, and my sister, Billie, and myself).  

I want to be the Mimi that Brayden tells cool stories about when he grows up.  I want Connor and Stephanie to be able to say that I actually taught them something special!

So, last Thursday night, Brayden and I started making Christmas candy.  You must know that he loves to scrapbook with "Mimi" and he also enjoys setting up the classroom for all of my classes.  He is a great helper!  I want to teach him some other fun things in his little life too.  I know that all too soon he will be busy with sports, scouts, etc, and won't really care about such things.


We started off with simple candy and made "Rolo Cookies".  They are really easy to make.  Brayden unwrapped all the rolos and placed them on the pretzels.  We asked Connor to help and he told us that he didn't want to do it until he saw how much fun we were having.  Then he jumped right in and helped (he wouldn't let me take his picture!).


We baked them for 4 minutes at 350 degrees.


The final step is to add a pecan halve by gently pressing the pecan into the warm chocolate.   Let cool and they
are ready to enjoy. 

We also made Graham Cracker Toffee....thanks to Anna who gave us the recipe!  It is a new favorite around our house.  That was a little tricky because the caramel sauce has to be cooked on the stove top.  I stood Brayden in a chair and he helped me stir the pot.


This is a photo of the toffee as it is cooling off.  It is O-SO yummy!  We took some of each kind of candy to the beauty shop (that Brayden's mommy works at) as a Christmas treat.

So, in closing, I am going to try to be better about building memories with both boys.  If you are a busy mommy, be sure to hold and "play" with your kiddos!  If you are a busy Mimi/Grandmother  be sure to hold and "play" with your grand kids!  They grow up too fast and then that time is gone.  Enjoy them everyday! 


Wednesday, December 14, 2011

Peace on Earth Card


This card is also a product of the <square1> key on the Cricut.  The star embellishment is the <star1>  in graduated sizes and I popped each layer with 3D Foam Tape.   I chose the Christmas Love stamp set for the sentiment and I used a Rhinestone brad and sparkles to jazz it up a bit.  The card was cut as a 4 1/2" card from the <square1> key.

Tuesday, December 13, 2011

Merry Christmas Treat Box


December is proving to be a busy month!  It has been days since I have been able to post due to lots of family events.   will try to be better the rest of the week about posting! 

We made this little treat box at my Cricut Class last night.  All of the dimensional boxes from the Cricut Art Philosophy Cartridge are so fun to create and decorate. 

This box is located on the <square1> key.  It was cut at
5 3/4" (using the keys: Font Layer; Shift; <square1>;
on page 23 of the Cricut Booklet). 

We also used the <square3> on page 43 to decorate the box.  The tag was cut on the Cricut and stamped with the tag on the Christmas Cheer stamp set. 

The Holly leaves were cut on the Cricut and then stamped with the coordinating stamps from A Holiday stamp set.  We stamped the holly berries from A Holiday on a 3/4" circle which was also cut  on the Cricut. 

We sponged the edges of the pieces with Topiary ink and then added Red Glitz Glitter Gel over the holly berries.  Fill it with candy and it is a sweet treat for someone special!

Wednesday, December 7, 2011

Roxie Workshop on the Go Cards


I created these cards for the Roxie Workshop on the Go - Cards Workshop.  The pattern is from the Wishes book and is called "File Pocket." 


The Roxie WOTG kit includes:  Roxie Level 2 Paper, Roxie My Acrylix Stamp Set, Bling Assortment, Black Hemp and the Roxie Workshop Guide.  The kit is $35 (which includes tax and shipping). 


When you purchase the Roxie WOTG kit, I will include the card instructions to complete these cards.

Tuesday, December 6, 2011

All Decked Out Snowman


I bought these cute socks at CVS Pharmacy several weeks ago because I love snowmen!  They inspired me to get out my All Decked Out stamp set and make this 6x6 card.


I love this stamp set! It is one of those stamps that you stamp and color the elements to add pop!  The All Decked Out stamp set includes snowman parts:  the body in separate pieces, mittens, arms, scarves, hats, and snowflake flourishes.   

Since the socks had two shades of blue, I looked through my stash to find things in those colors.  Believe it or not, the Pacifica B&T behind the snowman came from the Dreamin' paper packet!  I added Crystal Blue and Pacifica Cardstock to it and Whoala!  Think outside the box when choosing paper patterns and you will be amazed with what you can create!


I added this photo because I wanted you to see that Prisma Glitter was added to the snowflake flourishes, which was hard to see with the straight on shot of it.  The snowman is lightly water colored blue with our watercolor pencils and watercolor brush.  I used Rhinestone Brads to embellish  the card, as well as ribbon from the Blue Ribbon Assortment.

**Tips - Use Bonding Memories Glue Pen to add Prisma Glitter to any project.  Put the glue on the area you wish to highlight; let glue dry to clear; add Prisma Glitter with the eraser on a pencil (which just adds glitter where you want it and not all over your table and your lap!).

Monday, December 5, 2011

Sonoma Card Box and Cards

Yesterday I had a great group of ladies over for the Sonoma Card Box and Cards Workshop.  We wonderful time creating these cute card boxes filled with cards.  If you haven't made one of our My Creations boxes, you need to do it as soon as you can!  They are so much fun to create.


We used the My Creations Card Box, Sonoma Level 2 Paper, Mini Medley Pewter Assortment, Heirloom Assortment, The Present stamp set, Pearl Opaques, purple ribbon from my stash, and the Cricut cartridge to cut some of the
flowers and leaves.


The Sonoma paper packet is just beautiful!  It features Olive, Smokey Plum, Bamboo, Amethyst, and Cocoa.  We distressed the edges of the box with cocoa ink and a sponge prior to decorating it. 

**Tip - Use Bonding Memories Glue Pen to get a good even bond between the paper and the box.   You need to work quickly so that you are adhering it when it is wet.  The Bonding Memories Glue Pen is wet when you put it on the paper and that provides a permanent bond.  When you let the glue dry to clear (or if you are not working quickly it will dry) and it is a temporary bond similar to that of a post-it note.


We made 10 cards with the remaining paper and the kits included CTMH 3x3 envelopes (10 per package).  This is a great gift to give someone and the box can be used as a trinket box later for jewelry or other small memorabilia.


We made 5 cards of this style.  We used the Say It in Style stamp set for the sentiments.  If you don't own that set, you need it!  It is all inclusive with lot of phrases that are
great for card making.


We also made 5 cards of this style.  This card features a Cricut frame and leaves, the Heirloom Assortment flower and jewel, and Pearl Opaques.  We used the Say It in Style stamp set for these cards too.


Sunday, December 4, 2011

Spiced Tea - Another Holiday Tradition

Many of you have been the recipient of Spiced Tea.  I love drinking a piping hot cup of it, especially during the fall and winter months and I like to give it to family and friends during the holidays!  My earliest memories of drinking it were in elementary school.  My mom's friend made my brother, sister and myself a cute little jack-o-lantern cup and we would drink our spiced tea in it.


My friend, Tina, and I decided to make teacher's gifts with our spiced tea recipe and I wanted to share that process with you.  The first thing that you must do is get in the mood!  We put some Holiday tunes on and just had a good time preparing our little gifts!  We used recycled Starbucks Frappucino bottles and stamped our labels for the lid and the jar.  We bought cute Christmas ribbon at Hobby Lobby to finish them off.


Tina's mom saved the frappucino jars for us!


Quality ingredients make quality tea!


All mixed up!  It smells delicious!


These jars look great filled and decorated. 

*We made Avery labels on the computer with the sentiment, "Just a little something to spice up your holidays! 
Merry Christmas!" 

*We stamped the labels using the trees from the Bundled Buddies stamp set and a snowflake from the December 25th stamp set to make them more decorative.  

*We cut the small green tags with the Cricut cartridge and stamped them with a snowflake from the December 25th stamp set. 

*We also stamped the circles from the Countdown stamp set on White Avery label paper and punched them out with our
1 1/4" circle punch - we used the cirlce labels to cover the
Starbucks logo on the lids. 

*Reindeer ribbon is tied around the neck of the bottle and the "from" tag is tied on with glitzy red wire.

My recipe actually came from "The Cottage" which used to be on 34th Street in Lubbock.  Our family loved that store and visited each year during their Holiday Open House. 

Here is the recipe:

2 Cups Tang
1 1/2 Cups Instant Tea
1 Cup Powdered Lemonade
1 1/2 Cups Sugar
1/2 tsp. Ground Cloves
1/2 tsp. Cinnamon

Mix ingredients well.  Stir 2 Teaspoons into 1 cup hot water.

In closing, may your holidays be filled with spice and the simple joy of spiced tea.  I challenge you to mix up a batch and give it as a gift.  You will make the recipient's holidays very happy and your's more memorable!

Saturday, December 3, 2011

You're Sweet


This card was also inspired by my friend, Karen Pedersen.  This card features the December Stamp of the Month "Mad About You."  The flowers are made from 5 hearts for the lower layer and 5 hearts for the top layer - all of the hearts were cut on the Cricut and then stamped with the coordinating stamp.   Silver Glitz Glitter Gel adds that special sparkle to the border along with a bling button that I added to the center of the flower.  The flourish is from the Instant Memories stamp set.

Friday, December 2, 2011

Love To Love You Card


This 3 1/2" x 8" card was inspired by my friend, Karen Pedersen who lives in Utah.  We served on the CTMH Advisory Board together and she is a dear friend AND a brilliant artist!   Check out Karen's blog here!

I used the Roxie paper packet along with the Mad About You (stamp of the month) and Instant Memories stamp set.  I embellished the card with our Chocolate Striped Ribbon and Pearl Opaques.  The hearts were cut on the Cricut.

Thursday, December 1, 2011

Don't Open Until Dec. 25th - Christmas Petal Box


I was so excited about the Cricut boxes on our new cartridge.  I quickly realized that you need to cut various sizes from scrap paper before you decide on the size you want.  The finished size of this little box is 3" - this surprised me because I set the dial to 6" when I cut it.   


The products I used for this little petal box are:  Believe Level 2 Paper, Red Glitz Glitter Gel, and the Green Ribbon Assortment.  The gift tag is on the Cricut cartridge and I used the December 25th My Acrylix Stamp to stamp the sentiment.


Those who know me well, know that I love to make jewelry!  It is only fitting that this cute little gift box have 2 pairs of heart earrings enclosed! 

PS - Don't Open Until December 25!


Wednesday, November 30, 2011

Christmas Tree Clear Card


This is one of the first projects I made using the Cricut Art Philosophy Cartridge and the stamps in the bundle.  I cut the trees with the cricut and used the stamp set in the bundle to stamp them.  This card is a clear card from our specialty card line.  I used Believe paper, Green Ribbon Assortment, Bling Buttons,  Cricut AP Cartridge and stamps, and Red Glitz Glitter Gel.

Tuesday, November 29, 2011

Christmas Joy Layout


I can't wait until Christmas gets here and I have photos to add to this cute layout!  This 2-page layout features Believe Level 2 Paper, Dimensional Elements Monograms, Bling Buttons, our cute new Holiday Pockets and Prisma Glitter.


I used one of the Reindeer Zip Strips in the paper packet as "ribbon" across the layouts.  I also used the Love Life stamp set to add the flourishes. 


**Tip - To embellish the "JOY"  Dimensional Elements Monograms I sponged them with Sweet Leaf Ink;  I stamped a patterned stamp from the Love Life stamp set with Topiary Ink; I let the ink absorb into the chipboard a few minutes and then I covered them with Bonding Memories glue and sprinkled Prisma Glitter over them. 

I cut the scalloped banner with the Cricut AP Cartridge and added bonding memories glue to the edges and sprinkled Prisma Glitter over that piece as well.  I think it adds just the right amount of glitz.


Friday, November 25, 2011

Hip Hip Hooray Clear Card


Here is another card made with the Childhood Portrait stamp set.  I love this little boy playing with his yo yo.  I used Red Glitz Glitter Gel to highlight the yo yo.   I used a Clear Card, Roxie Level 2 paper, Cricut AP Cartridge, Dimensional Elements Mixed Shapes, black heat embossing powder, black ribbon and Licorice Opaques.

** Tips - I punched holes in the scallop of the clear card to dress it up.  You could thread ribbon through the holes for added dimension.

Wednesday, November 23, 2011

A Holiday Tradition

You may or may not know this about me but here it is....I am the family "Pie Baker."  When Thanksgiving and Christmas come around each year, I bake the pies for all sides of the family.  I always bake pumpkin and pecan pies for each household (The Keys, The Boles', and the Kesler/Webster's) and sometimes I will try something new. 

This morning I went to the grocery store very early to beat the crowds.  I chose the items I needed for today's baking and Thanksgiving dishes.  As I strolled through the produce department, my eyes landed on orange slices - you know the little gummy, sugary ones from days of old (because I am old!).  My Great Grandmother Holder, Grandmother Jacquie, and Grandmother Boles always bought these sweet treats for us when we were kids.  It was a blast from the past, so of course I put them in my cart. That began my thinking about all the things our grandmothers teach us when we are growing up. 

My Grandmother Jacquie spent many hours as a professional baker and shared her talents with my brother, sister and myself.  We had so much fun learning to make pie crust and the many other things she taught us. 

So today, I started my day thinking that I would be posting artwork (have a card I was going to post for you), but instead spent the entire day baking and remembering my grandmothers.  I am so thankful for all they taught me - how to cook/bake, how to cross-stitch, how to gather eggs from the hen house, how to iron, a good work ethic, good character, kindness, laughter, and the list goes on.  My Great Grandmother also taught me a bad thing - procrastination - I think it is just genetic!  Anyway, here are some pictures from today's baking quest.


See this old rolling pin?  It was Grandmother Jacquie's rolling pin and one of my favorite things that I inherited from her.  As I roll the pie crust out, I think of her.  I use an Amish Pie Crust recipe that a friend shared with me about 15 years ago.  That recipe makes perfect pie crust every time!


My favorite pie plates from Longaberger.  I have four of them!


Here are the pumpkin pies.  I use the recipe from "Better Home and Gardens Cookbook."  (Mine is the Third Printing from 1982.)  I know that doesn't seem important, but it is because the recipes change with each new printing.  My Great Grandmother Holder told me to substitute the spices in that recipe in equal measurement with Pumpkin Pie Spice and it makes all the difference in how it tastes!


Here are the pecan pies.  Again, I use the Pecan Pie recipe from the "Better Homes and Gardens Cookbook."  It makes perfect pecan pie.  They are not runny at all and are the best tasting pecan pie ever....I can't even eat any other pecan pie.    My dad asked me many years ago,  if I would chop the pecans very fine to make it easier for him to eat.  Let me just say that he was on to something grand.  Those crushed pecans make the best topping.  Dean was in the kitchen begging for pie tonight - he said his mouth was watering for it.  I told him "no" at first but then I gave in.  Who can tell a man "no" that is begging for your pie!


Today's "something new" was a Chocolate Cream Pie with Meringue.  Dean requested that I make one this year.  I tried it many years ago and thought it was too much work,  but tonight it didn't seam as hard as I remembered it being.  It turned out very pretty and I hope it tastes as yummy as it looks.

Tomorrow, let us not forget to be thankful for all those family members who have gone before us, but taught us SO much before they did!   I pray that you have a Very Happy and Blessed Thanksgiving!  Happy Pie Eating!


Tuesday, November 22, 2011

Love to Love You Card


Our December Stamp of the Month (Mad About You) is inspiring me to think about Valentine's Day.  I know, we haven't even celebrated Thanksgiving, but if you make cards for holidays, then you need to think ahead, right? 

I used Roxie Level 2 Paper, Childhood Portrait stamp set, Instant Memories stamp set, Mad About You stamp set, Pearl Opaques, and black ribbon. 

The card pattern is in the Originals book and is called "It's a Wrap."  The card is "wrapped" with a band which is very cute and different than just a standard card.  I heat embossed the kids with Versamark and Black Embossing Powder.  The Childhood Portrait stamp set takes me back to yesteryear because reminds me of the silhouette pictures that my Grandmother had in her bedroom when I was a little girl.  Every time I see something made with this stamp set it reminds me of her.

Monday, November 21, 2011

Dreamin' Workshop on the Go Cards

These are the cards for the Dreamin' Workshop on the Go that we are making this week.  The Dreamin' Kit includes:  Dreamin' Level 2 Paper, Dreamin' My Acrylix Stamp Set, Bronze Glitz Glitter Gel,  Shimmer Brads, and the Workshop Guide.   The price is $35 (includes tax and shipping).  These cards/ instructions were made by me for the workshop.


Card 1


Card 2

Card 3

If you purchase the Dreamin' WOTG kit I will include the card instructions.


Sunday, November 20, 2011

Santa's Workshop Kids Kamp Projects

Yesterday I had my first annual Santa's Workshop Kids Kamp, so that kids had an opportunity to come make gifts for family members.  We had so much fun and I wanted to share the projects that the kids made.


These are refrigerator magnets.  We cut the flowers on the Cricut and stamped them with the Hooray Bouquet stamp set.  The colors are Garden Green, Sorbet, and Creme' Brulee.  We used Alene's Magnetic Tacky Dots for the magnet and the pebbles were adhered with Liquid Glass.


This fun bracelet is perfect to use up old (or new) buttons.  I used our Pink Button Assortment for this bracelet but each child got a different selection of buttons.  We stung the buttons with "Stretch Magic Jewelry and Bead Cord" that I purchased at Michael's.  When you make this type bracelet you need to wrap the Stretch Magic cord around your wrist twice which allows for the overlapping that naturally occurs as you string the buttons.


We took a $1 pocket calendar from Michael's Dollar Spot and created a work of art.


We used Roxie Paper, the Cricut to cut out the heart, Mad About You Stamp Set (December Stamp of the Month),  Winter Joy Stamp Set, Save the Date Stamp Set, black ribbon, and Just Blooms Paper Shapes to transform this pocket calendar.

And, last but not least, a plain wooden frame (also purchased at Michael's), becomes a work of art!  Wouldn't it be a perfect gift for grandparents with a family photo or the child's school portrait?


The kids were able to choose which color of paint they wanted to use for their frame.


I cut all of the roses from Colonial White Cardstock on the Cricut.  The kids chose which color they wanted their roses to be.  I mixed water and re-inker in little spritz bottles (I used Lagoon, Cranberry, and Sweet Leaf re-inker).  We spritzed them and set them aside to dry.  When they were dry we sponged the edges with Desert Sand ink.


We used the Love Life Stamp Set to stamp these beautiful flourishes with Brown StazOn Ink.  I know that I keep saying it, but Love Life is my FAVORITE stamp set in this catalog!


The red frame is my favorite one (because it matches my home decor and it is one of my favorite colors).  I made distressed roses for this one (see the post on Sunday, October 30 for the Distressed Flower Tutorial) and simply sponged them with Desert Sand ink.   We used Pearl Opaques to embellish the frames - and it covers up some of the stamping issues that occur when stamping on wood, using StazOn, etc.  (you know what I always say....."Mistakes are opportunities to embellish!")

These are the Santa's Workshop Kids Kamp Participants (and teachers):


Thank you sweet kids for making Santa's Workshop Kids Kamp a success.  I look forward to having it again next year!