Showing posts with label Baker's Twine. Show all posts

Thursday, June 28, 2012

How Tweet Of You Cricut Project


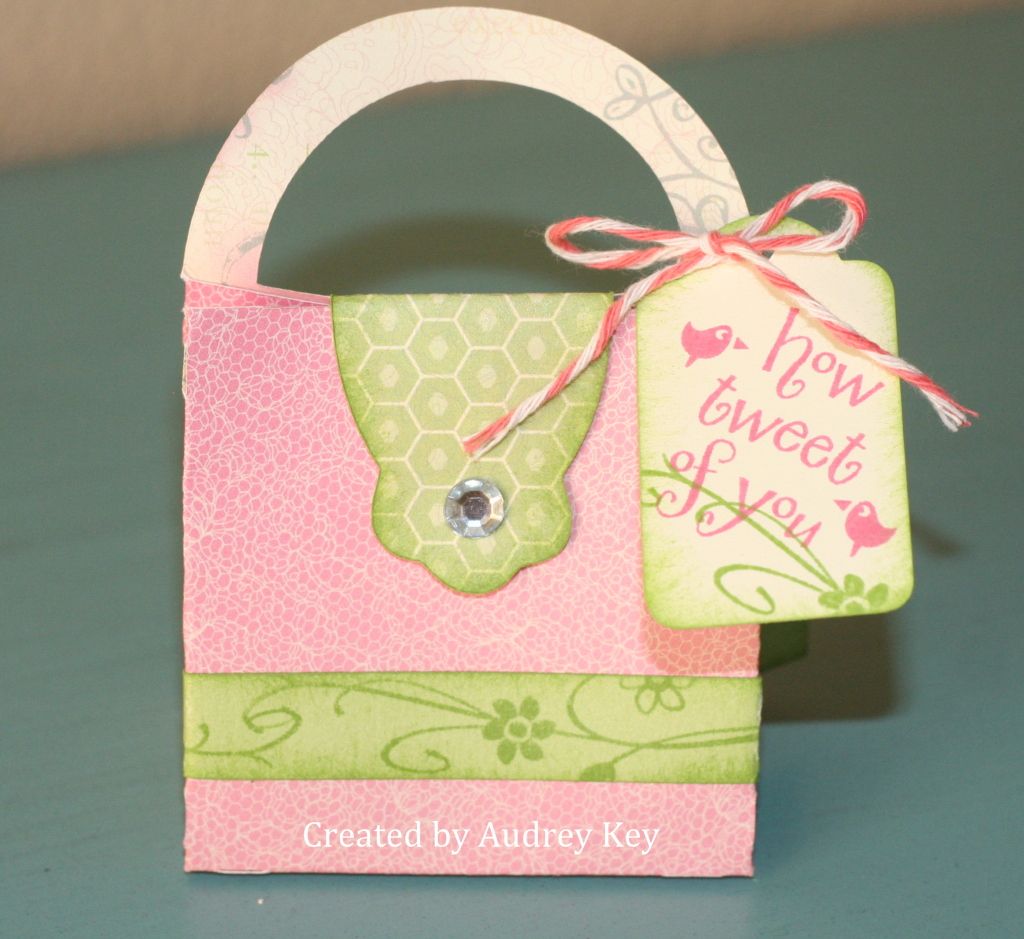
We made this cute little purse at my cricut class last week.  Our focus page from our Cricut AP Cartridge was page 50 - the tag is on that page and we cut it at 2". 

The purse is on page 23 and on the Font Layer/Shift Keys (5").  We cut the front handle off and added <shape2> for the purse tab/buckle (tab was cut at 1 1/4" and I used a small piece of velcro as the closure). 

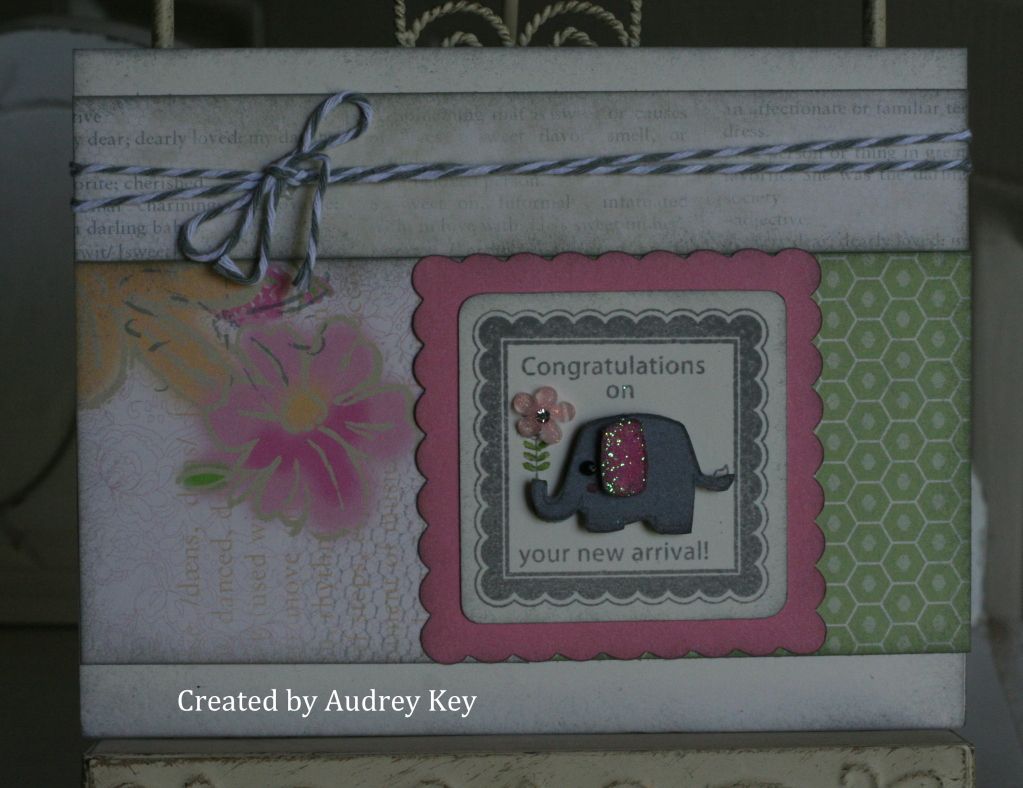
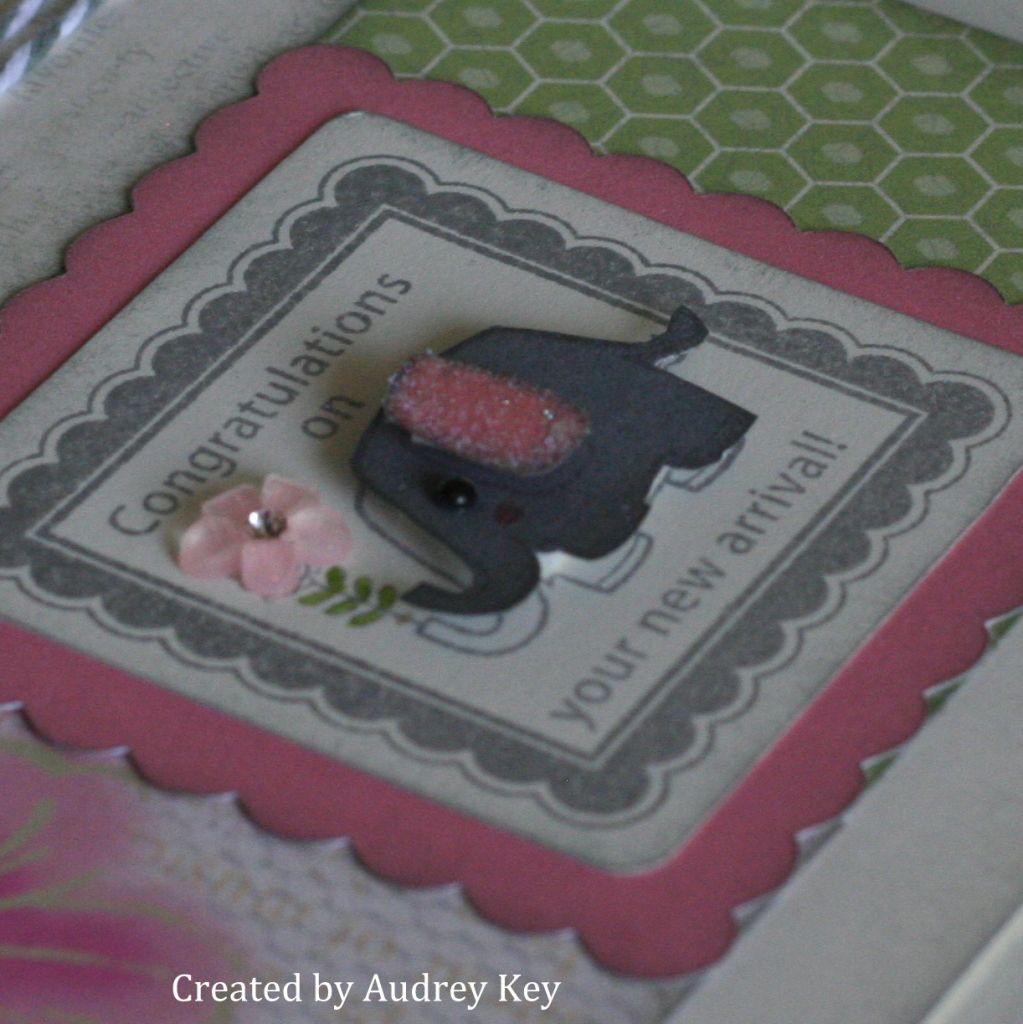
We used the "Life is Tweet" Stamp of the Month for the stamping.  A large sparkle and Paradise Baker's Twine were used to embellish this cute purse.

These would be perfect as a favor for a Tea Party, Birthday Party, Wedding, etc.  You could put candy, earrings, or anything small in this little purse! 

Monday, June 18, 2012

Congratulations on Your New Arrival Card


The focal point on this card was inspired by my friend, Christine Adams.  I just love this little elephant and I scraplifted the way she made his ear on her card!  The stamp is from the New Arrival set and is Cricut AP compatible, so I cut out the Colonial White piece and the Blush Cardstock piece on the cricut.  The paper is from the Lucy paper packet - so cute for a baby girl!


I stamped the elephant on the Colonial White Cardstock; again on Grey Wool Cardstock; and a third time on Blush Cardstock.  I cut the Grey Wool Elephant out and popped it up with foam tape and repeated that step for the pink ear.  I used our bonding memories glue pen on the ear and let it dry a bit; then added prisma glitter. 

The flower is from our new "Bitty Buds" assortment and I colored the leaves with pear marker.  I used Grey Wool Baker's Twine and a Licorice Opaque to finish it off.  I don't know about you, but I need to make baby cards!  If you have made any lately, please email me a picture!  You may win A PRIZE!

Friday, June 15, 2012

Happy Birthday Clear Card


This is one of our clear cards and I used Lucy paper and the Lucy Workshops on the Go stamp set for all of the stamping.  I cut the flower with the Cricut AP Cartridge and then used the coordinating stamp.  I cut the leaves out on the cricut and crimped them with my Fiskars crimping tool.  I made a  fold in each leaf and distressed them with grey wool ink.

I used sparkles and Neutral Baker's Twine in grey wool to embellish this card. 


Tuesday, May 29, 2012

Dotty for You - Fluttering By Card


This is the final card that I showed at the Cricut Class last week.  It is the 2nd card base on page 55 (card/shift keys).  I adhere a piece of Dotty paper inside the card show that it would show through the cut out butterflies.  I used a 2" butterfly that I embossed with the cuttlebug and adhered it with foam tape - I used Mocha Opaque for the body.

I stamped the sentiment and butterflies from the "A Tree" stamp set and used the stubble tool to add color to it.  I also used Paradise Baker's Twine.

Sunday, May 27, 2012

Dotty For You - Monogram Card


This is a monogram card that I created for my Cricut class last week.  This month, we focused on page 55 of the Cricut AP Cartridge booklet.  That page includes the <rectangle7> and <buttrfly2>.  The "B" is found on the font/shift keys.  I think monogrammed cards are really fun - I had planned to make them for our office staff at school but ran out of time.

I used the  Instant Memories stamp set (flourish).  I cut a
 2 1/2" "B" and tied our new Paradise Baker's Twine on it.  I used Mocha Pearls to create the butterfly's body.

The "Dotty for You" paper packet is only available for 4 more days.  Get yours for $5 with a $35 subtotal purchase.

Monday, March 12, 2012

Patriotic Pinwheel Centerpiece

It seems like pinwheel are all the rage these days.  My mom found the little vases at a local shop called "Uncommon Graphics" and I found the star centerpiece at the dollar store.  The Super Hero paper packet is perfect for patriotic pinwheels!  I used the American Celebration stamp set to stamp the flag and tied it on the vase with red seam binding ribbon.


I used straws to make the pinwheel sticks.   I adhered a glue dot at the top of the straw and wrapped it with our black and white Baker's Twine.  As I progressed down the straw, I added glue dots ever so often to keep the twine adhered to the straw.


I cut 3" squares and marked them as shown with a pencil.  I marked the center point and then made the pencil marks up to 1/2" from the center point.


The next step is to cut along the pencil marks and erase the pencil marks.  Fold the top right corner of each triangle down to the center and adhere with permanent adhesive.


The next step is to install a brad through all of the layers of the pinwheel.  I used a large silver Shimmer Brad for the center of my pinwheels.


Here is a close up of the finished pinwheel.  I adhered them to the straws with 3D Foam Tape. 


I think pinwheels would be great for birthday parties, baby showers, backyard picnics, etc.