Showing posts with label Ribbon. Show all posts

Saturday, July 7, 2012

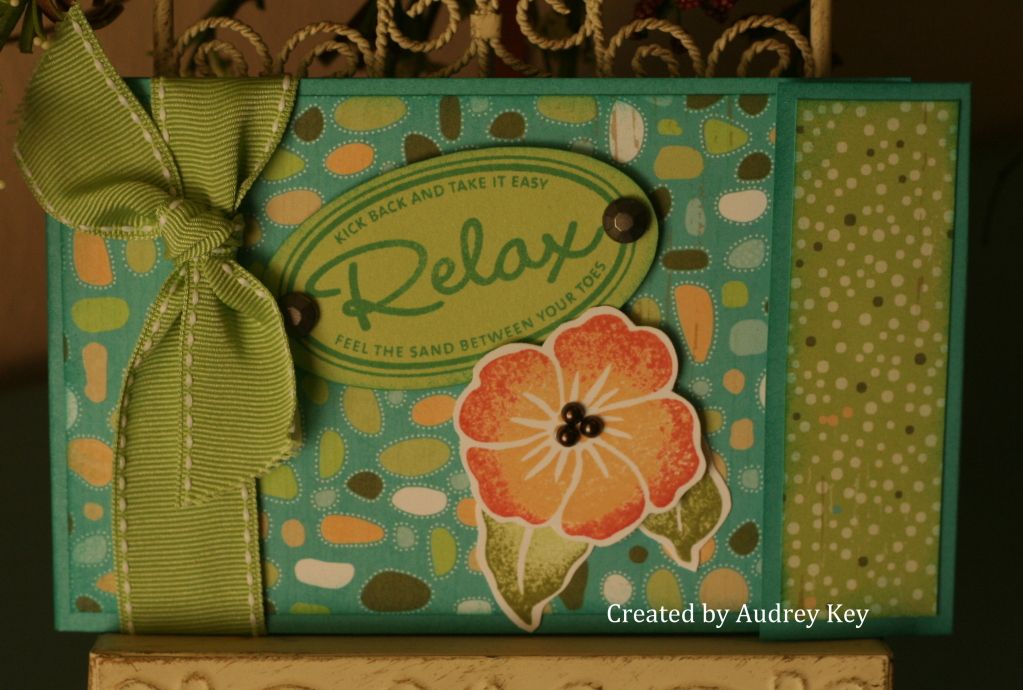
Kick Back and Relax Mini Album


This mini album is made with our Footloose Paper packet. Footloose is a very happy paper packet.  It just feels like summer, pools, parks, beaches, etc.  It is perfect for your summer themed scrapbook pages and cards.

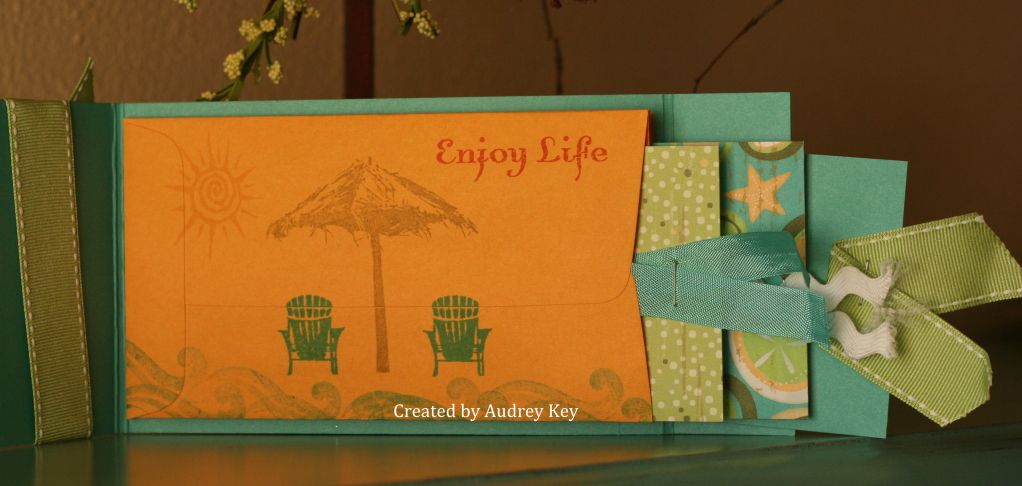
I used the Kick Back stamp set to stamp the flower and sentiment (and the scene on the the inside page).  The embellishments are:  Round Durable Brads, Opaques, and our Sweet Leaf Grosgrain Ribbon, as well as some miscellaneous ribbon from my stash.


The inside has coin envelopes (I purchased a big box at Office Max) with small tags to place your pictures on. 


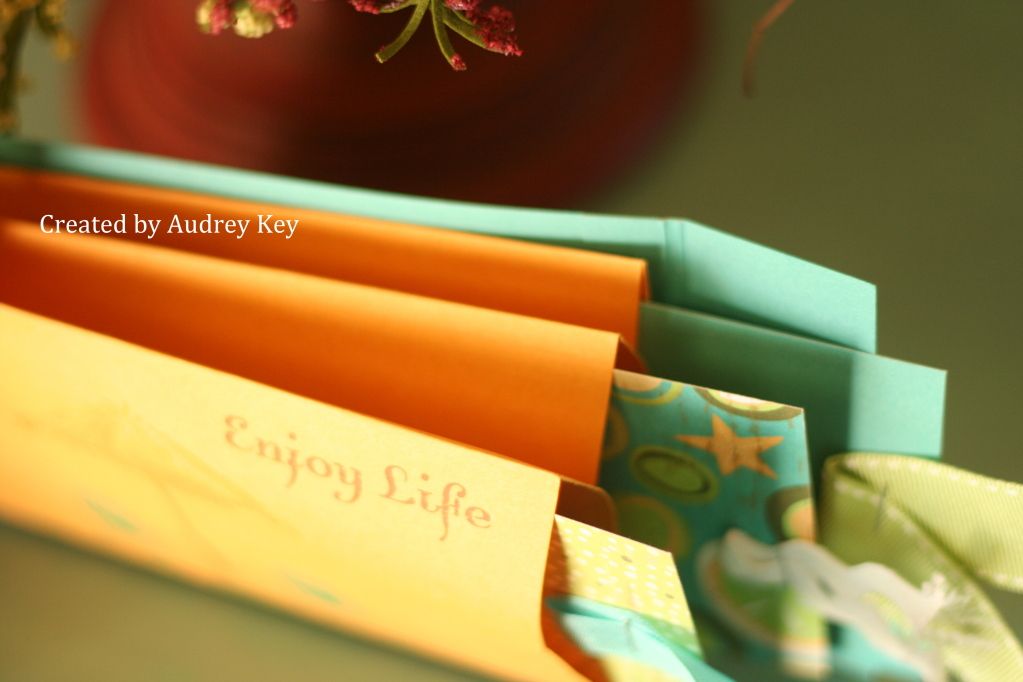
As you can see from this view, there are 3 coin envelopes inside the album.  I cut the flaps off and adhered them together in the center of each envelope. 

**Tip - if you adhere the envelopes completely together around the edges, they won't fan out.  Only place adhesive down the middle of the envelopes.  It is fine to use more adhesive on the envelope that is adhered to the album cover. 

If you want the cutting recipe for this mini album, please email me....I am happy to share it with you!


Thursday, June 14, 2012

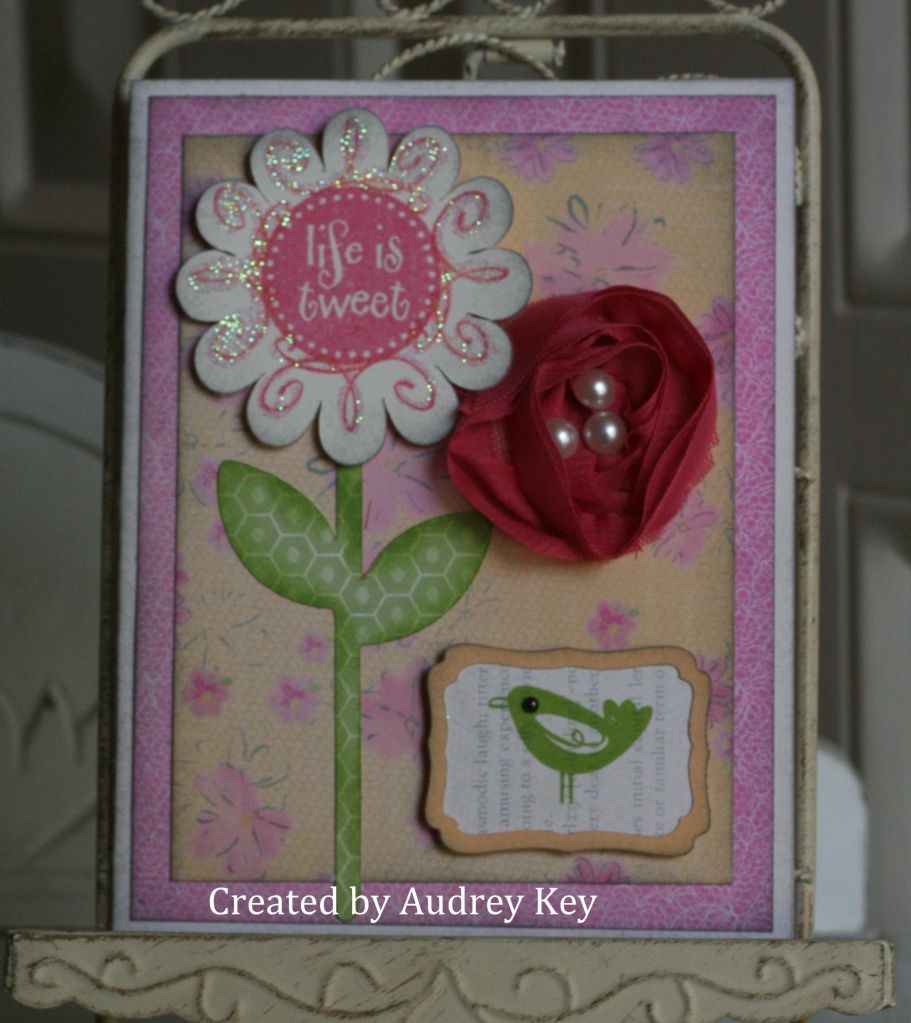
Life is Tweet Card


Here is another June Stamp of the Month card.  I cut the Colonial White flower out with the Cricut AP Cartridge and stamped it with the coordinating stamp.  I also cut the stem/leaf and the little bird piece with the Cricut as well. 

The large pink flower is from our Pink Ribbon Collection and I trimmed one flower off and adhered it with glue dots.  I added Pearl Opaques to the center of the flower and also to the bird's eye. 

After the card was assembled, I used our Bonding Memories Glue pen and traced the design on the large flower; I let it dry a bit; and then I added Prisma Glitter.

Monday, March 26, 2012

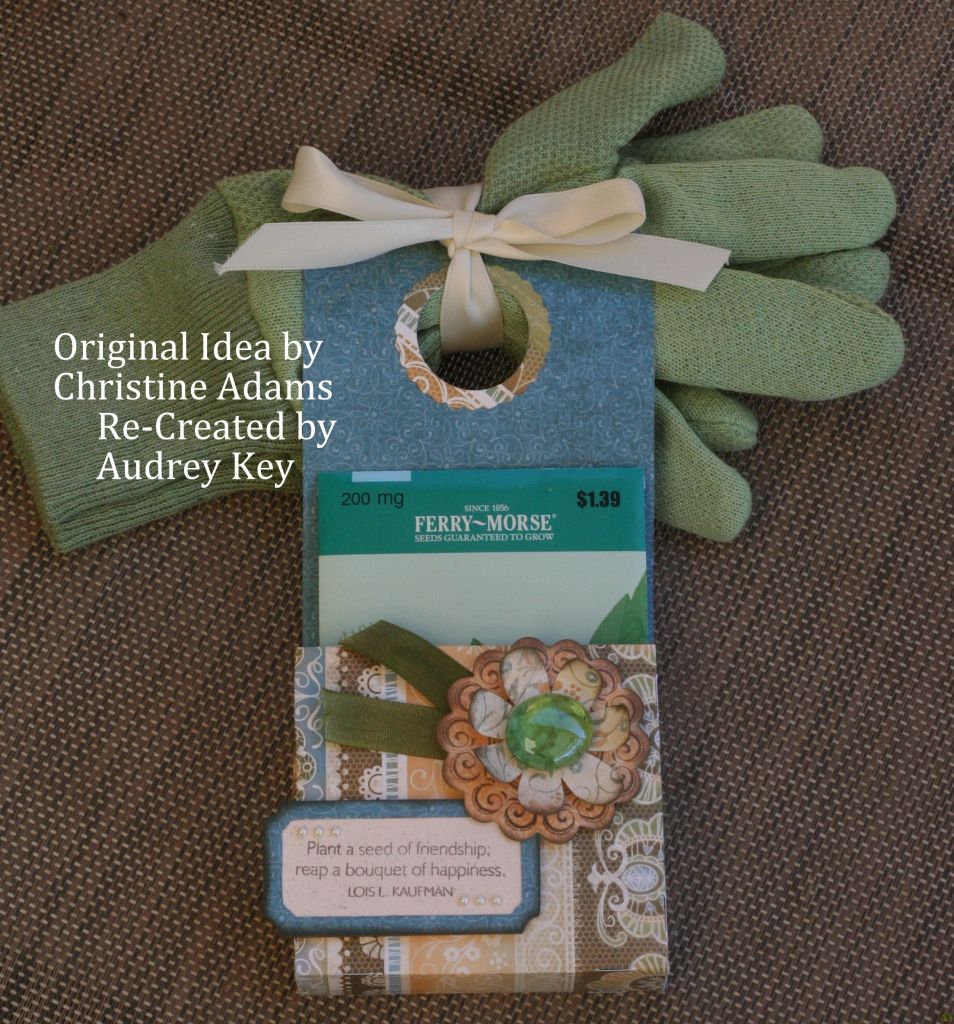
Seed Packet Door Hanger - Cricut Class Project


First, let me say that this project was inspired from my friend, Christine Adams.  She is very, very talented and made this project with the Lucy paper packet.  It was so darling, I knew that we just had to make that our Cricut Class
project for March!

This door hanger is on page 25 of the Cricut Art Philosophy Booklet and it is on the Font Layer.  I cut the door hanger as  "Fit to Page" and the Cricut cut it as an
11 1/2" door hanger. 


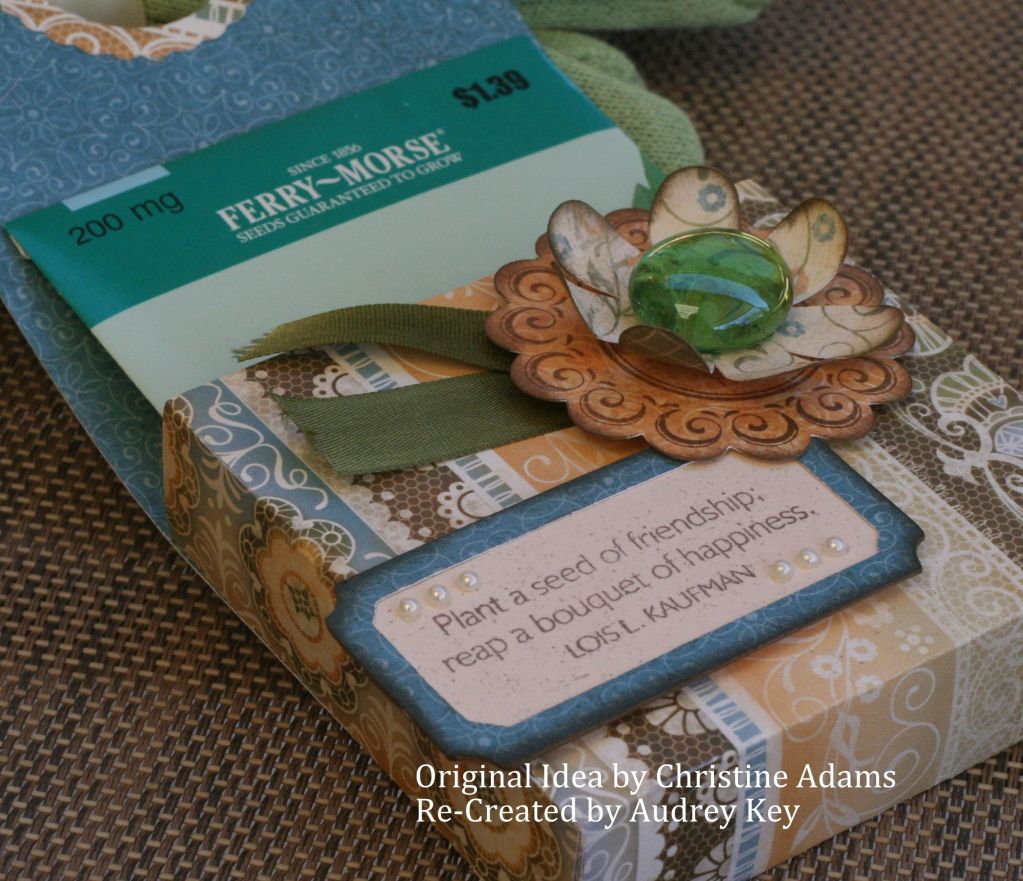
I used the Enjoy stamp set to stamp the flower (it is a Cricut image and the stamp says "freshly baked" - we covered the sentiment with the top flower).  I cut out a second flower on the Cricut.  We curled the petals upward on the top flower and layered the flowers with 3D Foam tape.  We used a glue dot to adhere a glass pebble to the flower center.  

The flower leaves are made from our new Color Ready Seam Binding - I used a sponge dauber to apply Olive ink to the seam binding.  The sentiment is from the May Stamp of the Month "Friendship Bouquet."  Pearl opaques were used on the corners of the sentiment. 

We used ribbon to add gardening gloves from Dollar Tree and a Basil Seed Packet purchased at Wal-Mart.   These would  be great little gifts for teachers or someone special.

**Tip - When adding ink to Color Ready Seam Binding, use a hot dry iron to help the drying process along .  Adhesive won't stick to wet ribbon!

Monday, March 12, 2012

Patriotic Pinwheel Centerpiece

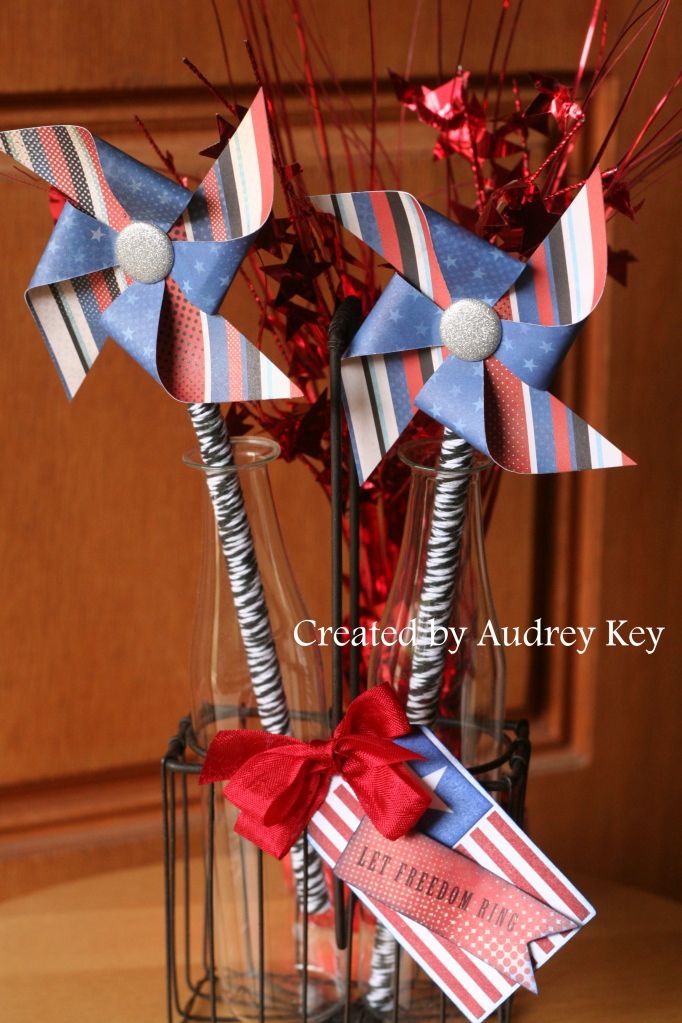
It seems like pinwheel are all the rage these days.  My mom found the little vases at a local shop called "Uncommon Graphics" and I found the star centerpiece at the dollar store.  The Super Hero paper packet is perfect for patriotic pinwheels!  I used the American Celebration stamp set to stamp the flag and tied it on the vase with red seam binding ribbon.


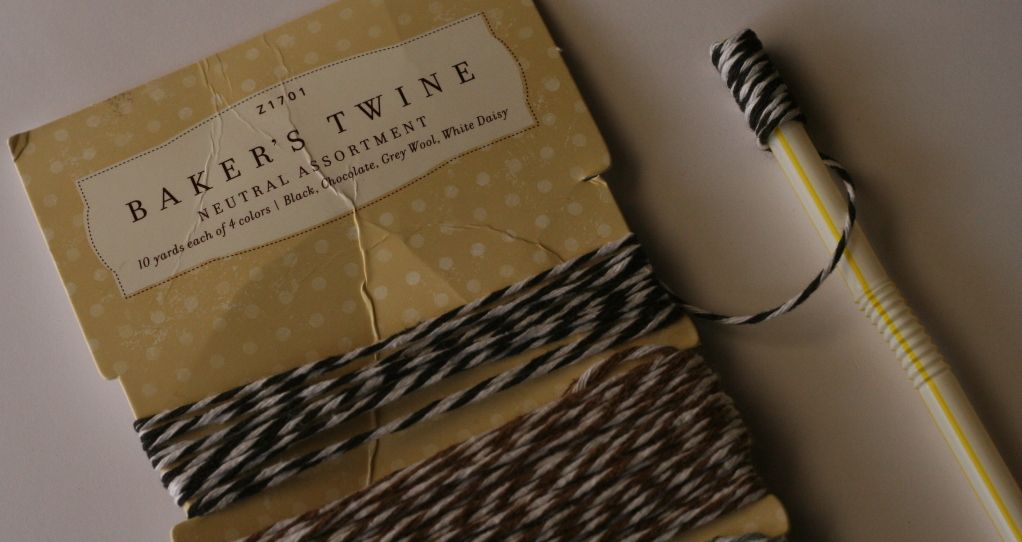
I used straws to make the pinwheel sticks.   I adhered a glue dot at the top of the straw and wrapped it with our black and white Baker's Twine.  As I progressed down the straw, I added glue dots ever so often to keep the twine adhered to the straw.


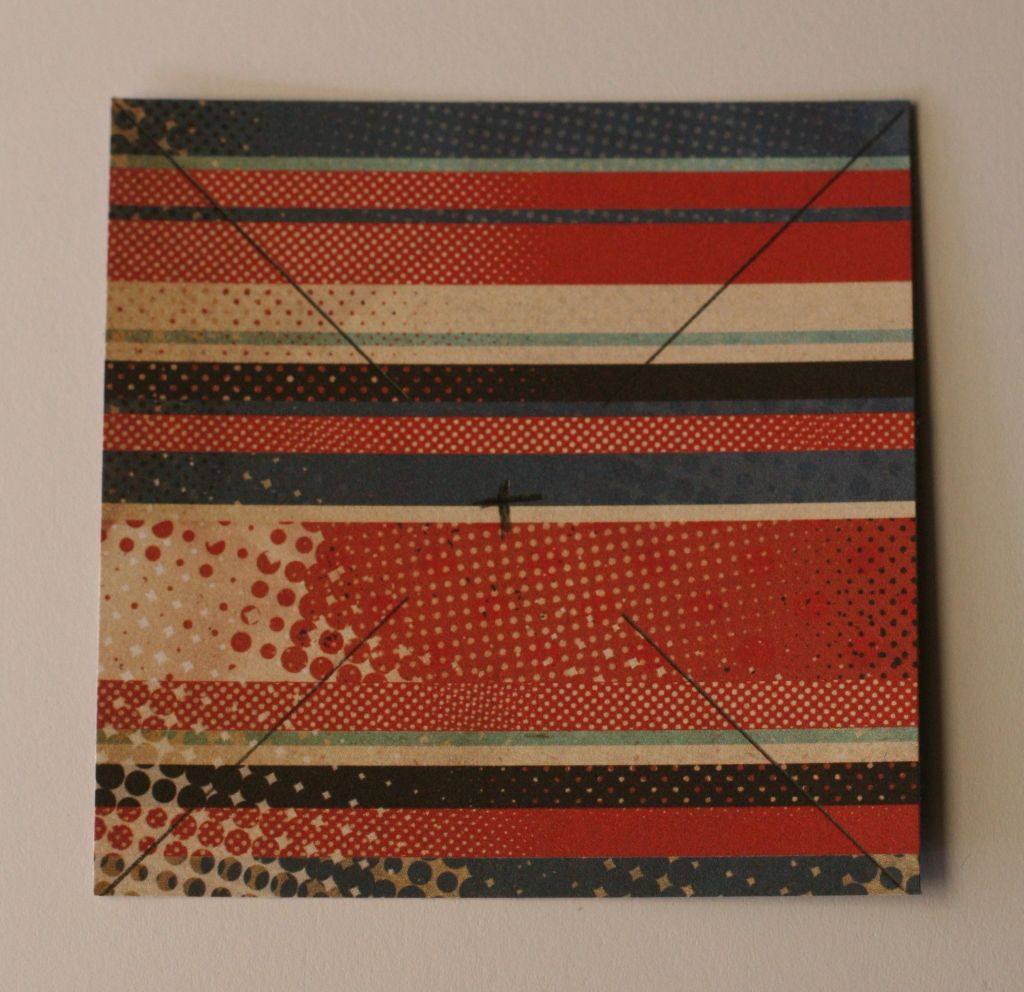
I cut 3" squares and marked them as shown with a pencil.  I marked the center point and then made the pencil marks up to 1/2" from the center point.


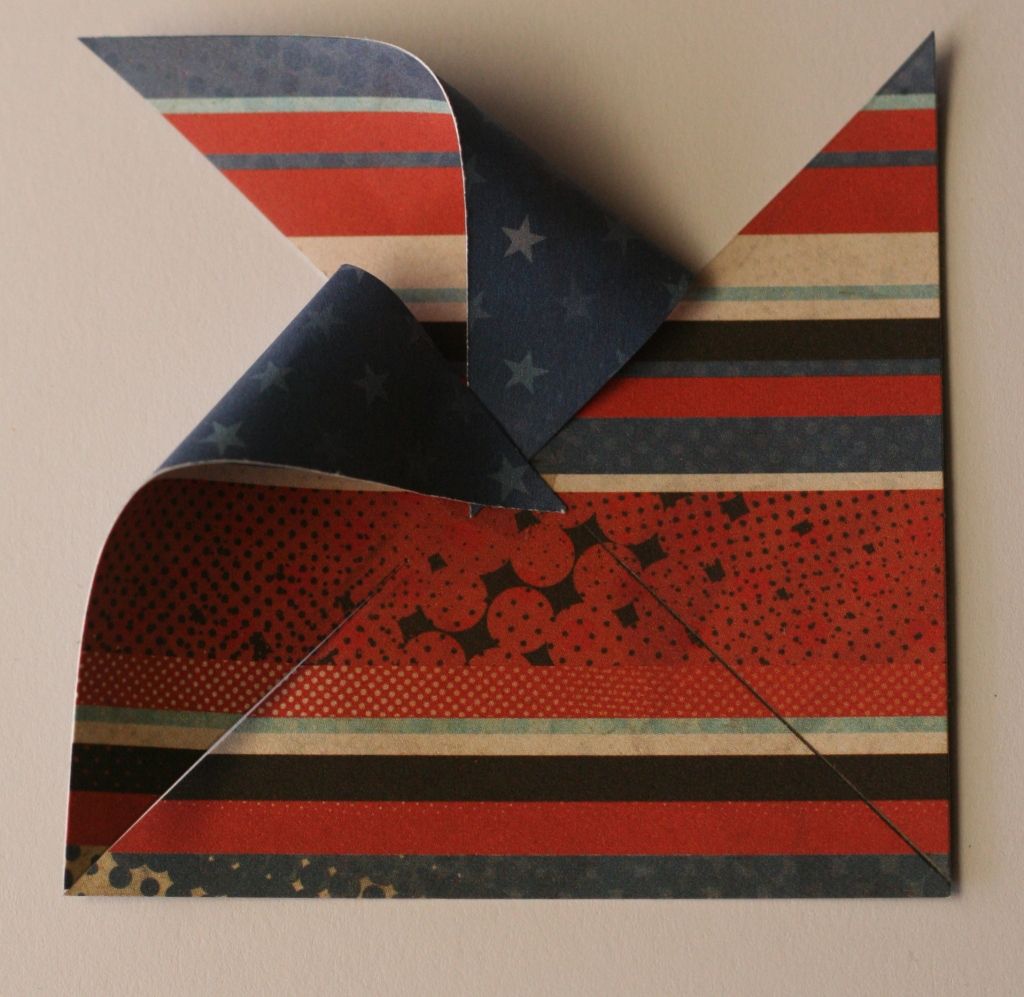
The next step is to cut along the pencil marks and erase the pencil marks.  Fold the top right corner of each triangle down to the center and adhere with permanent adhesive.


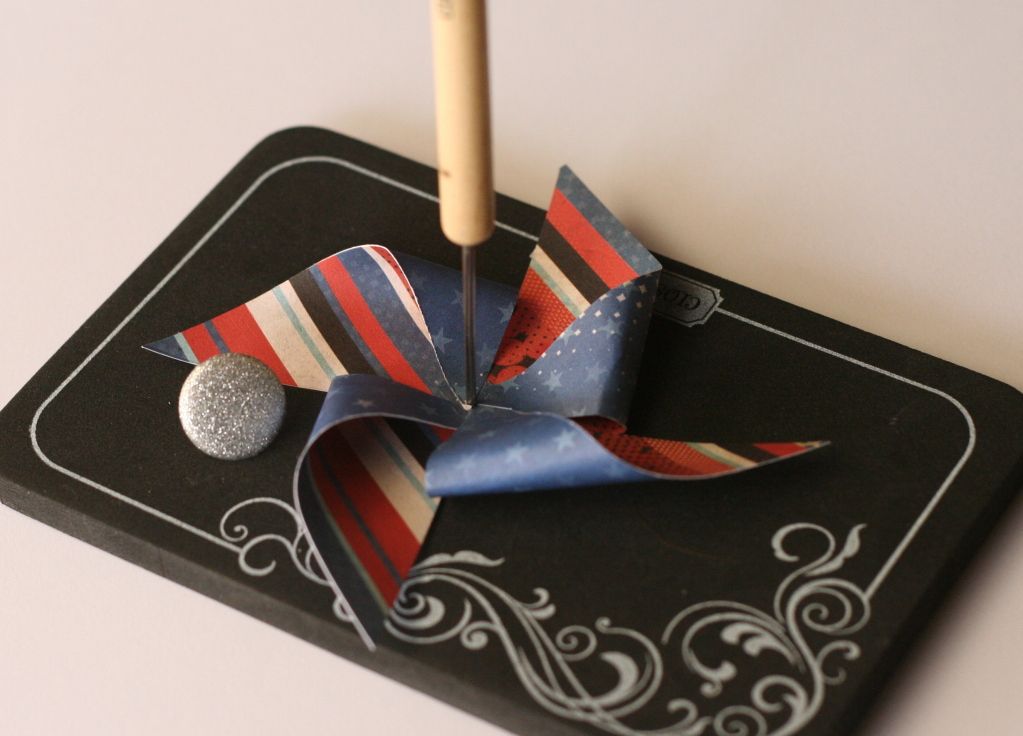
The next step is to install a brad through all of the layers of the pinwheel.  I used a large silver Shimmer Brad for the center of my pinwheels.


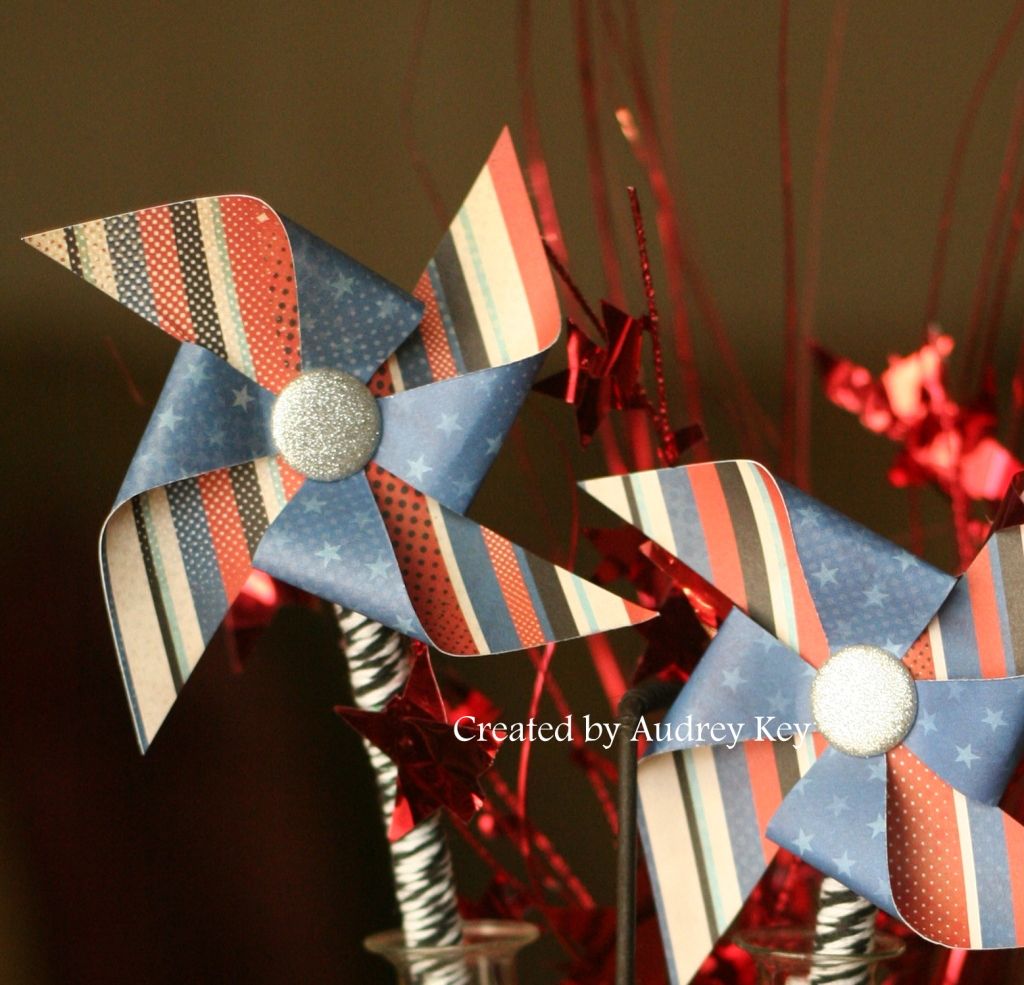
Here is a close up of the finished pinwheel.  I adhered them to the straws with 3D Foam Tape. 


I think pinwheels would be great for birthday parties, baby showers, backyard picnics, etc.


Thursday, February 23, 2012

"God Moments" Prayer Journal


This past weekend, the Women of Westminster had a Women's Retreat called "God Moments".  Since my mom just had surgery, she nor I were able to attend...I know very sad! 

 However, many, many months ago the committee asked me if I would teach a group craft project (for 55),  as last year we made thank you cards with the ladies.  I was thrilled they asked me again, and after thinking about it for a week or so, I suggested that we make prayer journals to one of the committee members.  She didn't  relay that to the committee chair that week, but the next week they met with the retreat speaker and she told them that she really emphasizes journaling.  Well, I don't know about you, but I took that as a sign that God meant for us to make those journals to record their "God Moment" in. 

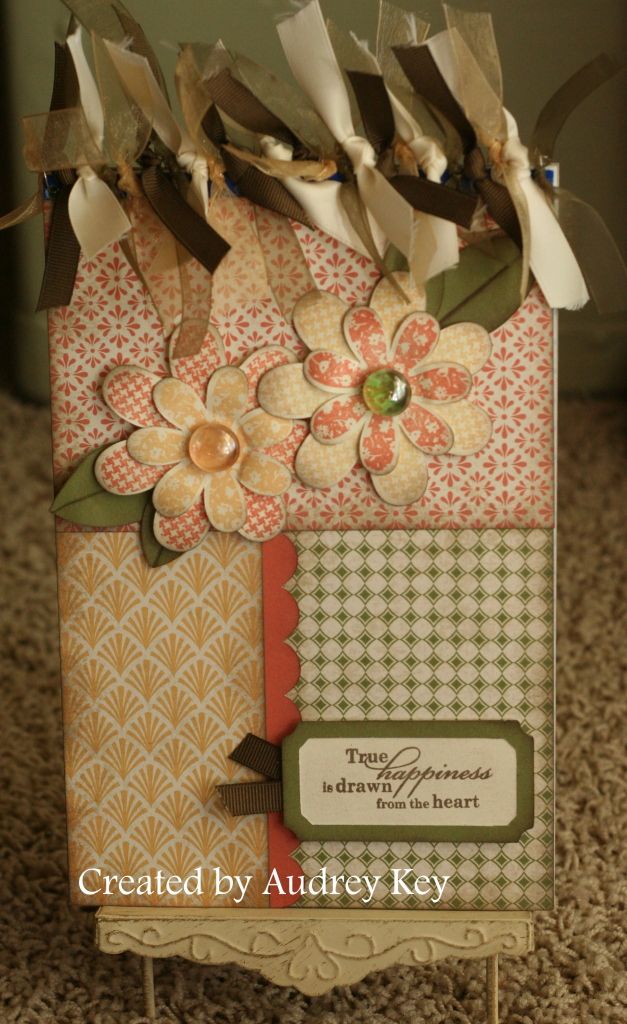
The above journal is what we made.  I used the Elemental Paper packet and miscellaneous ribbons from my stash.  I cut the scalloped border, leaves and flowers on the Cricut and stamped them with the Hooray Bouquet stamp set.  We used liquid glass to adhere the pebbles to the center of the flowers. 

 Everyone loved their creations...many of them don't scrapbook or make cards and told me that it made them feel really "crafty"!  Those are the days that I love my job!

PS - Thank you to my last minute helpers!  My mom, Aaron Brown, Aunt Barbara, Nancy, and Jackie helped me,  as the committee split everyone up into groups - and there aren't 6 of me (thank goodness)!

Wednesday, February 22, 2012

Congratulations Card


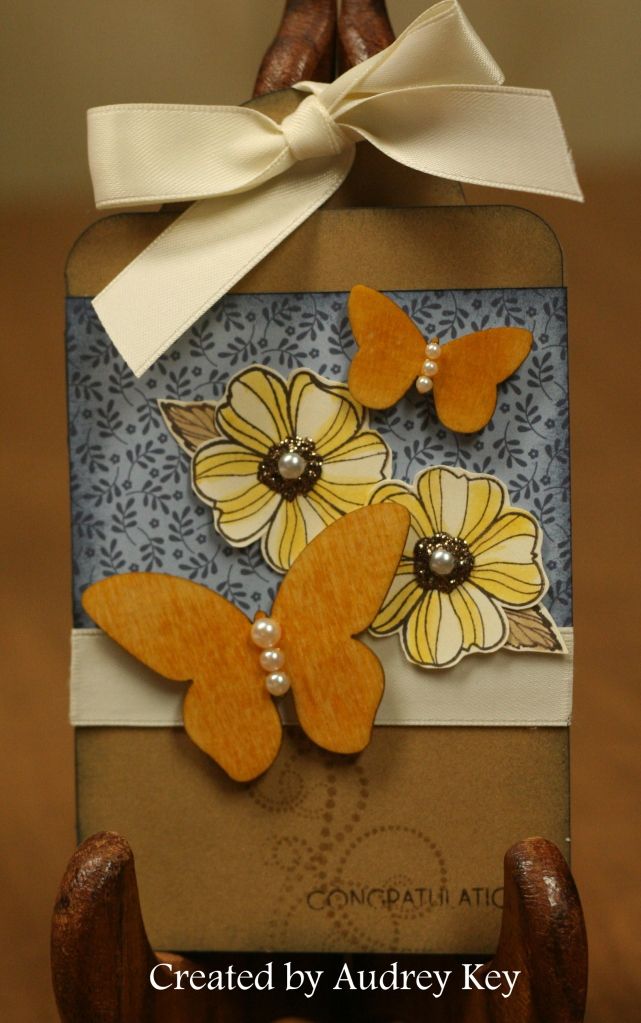
This Pemberly card was cut out on the Cricut (you just have to love that Cricut AP Cartridge!).   I used the Card Word Puzzle to stamp the flowers, leaves and "congratulations."   I stamped the flowers and the leaves with Brown StazOn ink and then water colored the flowers with  Buttercup ink and the leaves with Desert Sand.  I stamped the flourish with the Love Life stamp set.

The butterflies are from the Color Ready Accents assortment and I sponged Honey ink over them.  I embellished the card with Bronze Glitz Glitter Gel, Pearl Opaques, and ribbon from my stash. 

Friday, February 17, 2012

Pemberly Sympathy Card


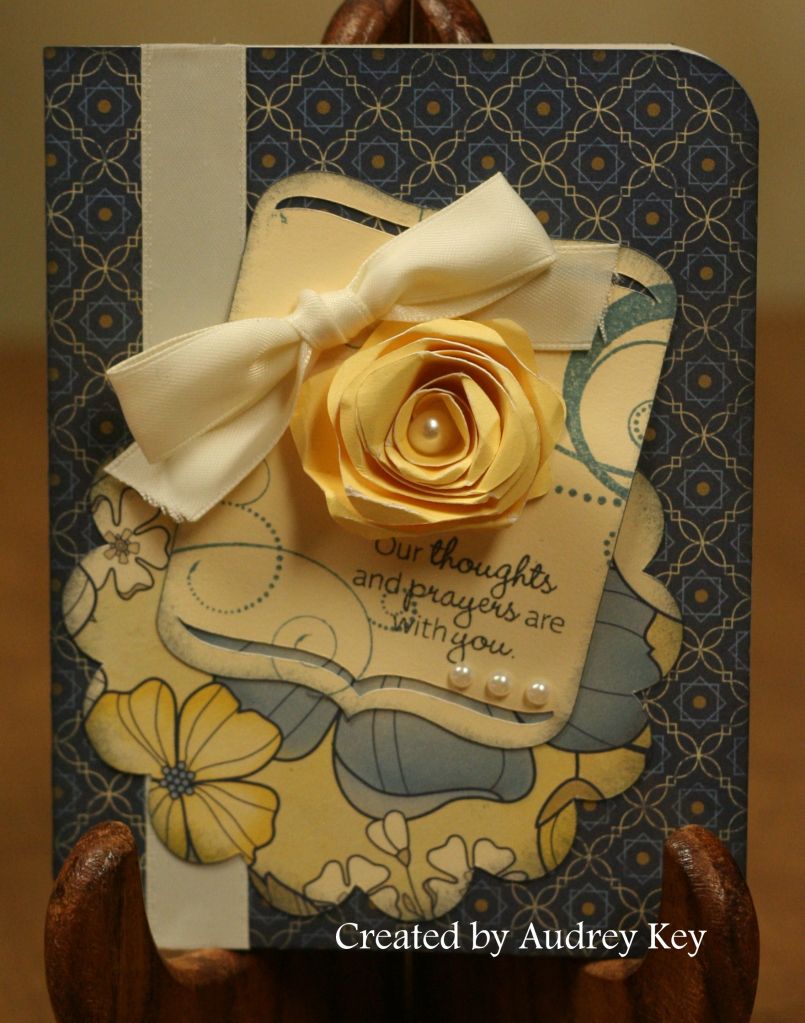
Our new Pemberly Paper is perfect for many themes.  This is a sympathy card that I made using the Cricut AP Cartridge, A Blossom stamp set, Love Life stamp set, Pearl Opaques and ribbon.  I cut the floral scalloped circle, the sentiment piece and the rose with the cricut. I also corner rounded the upper right and the lower left corners of the card base.   

The "A Blossom" stamp set is one of our new $6.95 stamp sets.  There are many of them in the new catalog and I call them the "Deal of the Day" because you get a lot of bang for your buck! 

Saturday, February 11, 2012

A Note for You... 3x3 Card


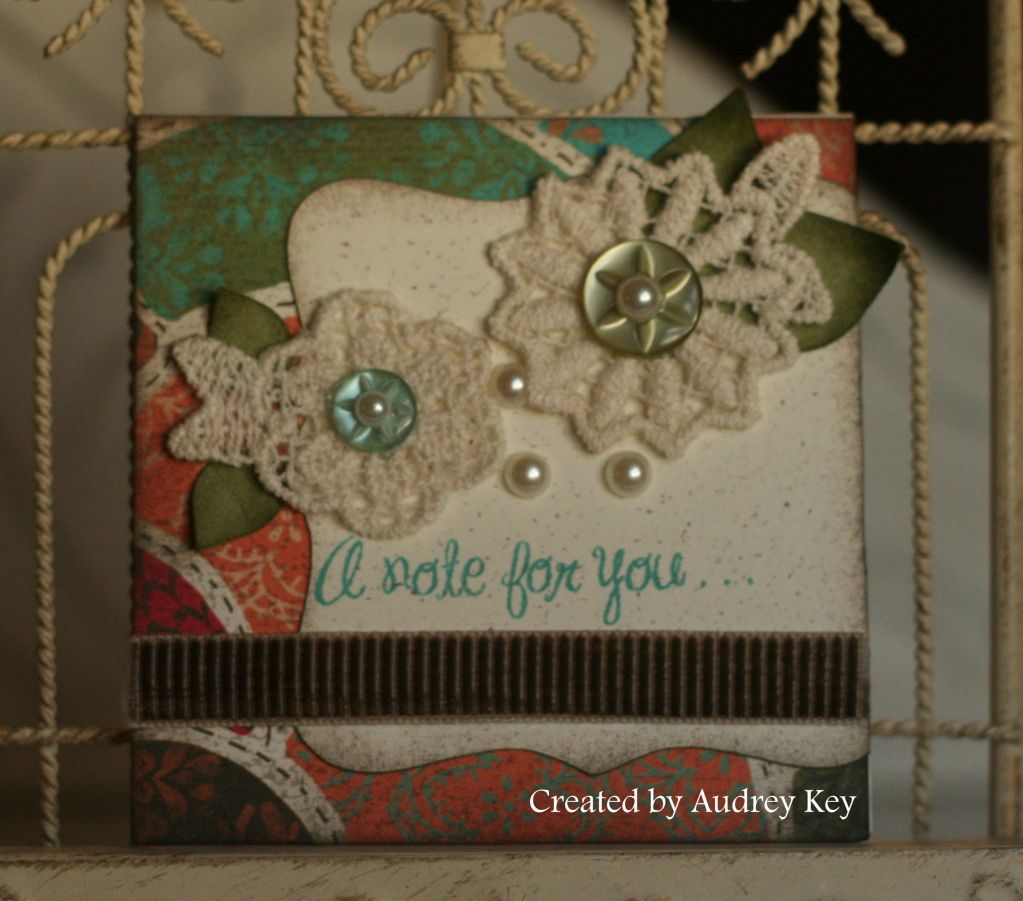
This card features Stella paper, Cocoa ribbon, Opaques, Green Button Assortment, and our new Bohemian Assortment(doilies).  I used the Cricut AP Cartridge to cut the square and the leaves.  I distressed the square with the Black Stubble Tool.

Tuesday, January 31, 2012

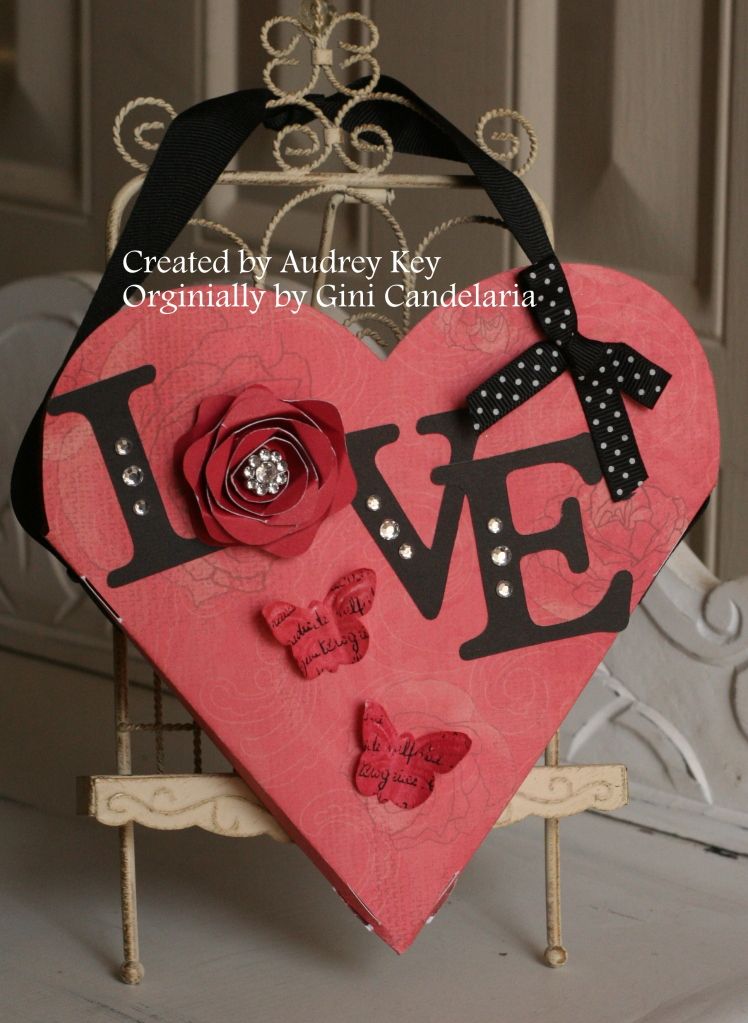
Love Valentine Pocket


This Valentine treat pocket was our project at the Cricut class last week and was inspired by a similar heart pocket that my friend and fellow consultant, Ginni Candelaria, made for me. 

 We cut this heart from the <shape1> key on page 26 in the Cricut booklet.  I cut the letters "L V E" and cut the flower  for the "O" -- all with the Cricut AP cartridge. 

We embellished the pocket with Sparkles, a Designer Rhinestone Brad for the flower center, ribbon, and Just Blooms Paper Shapes butterflies.  We added a "handle" by attaching wide ribbon with brads.

Wednesday, January 11, 2012

All Decked Out Snowman 2

It has been a while since I posted! We had a death in the family last week and traveled to East Texas. I am just getting back to "normal" since the holidays over and
getting back home.


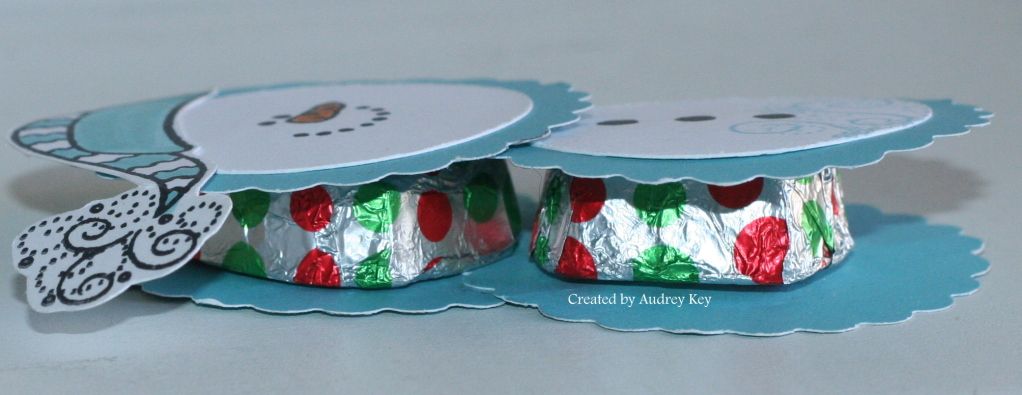
I have my sweet friend, Bea, to thank for this cute little snowman treat holder.  She made me one for Christmas that had peppermint patties in it and the background circles were black.  I am a snowman collector, so I thought it was darling, and I made lots of them for the kids at school and also for December class attendees.

You either punch the scalloped circle (2") with our circle punch (or you can cut them out with the Cricut AP cartridge - you will need 6 of the blue scalloped circles ).   The white circles (2)  are from a 1 1/2" punch (or cut on the Cricut).  
I used the "All Decked Out" stamp set to stamp his face, buttons, hat,  and the snow flourish.  I stamped the face, buttons, and hat with StazOn ink and then colored them with our markers (Goldrush and Crystal Blue).  Adhere the circles together and then adhere the candy in the middle.  We are making these at my Playgroups this week using White Chocolate Dove squares.


This side view shows the candy inside.  Any candy will do that is thin and within the size of your punched circles. 


I dreamed about this card two nights ago and knew it was the one we needed to make at Playgroup this month (this month we are making 2 projects!).  I cut the scalloped circles, white circles, ticket, and the frame/rectangle on the Cricut (such a time saver!).  We made the same snowman to put on this card.  We used "All Decked Out,"  "Snow Flurries," and the sentiment is from "Bundled Buddies."  We embellished the card with pearl opaques, Prisma Glitter, and brown ribbon from my stash. 

PS - If you love the Wonderland paper packet, purchase it!  It will be retiring on February 1st so the last day you can purchase it is January 31st.

Friday, December 23, 2011

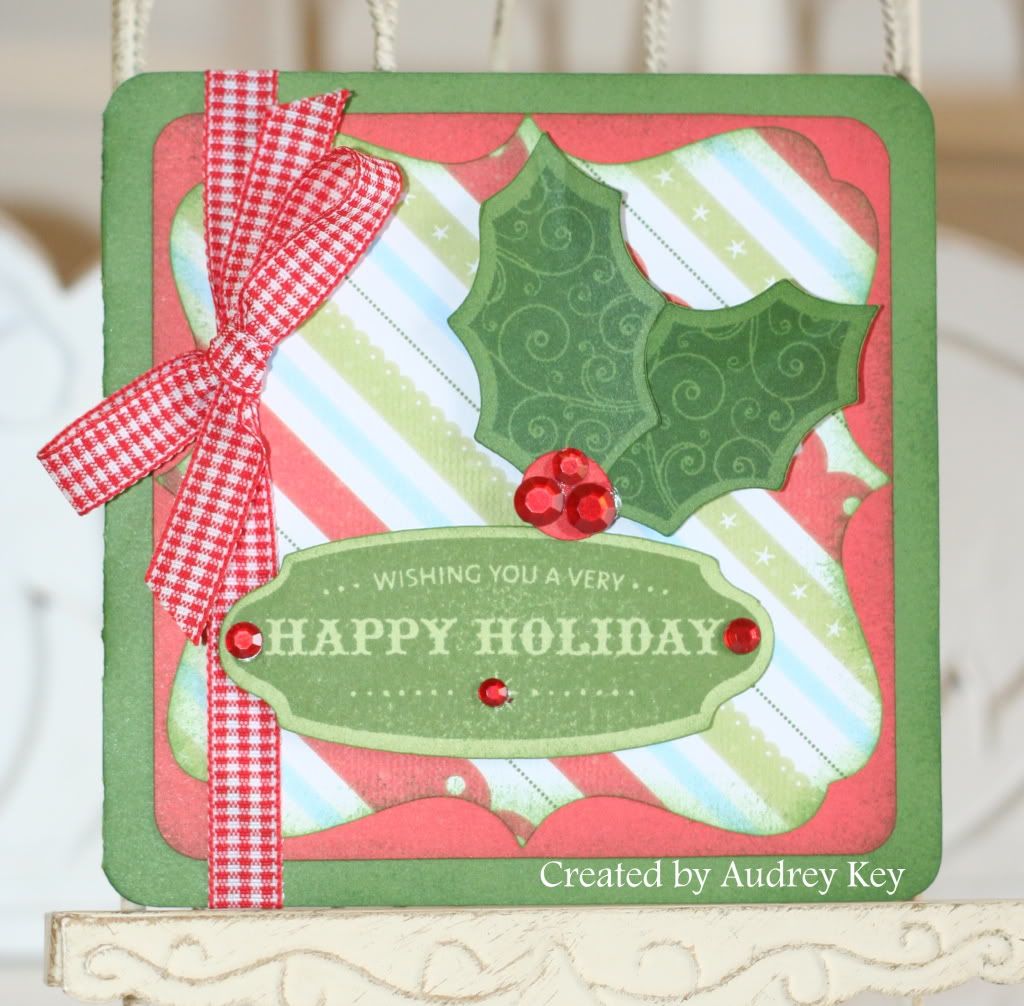
Wishing You a Very Happy Holiday Card


This 4 1/2" square card is from the Cricut Class last week.  The card base; red and striped background pieces; holly leaves; and the focal point piece were all cut on the Cricut.  If you are interested in which keys were used, please email me and I will give you that information.  I used  "A Holiday" and  "Holiday Cheer" stamp sets.  I embellished the card with Red Sparkles and checked ribbon. 

Monday, December 19, 2011

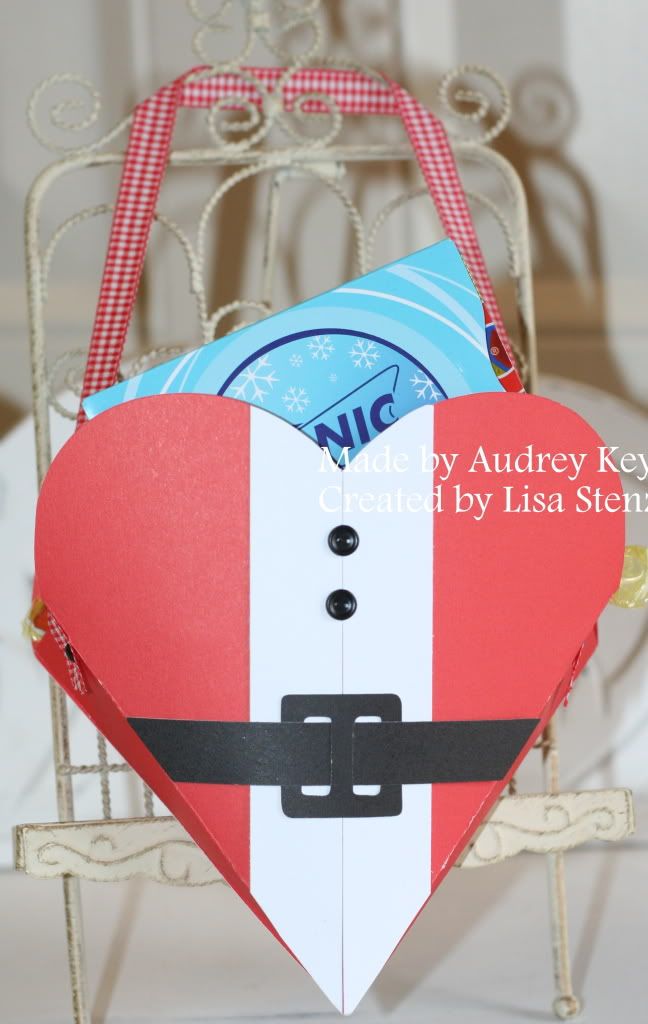
Santa's Treat Pocket


This cute little treat pocket was originally created by Lisa Stenz who is also a CTMH Consultant.  I thought it was so cute, that I made one to show at my Cricut Class last week. 

The heart pocket is on the <shape1> key
on page 27 in the cricut booklet. 

1.  The combination of keys is:  Font Layer; Shift;
<shape1>.  I cut my pocket at 11". 

2.   I creased all of the folds for the pocket
(don't adhere yet) and then added two strips of
White Daisy Cardstock that were 3/4" each. 

3.  I also cut a "belt" from Black Cardstock that was 1/2".   The belt buckle is on the <square1> key
(keys:  Tag; <square 1>.  I cut the buckle at 1").

4.  I used 2 button brads from the Black Mini
Medley Assortment for the buttons on the "coat".

5.  I used a piece of Cranberry checked ribbon as the
hanger and attached it with 2 small
black brads on the sides.

6.  The final step is to adhere the pocket together
at the side.  I used Terrifically Tacky Tape for that. 
TTT is a very permanent bond which is what you
want on all of the little treat boxes!

7.  The last step is to fill the pocket.  I put Christmas
candy and a Sonic gift card in my pocket!

Monday, December 5, 2011

Sonoma Card Box and Cards

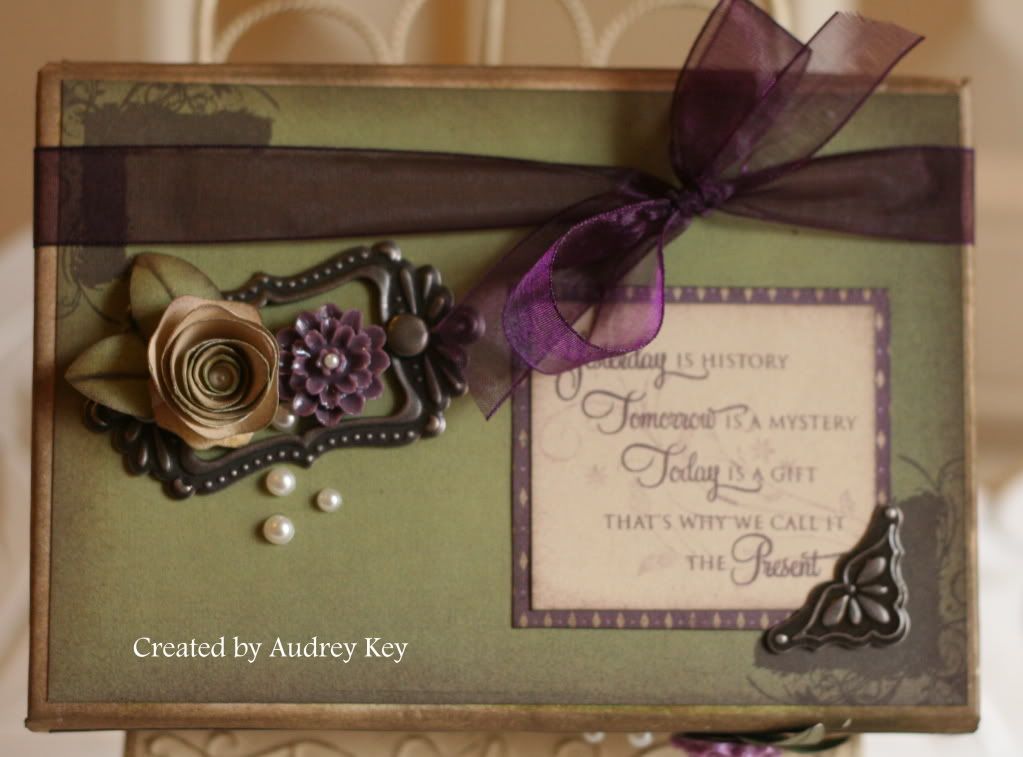
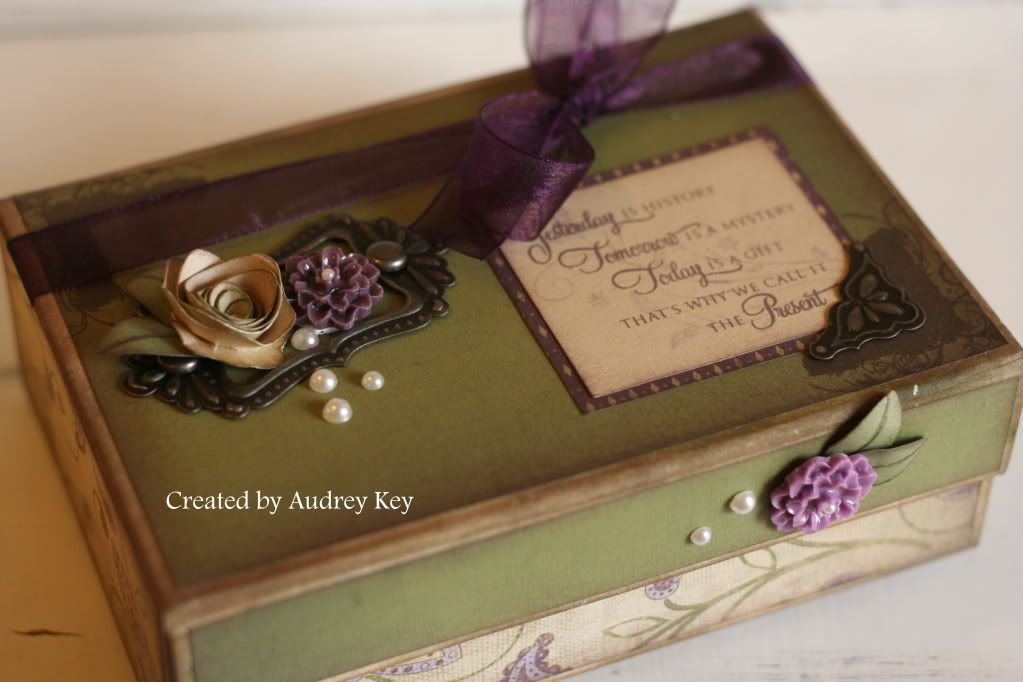
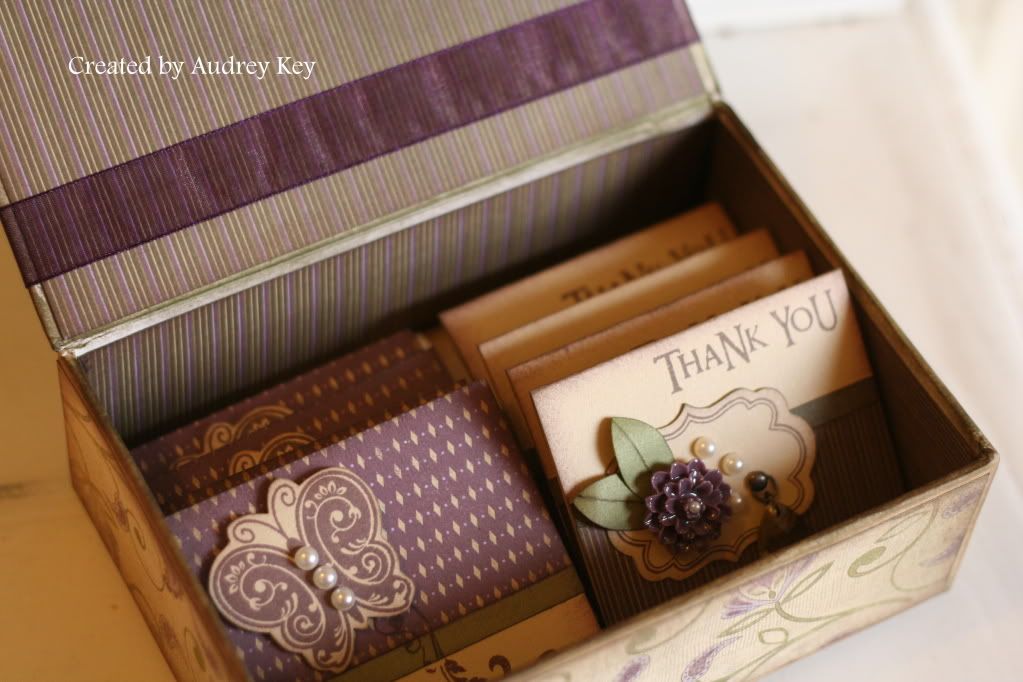
Yesterday I had a great group of ladies over for the Sonoma Card Box and Cards Workshop.  We wonderful time creating these cute card boxes filled with cards.  If you haven't made one of our My Creations boxes, you need to do it as soon as you can!  They are so much fun to create.


We used the My Creations Card Box, Sonoma Level 2 Paper, Mini Medley Pewter Assortment, Heirloom Assortment, The Present stamp set, Pearl Opaques, purple ribbon from my stash, and the Cricut cartridge to cut some of the
flowers and leaves.


The Sonoma paper packet is just beautiful!  It features Olive, Smokey Plum, Bamboo, Amethyst, and Cocoa.  We distressed the edges of the box with cocoa ink and a sponge prior to decorating it. 

**Tip - Use Bonding Memories Glue Pen to get a good even bond between the paper and the box.   You need to work quickly so that you are adhering it when it is wet.  The Bonding Memories Glue Pen is wet when you put it on the paper and that provides a permanent bond.  When you let the glue dry to clear (or if you are not working quickly it will dry) and it is a temporary bond similar to that of a post-it note.


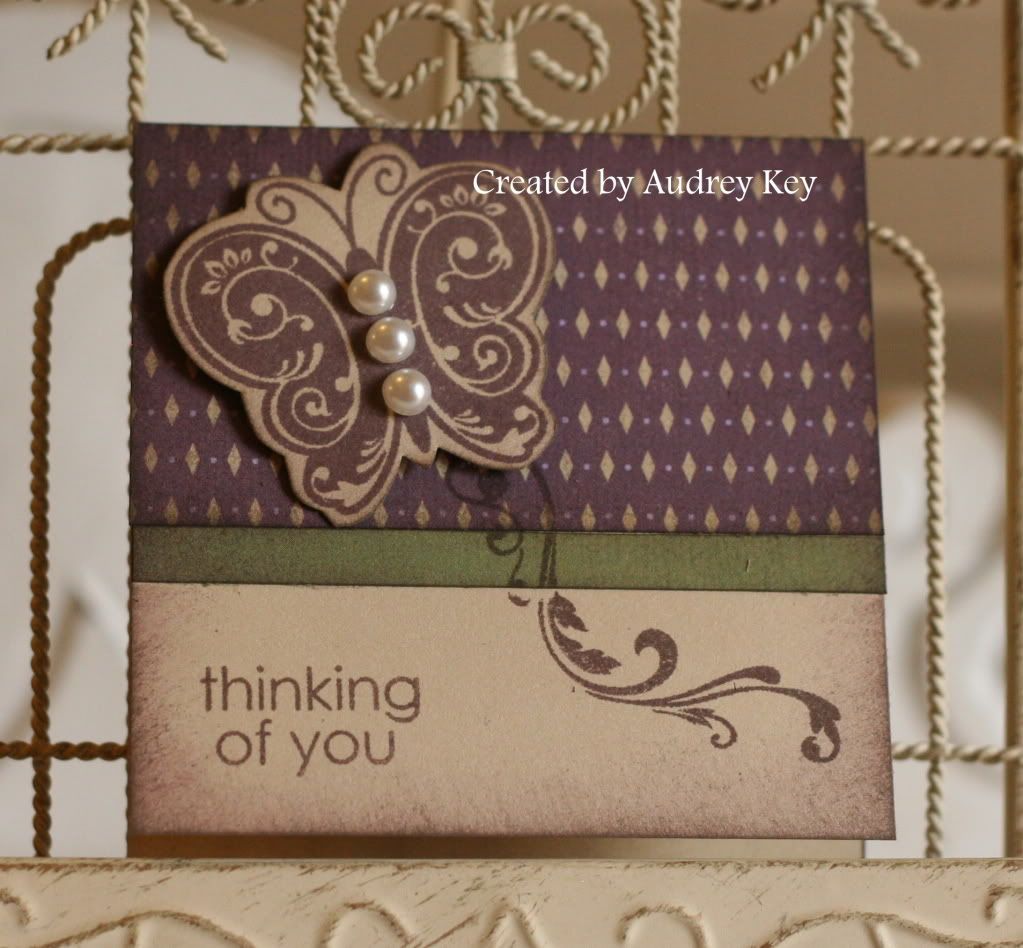
We made 10 cards with the remaining paper and the kits included CTMH 3x3 envelopes (10 per package).  This is a great gift to give someone and the box can be used as a trinket box later for jewelry or other small memorabilia.


We made 5 cards of this style.  We used the Say It in Style stamp set for the sentiments.  If you don't own that set, you need it!  It is all inclusive with lot of phrases that are
great for card making.


We also made 5 cards of this style.  This card features a Cricut frame and leaves, the Heirloom Assortment flower and jewel, and Pearl Opaques.  We used the Say It in Style stamp set for these cards too.


Sunday, December 4, 2011

Spiced Tea - Another Holiday Tradition

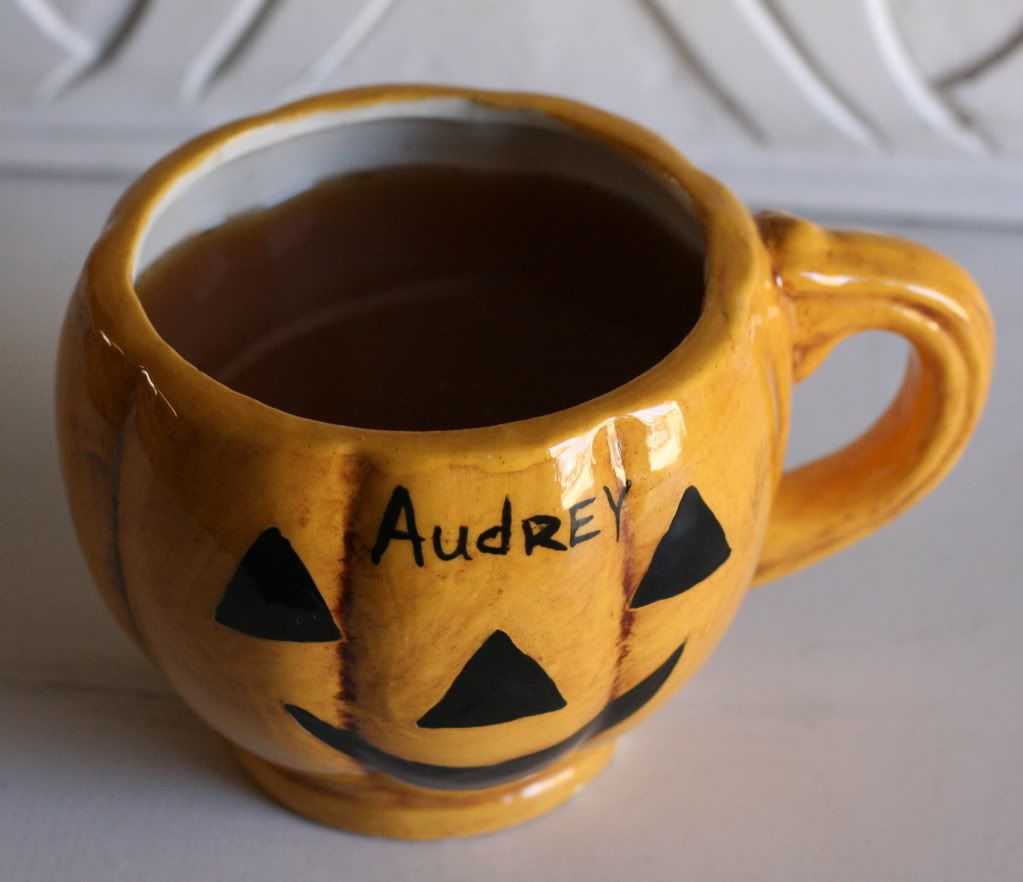
Many of you have been the recipient of Spiced Tea.  I love drinking a piping hot cup of it, especially during the fall and winter months and I like to give it to family and friends during the holidays!  My earliest memories of drinking it were in elementary school.  My mom's friend made my brother, sister and myself a cute little jack-o-lantern cup and we would drink our spiced tea in it.


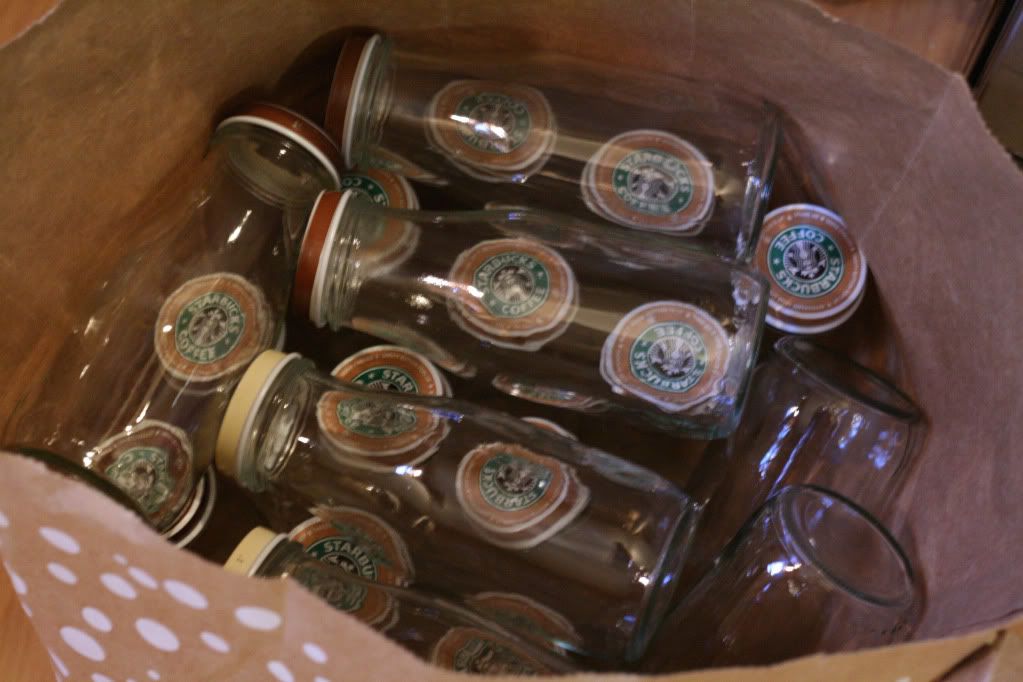
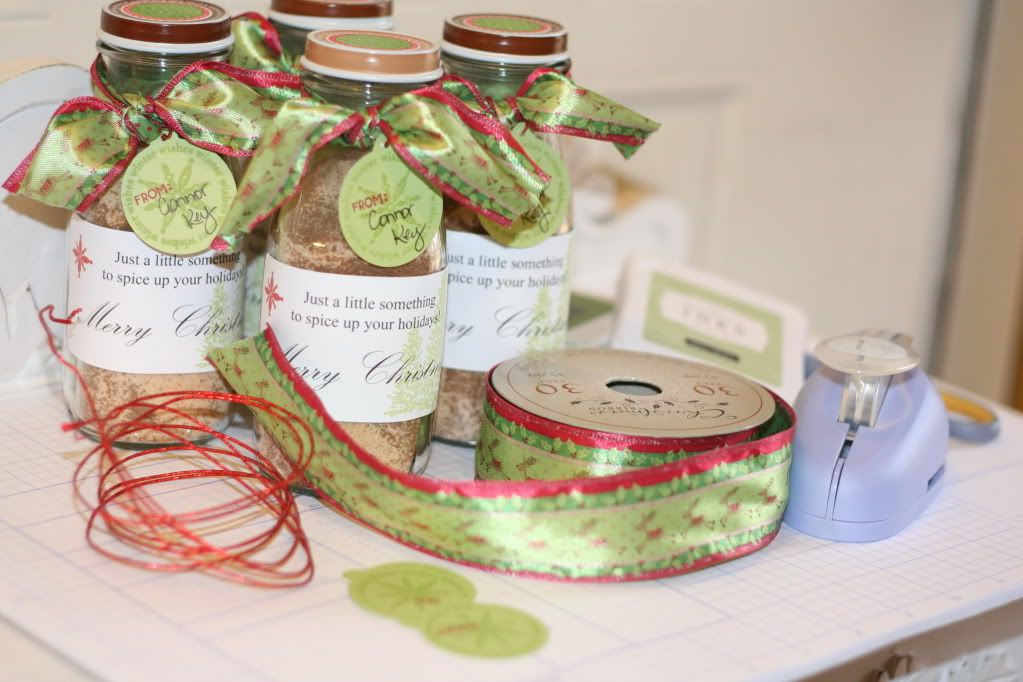
My friend, Tina, and I decided to make teacher's gifts with our spiced tea recipe and I wanted to share that process with you.  The first thing that you must do is get in the mood!  We put some Holiday tunes on and just had a good time preparing our little gifts!  We used recycled Starbucks Frappucino bottles and stamped our labels for the lid and the jar.  We bought cute Christmas ribbon at Hobby Lobby to finish them off.


Tina's mom saved the frappucino jars for us!


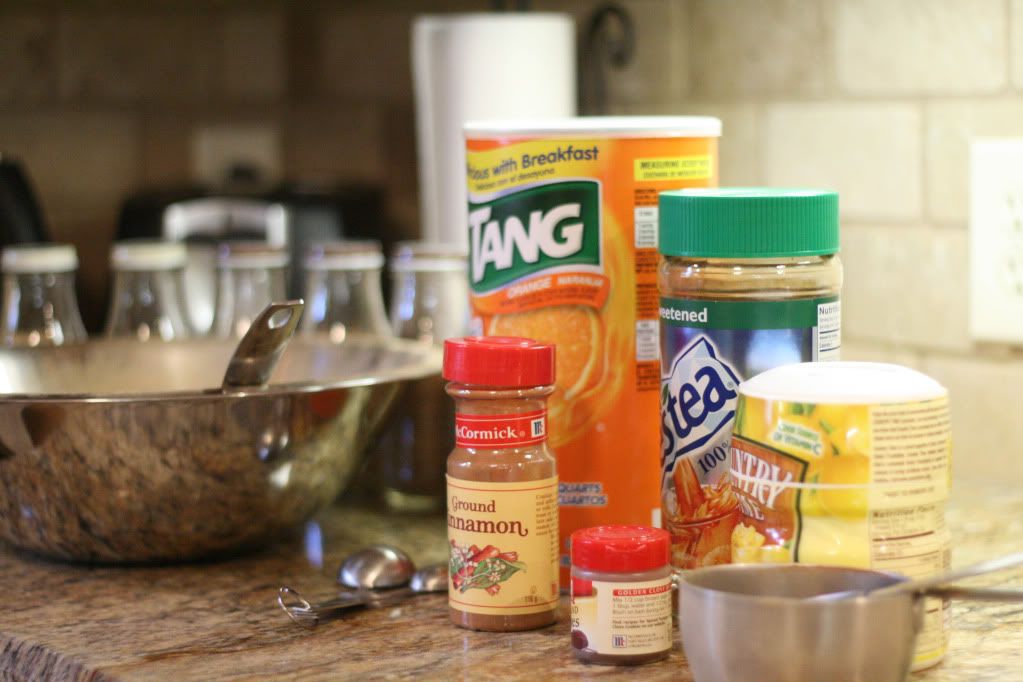
Quality ingredients make quality tea!


All mixed up!  It smells delicious!


These jars look great filled and decorated. 

*We made Avery labels on the computer with the sentiment, "Just a little something to spice up your holidays! 
Merry Christmas!" 

*We stamped the labels using the trees from the Bundled Buddies stamp set and a snowflake from the December 25th stamp set to make them more decorative.  

*We cut the small green tags with the Cricut cartridge and stamped them with a snowflake from the December 25th stamp set. 

*We also stamped the circles from the Countdown stamp set on White Avery label paper and punched them out with our
1 1/4" circle punch - we used the cirlce labels to cover the
Starbucks logo on the lids. 

*Reindeer ribbon is tied around the neck of the bottle and the "from" tag is tied on with glitzy red wire.

My recipe actually came from "The Cottage" which used to be on 34th Street in Lubbock.  Our family loved that store and visited each year during their Holiday Open House. 

Here is the recipe:

2 Cups Tang
1 1/2 Cups Instant Tea
1 Cup Powdered Lemonade
1 1/2 Cups Sugar
1/2 tsp. Ground Cloves
1/2 tsp. Cinnamon

Mix ingredients well.  Stir 2 Teaspoons into 1 cup hot water.

In closing, may your holidays be filled with spice and the simple joy of spiced tea.  I challenge you to mix up a batch and give it as a gift.  You will make the recipient's holidays very happy and your's more memorable!

Friday, December 2, 2011

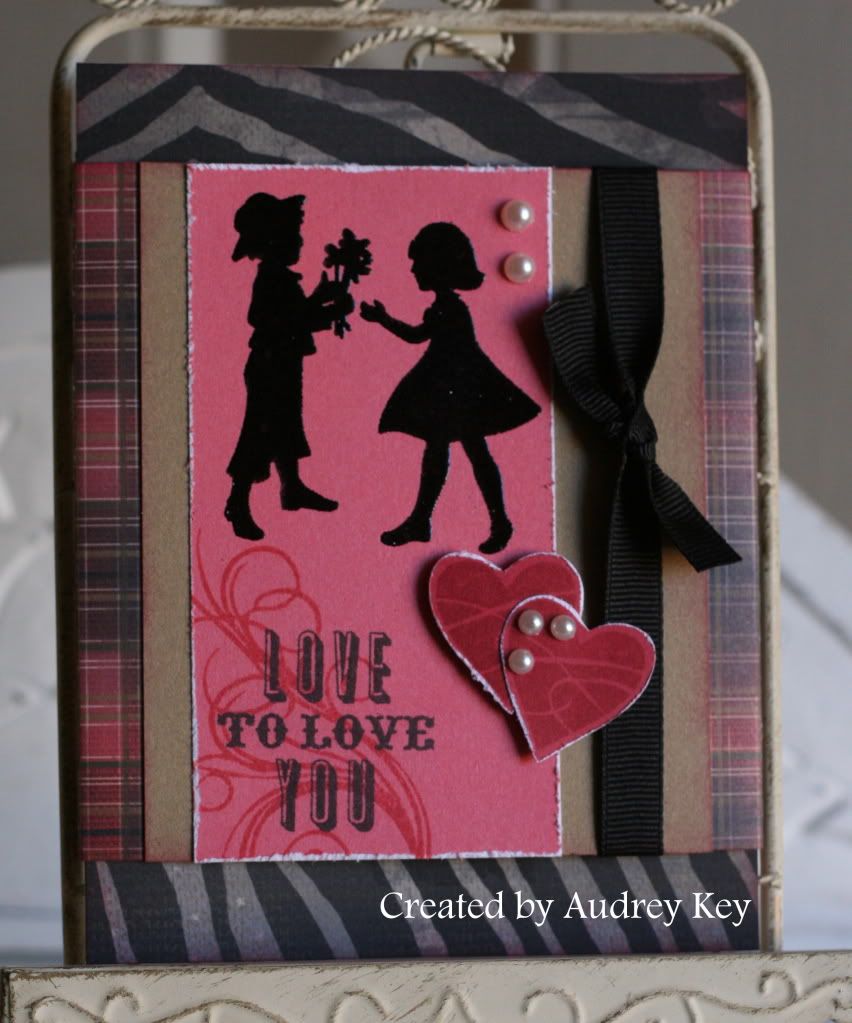
Love To Love You Card


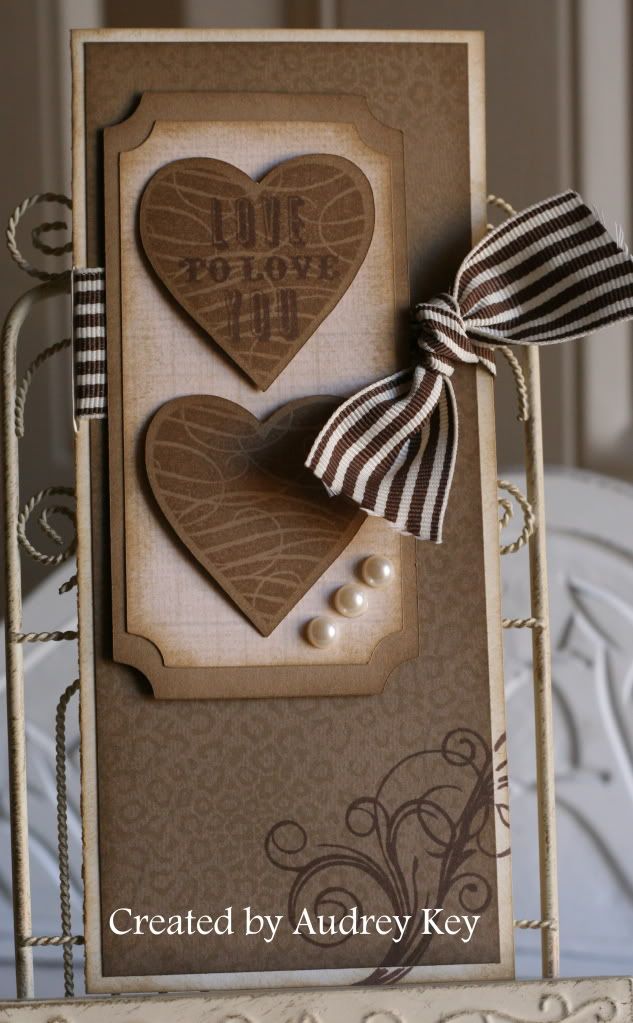
This 3 1/2" x 8" card was inspired by my friend, Karen Pedersen who lives in Utah.  We served on the CTMH Advisory Board together and she is a dear friend AND a brilliant artist!   Check out Karen's blog here!

I used the Roxie paper packet along with the Mad About You (stamp of the month) and Instant Memories stamp set.  I embellished the card with our Chocolate Striped Ribbon and Pearl Opaques.  The hearts were cut on the Cricut.

Thursday, December 1, 2011

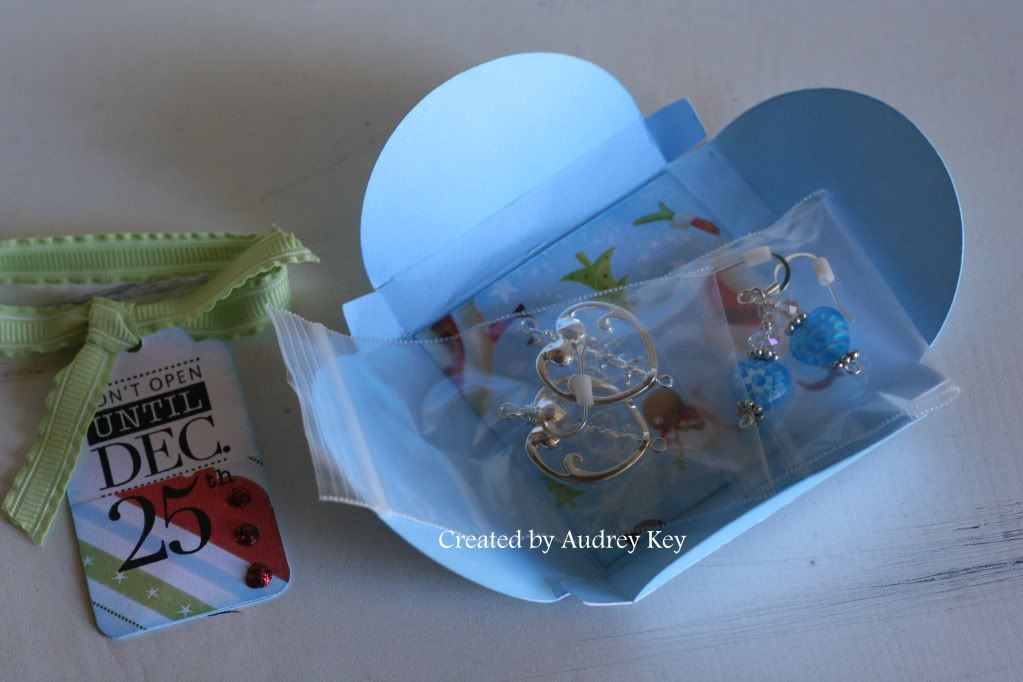
Don't Open Until Dec. 25th - Christmas Petal Box


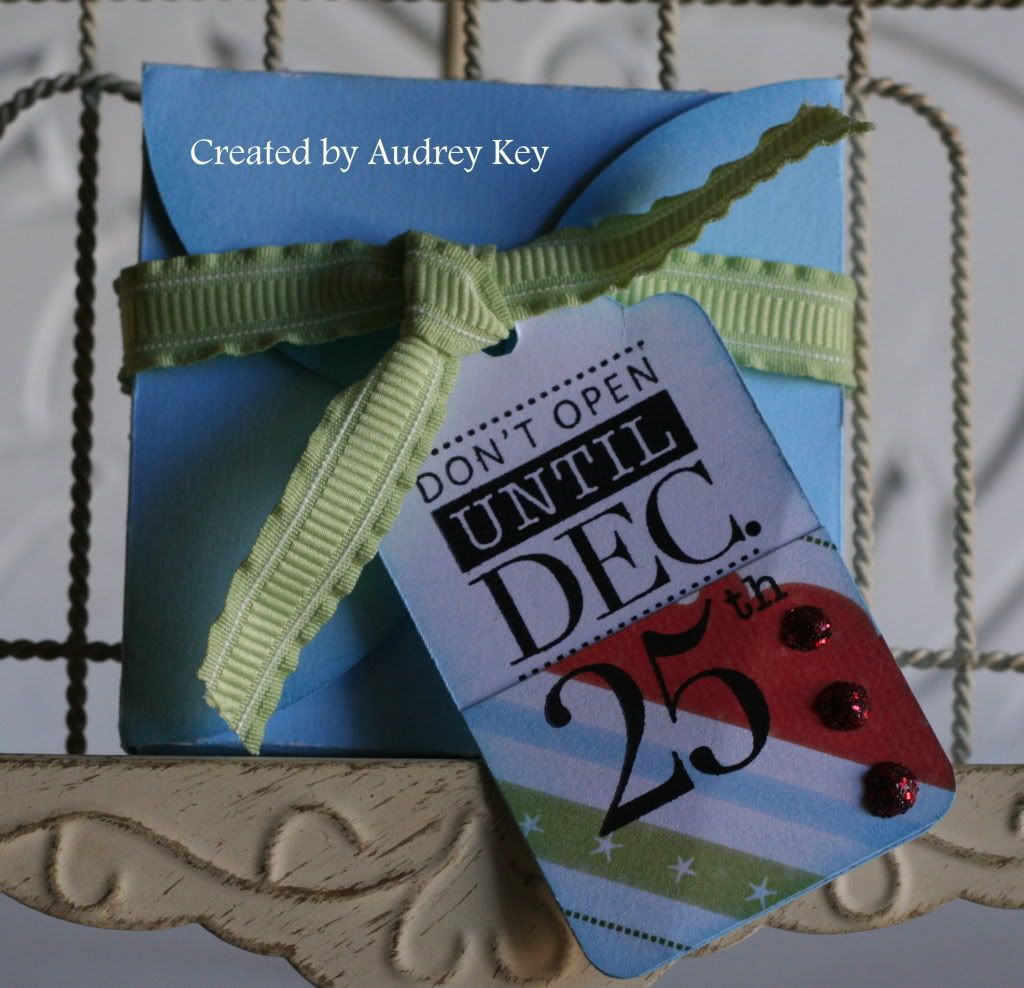
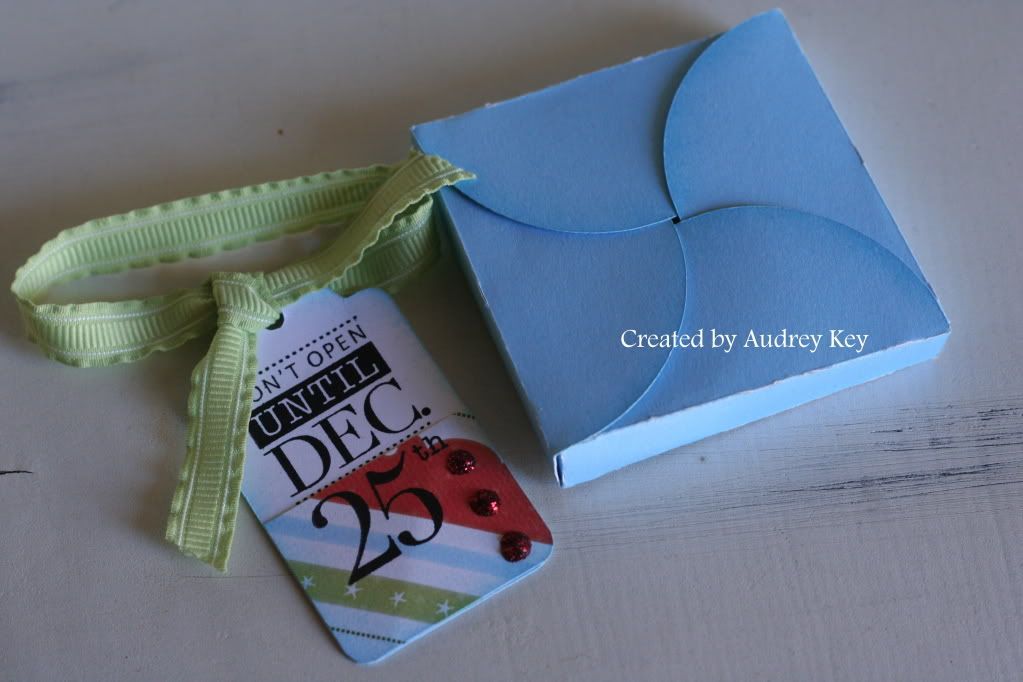
I was so excited about the Cricut boxes on our new cartridge.  I quickly realized that you need to cut various sizes from scrap paper before you decide on the size you want.  The finished size of this little box is 3" - this surprised me because I set the dial to 6" when I cut it.   


The products I used for this little petal box are:  Believe Level 2 Paper, Red Glitz Glitter Gel, and the Green Ribbon Assortment.  The gift tag is on the Cricut cartridge and I used the December 25th My Acrylix Stamp to stamp the sentiment.


Those who know me well, know that I love to make jewelry!  It is only fitting that this cute little gift box have 2 pairs of heart earrings enclosed! 

PS - Don't Open Until December 25!


Wednesday, November 30, 2011

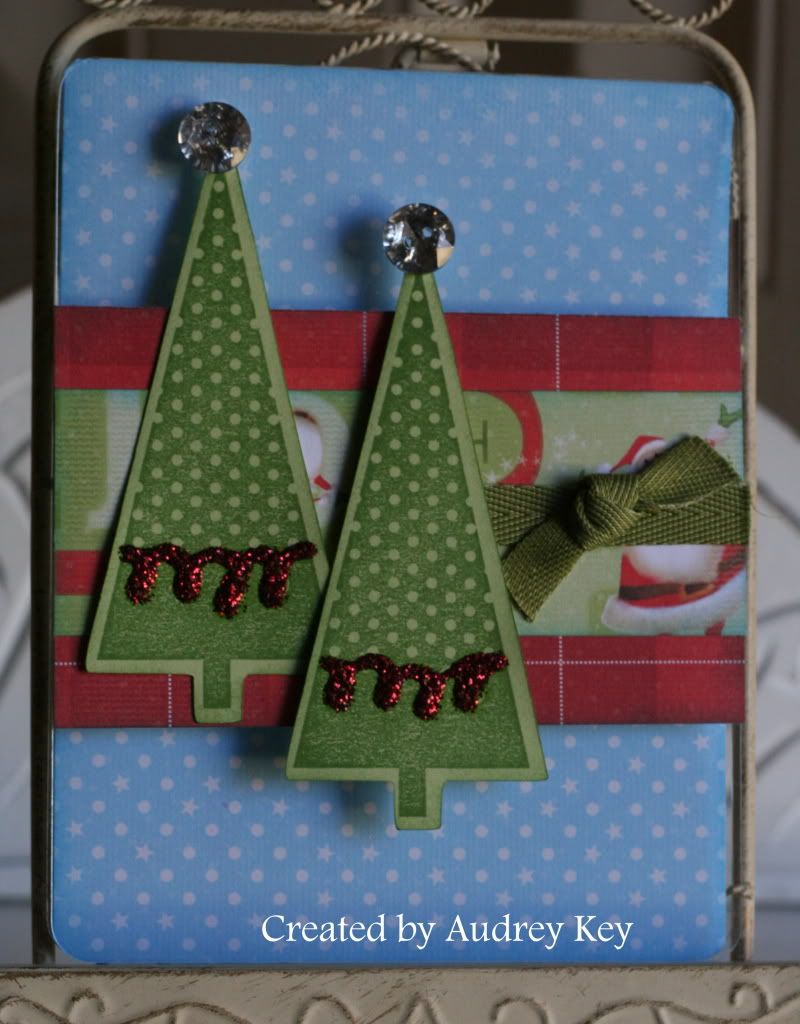
Christmas Tree Clear Card


This is one of the first projects I made using the Cricut Art Philosophy Cartridge and the stamps in the bundle.  I cut the trees with the cricut and used the stamp set in the bundle to stamp them.  This card is a clear card from our specialty card line.  I used Believe paper, Green Ribbon Assortment, Bling Buttons,  Cricut AP Cartridge and stamps, and Red Glitz Glitter Gel.

Friday, November 25, 2011

Hip Hip Hooray Clear Card


Here is another card made with the Childhood Portrait stamp set.  I love this little boy playing with his yo yo.  I used Red Glitz Glitter Gel to highlight the yo yo.   I used a Clear Card, Roxie Level 2 paper, Cricut AP Cartridge, Dimensional Elements Mixed Shapes, black heat embossing powder, black ribbon and Licorice Opaques.

** Tips - I punched holes in the scallop of the clear card to dress it up.  You could thread ribbon through the holes for added dimension.

Tuesday, November 22, 2011

Love to Love You Card


Our December Stamp of the Month (Mad About You) is inspiring me to think about Valentine's Day.  I know, we haven't even celebrated Thanksgiving, but if you make cards for holidays, then you need to think ahead, right? 

I used Roxie Level 2 Paper, Childhood Portrait stamp set, Instant Memories stamp set, Mad About You stamp set, Pearl Opaques, and black ribbon. 

The card pattern is in the Originals book and is called "It's a Wrap."  The card is "wrapped" with a band which is very cute and different than just a standard card.  I heat embossed the kids with Versamark and Black Embossing Powder.  The Childhood Portrait stamp set takes me back to yesteryear because reminds me of the silhouette pictures that my Grandmother had in her bedroom when I was a little girl.  Every time I see something made with this stamp set it reminds me of her.

Saturday, November 19, 2011

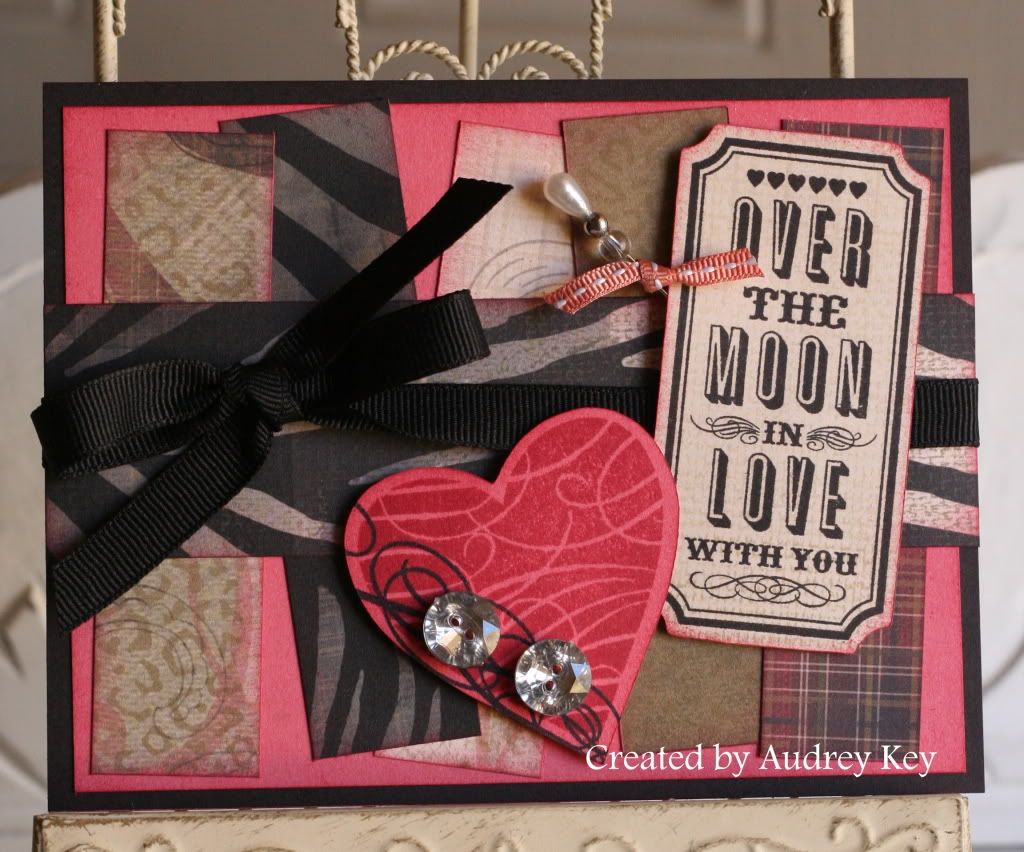
Over the Moon In Love Card


I couldn't wait to make this card!  I dreamed about it last week and knew that when we returned home I HAD to make it.  I used Roxie Level 2 paper, Red Ribbon Assortment, Black Ribbon, Bling Assortment, and the December Stamp of the Month called "Mad About You."  The ticket and the heart were cut on the Cricut!  Imagine that - the December Stamp of the Month is Cricut compatible!   This stamp set is great for wedding, Valentine's Day, or love cards and/or scrapbook pages.  In my opinion, it is a must have!