Showing posts with label Elemental. Show all posts

Thursday, February 23, 2012

"God Moments" Prayer Journal


This past weekend, the Women of Westminster had a Women's Retreat called "God Moments".  Since my mom just had surgery, she nor I were able to attend...I know very sad! 

 However, many, many months ago the committee asked me if I would teach a group craft project (for 55),  as last year we made thank you cards with the ladies.  I was thrilled they asked me again, and after thinking about it for a week or so, I suggested that we make prayer journals to one of the committee members.  She didn't  relay that to the committee chair that week, but the next week they met with the retreat speaker and she told them that she really emphasizes journaling.  Well, I don't know about you, but I took that as a sign that God meant for us to make those journals to record their "God Moment" in. 

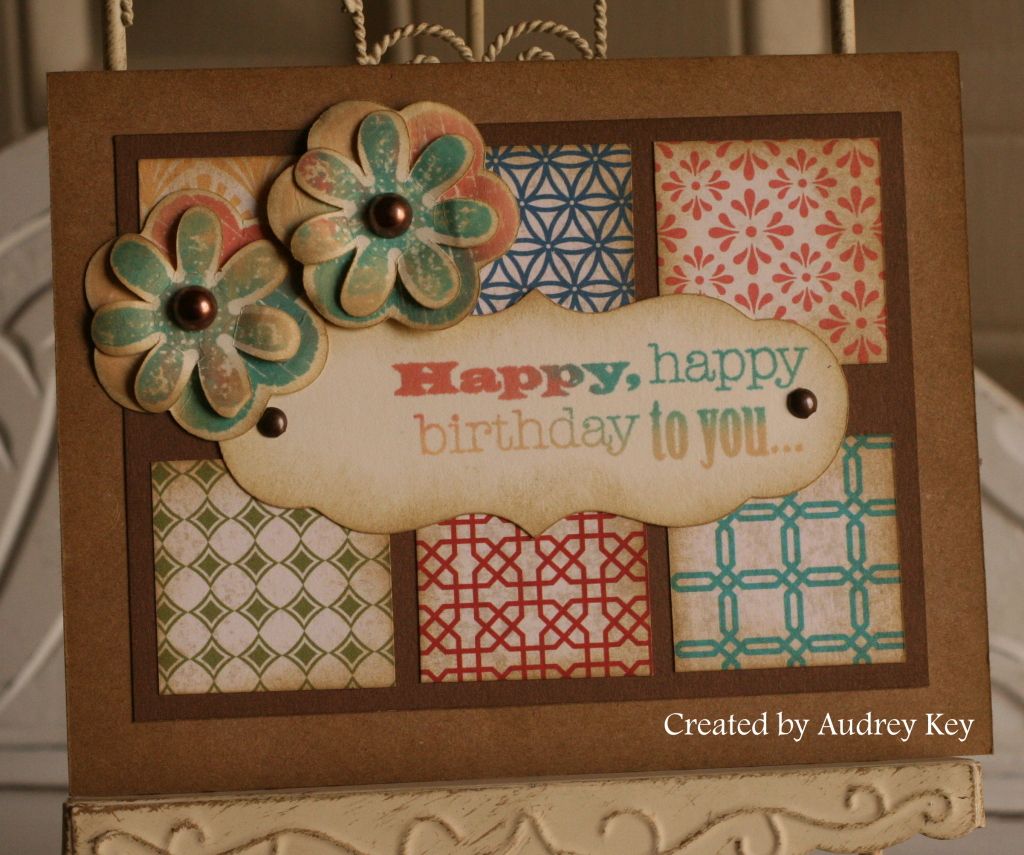
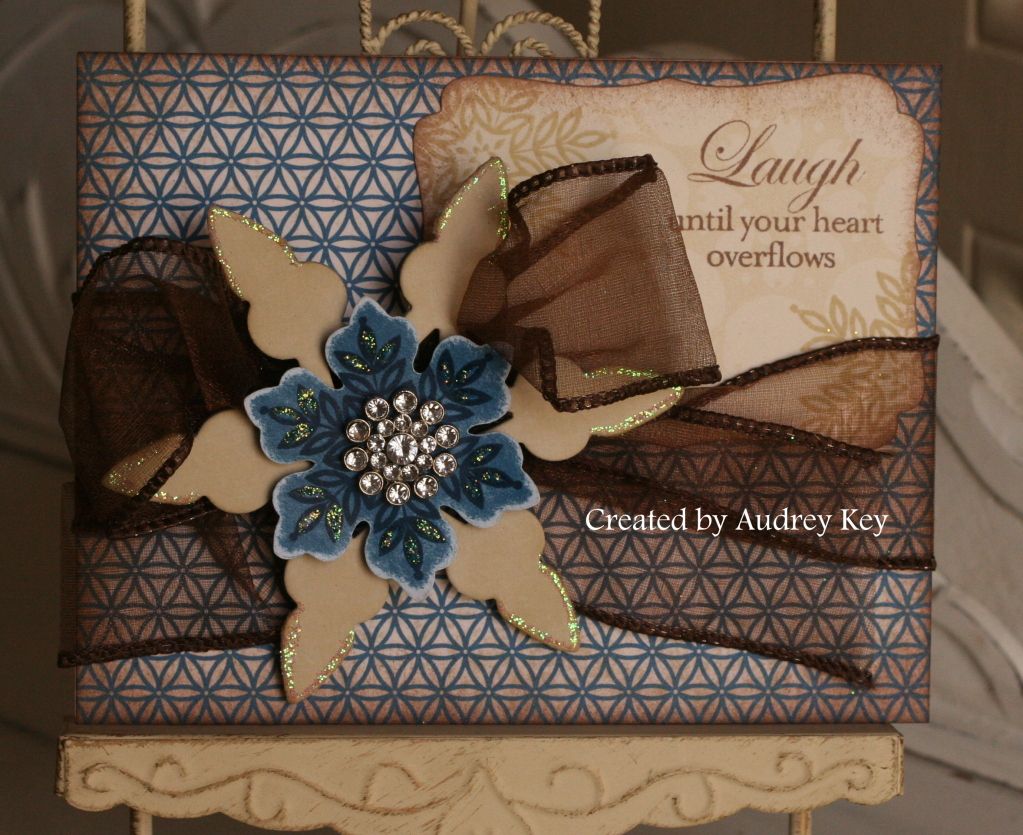
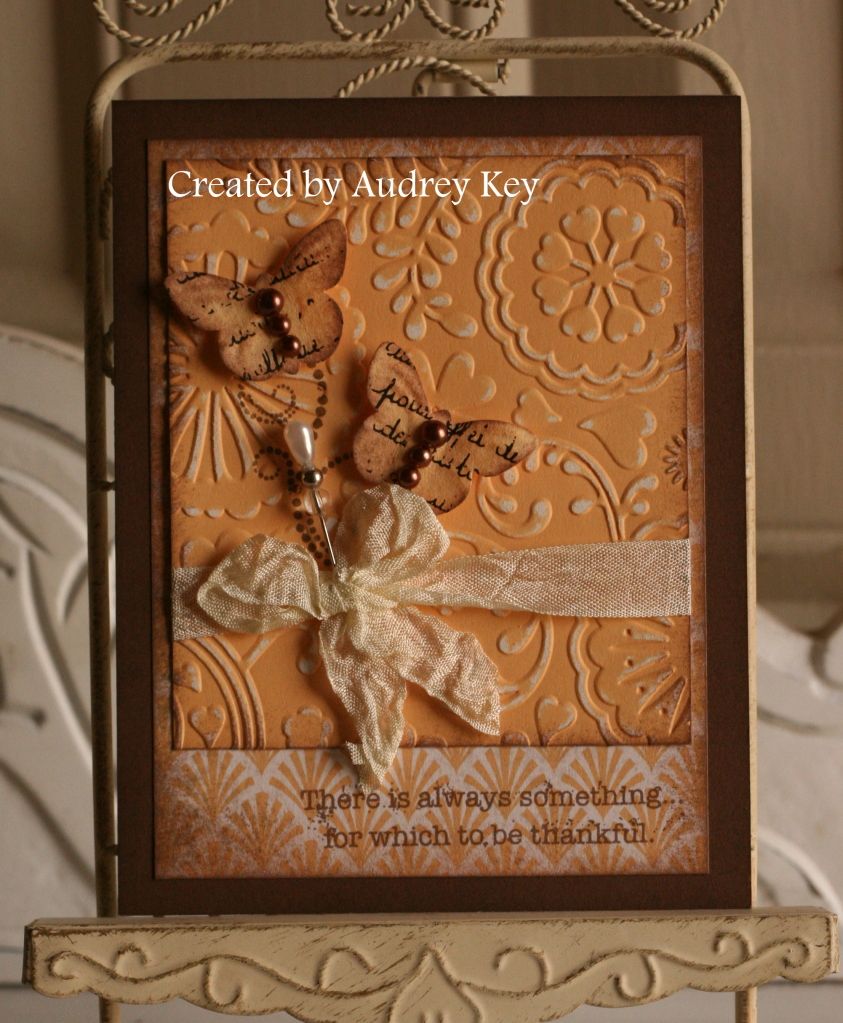
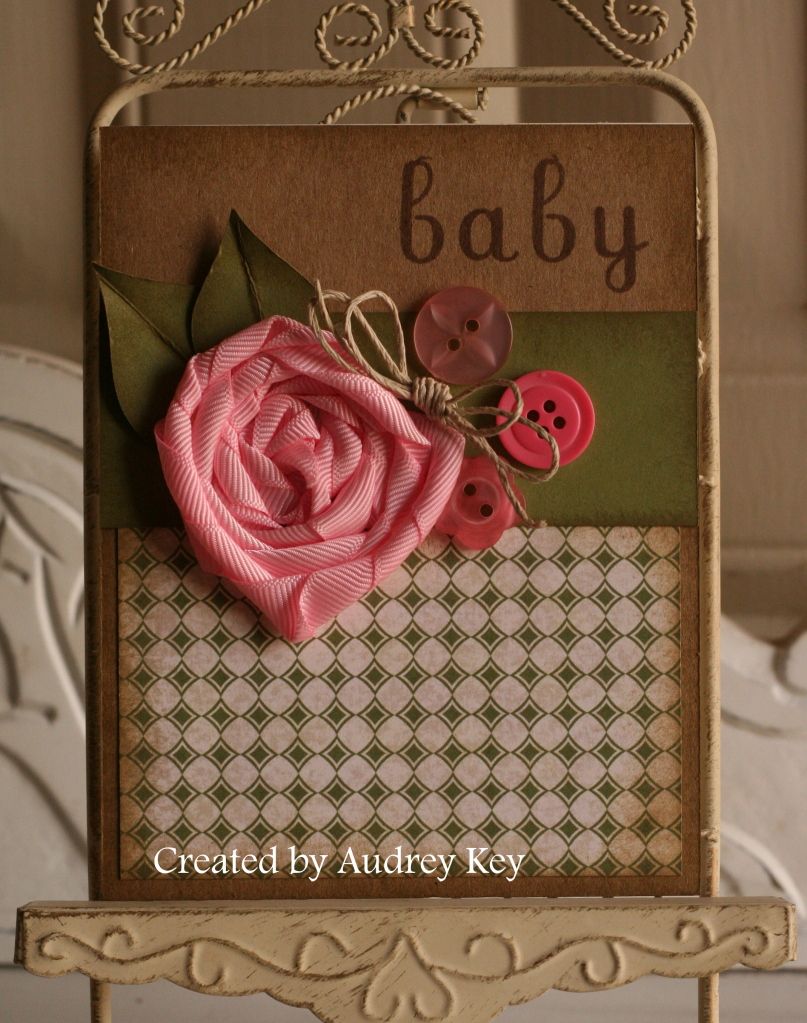
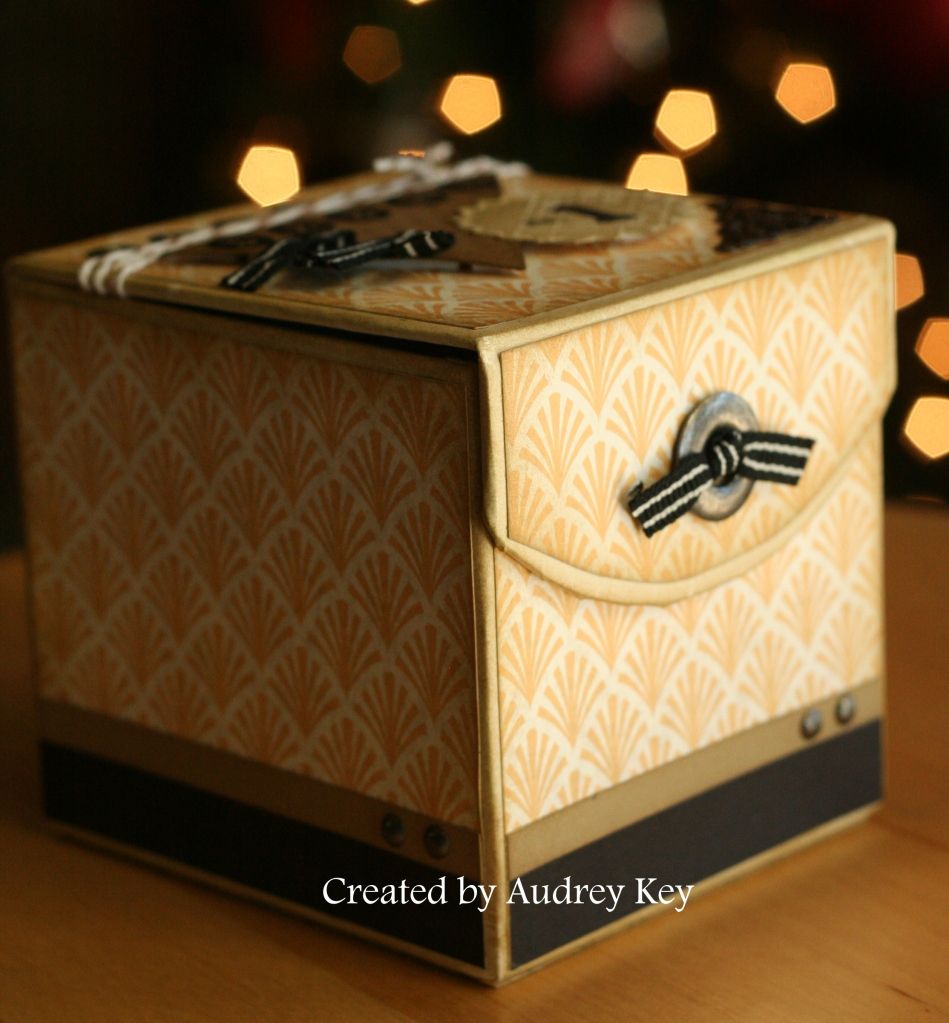
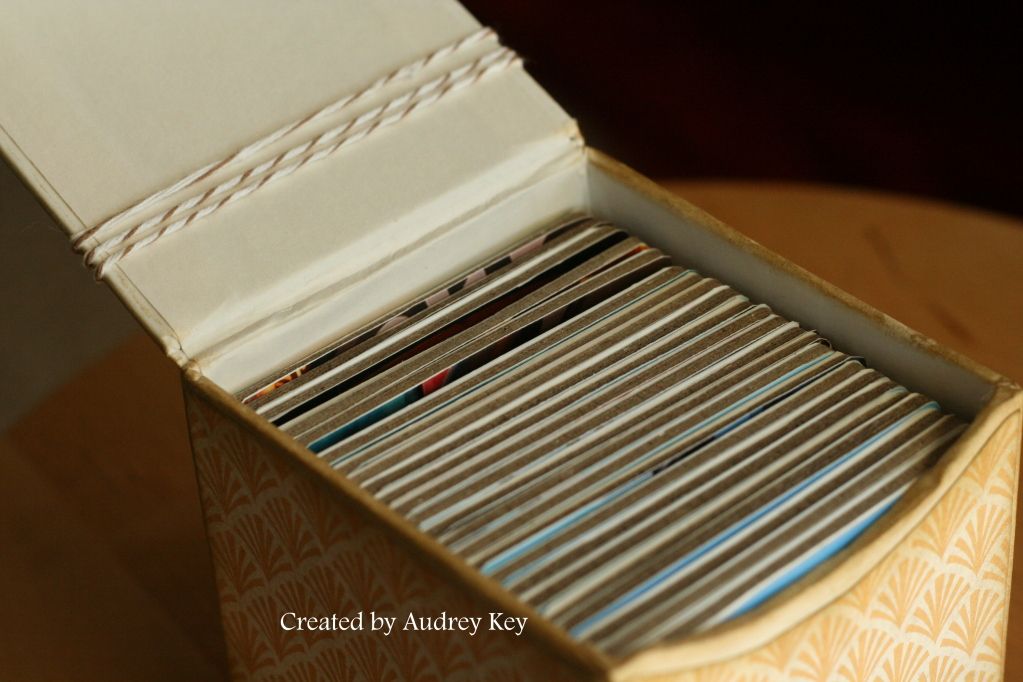
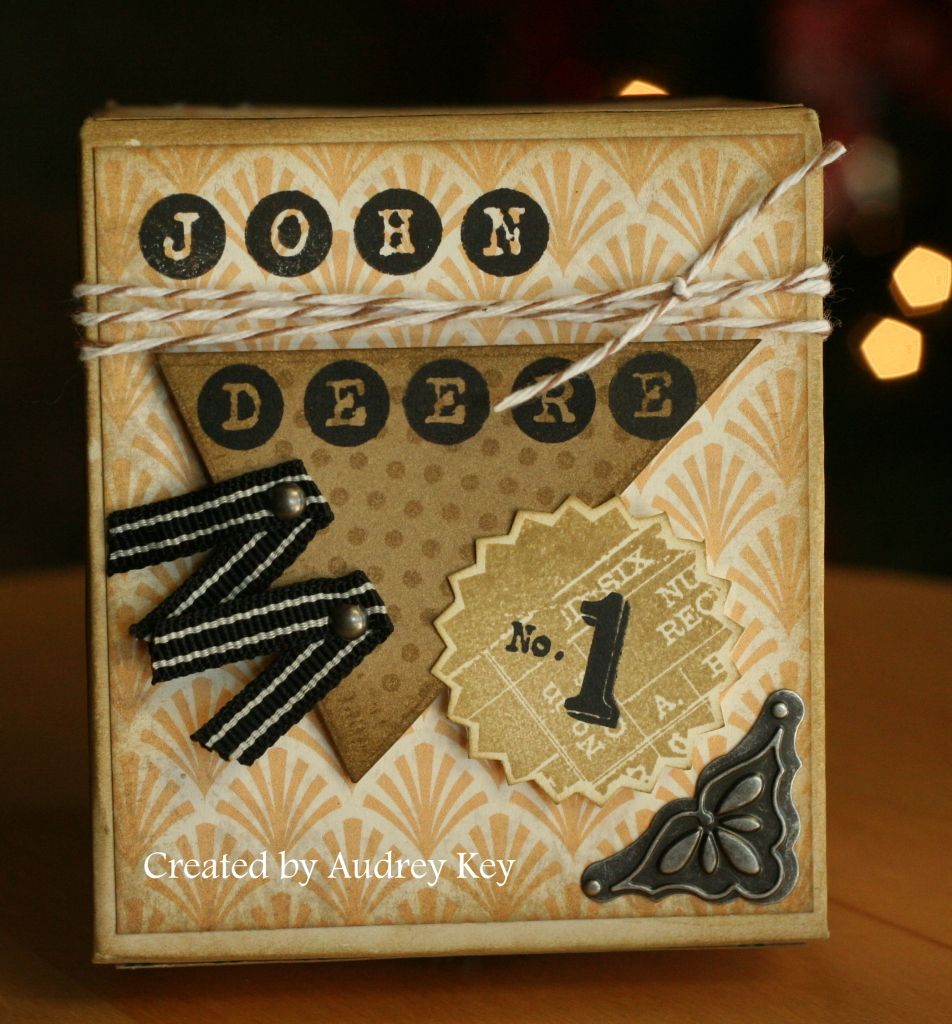
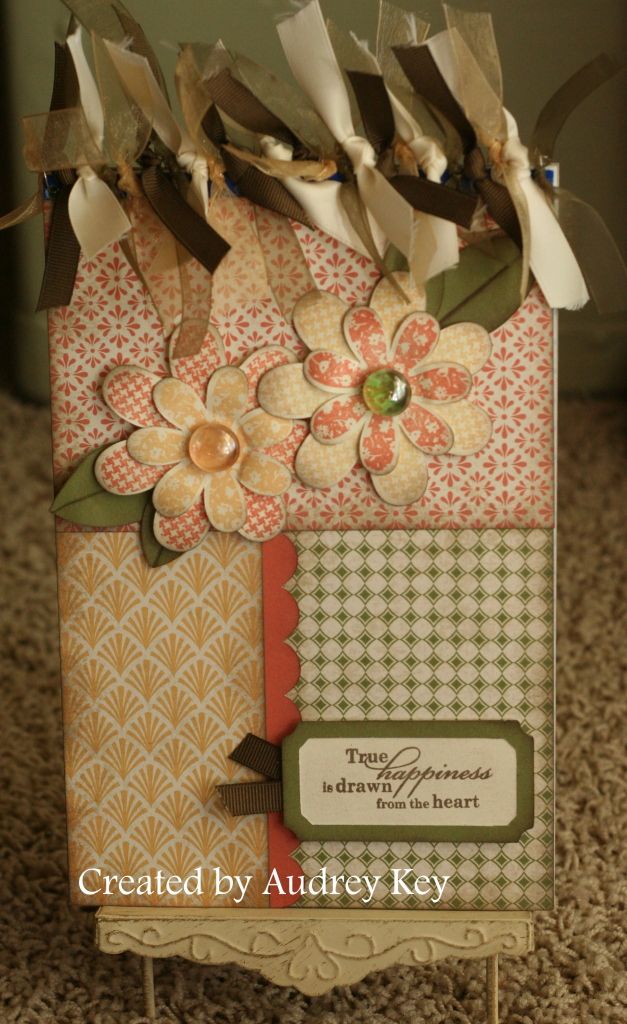
The above journal is what we made.  I used the Elemental Paper packet and miscellaneous ribbons from my stash.  I cut the scalloped border, leaves and flowers on the Cricut and stamped them with the Hooray Bouquet stamp set.  We used liquid glass to adhere the pebbles to the center of the flowers. 

 Everyone loved their creations...many of them don't scrapbook or make cards and told me that it made them feel really "crafty"!  Those are the days that I love my job!

PS - Thank you to my last minute helpers!  My mom, Aaron Brown, Aunt Barbara, Nancy, and Jackie helped me,  as the committee split everyone up into groups - and there aren't 6 of me (thank goodness)!

Friday, January 27, 2012

A Week of Stamp Camp Projects - #5 - Happy, Happy Birthday


This card features Elemental Paper, Chocolate, Colonial White and Kraft Cardstock.  I used the Cricut AP Cartridge to cut out the flowers and the focal point.

*The technique we used for this card is a Tie Dye Felt Stamp Pad.  To make a tie dye felt stamp pad you need, squares of felt, paper towels, a paper plate and miscellaneous re-inkers.   We used Creme' Brulee, Lagoon, and Sorbet re-inker to make our felt pad.  Layering from the bottom up:  paper plate, then the paper towels (folded up into a square), then the felt.  Rub the re-inker over the felt in whatever pattern you choose (try not to overdo the re-inker or it will be soupy).  Stamp as if is a regular stamp pad.  This will stay damp for a long time in a large Ziploc bag and can be used many times over. 

*We stamped the large flower (using the Hooray Bouquet stamp set).  The small flower was stamped on the felt pad  and then we used the Kiss and Twist technique (kissing a dry stamp to a wet stamp and then giving it a twist - it makes a batik look).

We used antique copper brads and Mocha Opaques to embellish this card.

Bonus Project coming up tomorrow!

Thursday, January 26, 2012

A Week of Stamp Camp Projects - #4 - Snowflake


This beautiful card features our Dimensional Elements Snowflakes, Elemental Paper, Pacifica and Colonial White Cardstock, Prisma Glitter, and our Designer Rhinestone Brads.

*We sponged the DE Snowflake with Bamboo ink and set aside to dry.

*We sanded the Pacifica snowflake that was cut with the Cricut AP cartridge.

*We stamped 1st and 2nd Generation snowflakes with Bamboo ink on the Cricut Square image.  Then we stamped "Laugh until your heart overflows."  (that is my favorite sentiment in the catalog right now).

*We added Bonding Memories glue to the tips of the snowflake and dipped them in Prisma Glitter (Very, Very Messy - but pretty).

More to come tomorrow!

Wednesday, January 25, 2012

A Week of Stamp Camp Projects - #3 - Thankful


This elegantly simple card was a fan favorite!  This card features Elemental Paper, Creme' Brulee Cardstock and Chocolate Cardstock.  We embellished the card with Just Blooms Paper Shapes, Seam Binding,
Opaques, and a Bling pin.

*We embossed the Creme' Brulee Cardstock.  We sanded it which shows the white core of CTMH's cardstock (it is a beautiful thing).

*We spritzed the seam binding/ribbon lightly with water; crumpled it up; and set it aside to dry.

*We sponged the Just Blooms Paper Shapes butterflies with Creme Brulee ink.  We added Mocha Opaques to create their bodies.

Stay tuned tomorrow for another fab Stamp Camp project!

Tuesday, January 24, 2012

A Week of Stamp Camp Projects - #2 - Baby


I am always in need of cards to give new moms!  I saw a sack in a magazine with a similar layout and thought it would be fun to make a card.  I used Elemental Paper and Kraft Cardstock for this card.  The embellishments are simply hemp and the Pink Button Assortment.

*The main technique that we learned with this card is to make a twisted ribbon flower.  Using a 1 1/2" square of Terrifically Tacky Paper - start at the center; twist the end of the ribbon up;  and stick it to the  TT Paper.  Twist and roll the ribbon in a spiral until you fill the paper square up.  Adhere the end of the ribbon to the backing after you remove the paper.  It will be ready to stick to the card.  (Terrifically Tacky Paper is in a small sheet and you cut off just what you need.  I ordered mine online.)

*The other technique on this card is making  dimensional leaves.  We made a score line down the center of the leaves and then folded and distressed them with a sponge.  We curled the tips upward with our fingers.

*The hemp bow is made by wrapping hemp around your four fingertips two times with one cut end at the top and one cut end at the bottom.  Then you simply slip off your fingers and tie the whole thing in a knot.  I makes a double bow.  It is a little tricky at first but oh so cute!

More Stamp Camp Projects to come!  Stay Tuned!


Monday, January 23, 2012

A Week of Stamp Camp Projects - #1 - Tailor Made Thinking of You


Stamp Camp is an event that I hold annually and this year was the 9th year.  The purpose of Stamp Camp is to learn new techniques.   We used the Elemental Paper Packet, paired with cardstock, for each of the projects!  You will see the versatility of Elemental with each project,
as the week goes on.

*For this card we rubbed the stamp pads on wax paper; laid the tag on the ink and pressed it a little.  Then we spritzed water over the wax paper  (which re-activated the ink) and laid the tag back on it and pressed it again.  When you lift it up it has a really cool watercolor looking image.  We set it aside to dry as we worked on the other steps. 
*We used crumpled seam binding as our ribbon - we spritzed it with water and crumpled it up and let it dry.  To get the fluffy bow, we tied three bows with the one length of ribbon securing it with a glue dot to hold it when we finished (you just keep tying bows until you run out of ribbon).
*The stamps that were used were:  Tailor Made, Love Life, and Childhood Portrait (for the sentiment). 
*We used Pin Clips, a large sparkle, and a large bling button to finish this beautiful card off!

I hope you visit tomorrow to see the next project!

Thursday, January 19, 2012

Elemental Workshop on the Go Cards


These are the cards that I created for the Elemental Workshop on the Go.  The great thing about the Elemental kit is that it so versatile.  This card was created to celebrate July 4th. 


This card is a birthday card.  The stamp set for this kit is Cricut compatible so all the images were cut out on the Cricut.  We used the sanding technique on all the cards as that was one of the techniques that they used for the WOTG. 


This card can be used for all occasions or birthday.  I love these Cricut flowers and I learned something new from my friend, Bea (she is so talented).  She said that she likes to bend the petals back with the tweezers and it works great! 

**Tips - I used the tweezers to roll the flowers up and then let them spring out. 
Use the back/curved side of the tweezers you can bend the petals back.
Re-roll by hand and glue in place with liquid glass. 

The Elemental WOTG Kit includes:  Elemental Level 2 Paper, Just Blooms Paper Shapes, Designer Brads Antique Copper, and the Workshop Guide.  The kit is $35 (that includes the tax and shipping)


Wednesday, December 28, 2011

John Deere Floor Puzzle


Here is a cute gift that I made for Brayden for Christmas (it was supposed to be wrapped and under the Christmas tree but I just finished it today).  I used our My Creations Memory Box for this project.  It is the box with a magnetic closure and it has 24 - 3"x3" chipboard squares inside.


I used the Creme' Brulee' B&T from the Elemental Level 2 paper packet along with Black and Desert Sand cardstock.


In our family, John Deere is #1!  Dean has worked for our Texas/Oklahoma industrial John Deere dealership for 27 years so we are "eat up with John Deere!"  Our kids and grandson learned at an early age that "John Deere is #1".  That is the saying around our house, so that is what I decided to put on the lid of Brayden's John Deere Puzzle. 

I used embellishments from the Black Mini Medley and the Pewter Mini Medley assortments.  I used the Vintage Type stamp set and the Blue Ribbon stamp set.  My mom gave me the cute twine that I tied around the lid (it was in my stocking). 


Side one of the floor puzzle is a backhoe that Brayden, Connor and Dean drove a year ago in September.  They dug a big hole with it; stood in it; and then covered it back up.  Brayden and Connor each took turns with the controls!


Side two is a photo of them sitting on an Articulated Dump Truck.  They didn't get to drive it but had a fun
time climbing on it.

To help Brayden out a little, I stamped a "1" on the side one pieces and a "2" on side two pieces.  I used StazOn ink and the Countdown stamp set.


Friday, October 7, 2011

Remarkable Wreaths - 3 Ways!

I thought it would be fun to show you the versatility of our new stamp set "Remarkable Wreath."  I decided to try out the Cuttlebug that my sister bought me for Christmas 2 years ago (I know, it is pathetic that I haven't been using it!).  It is a very cool tool!  Brayden loved it too - he sat down and embossed everything he could get his little hands on!


 Give Thanks Card:   I used the fall leaves wreath along with the stick wreath which I stamped in second generation ink.  I used Elemental B&T along with Cocoa Cardstock,  Foundry Metal Accessories (Pewter Ribbon slides), Mocha Opaques, and Sorbet ribbon (from my stash).  I rubbed the Cocoa stamp pad across the embossed cardstock so that the embossing would show up better.


All Occasion Card:   I used the floral wreath along with second generation Chocolate ink for the stick wreath.  Elements on this card are Creme Brulee Cardstock along with Elemental B&T, Mini Medley Pewter Assortment, Foundry Metal Accessories, Mocha Opaques, and
Chocolate Ribbon. 


Noel Christmas Card:  The Berry Wreath was stamped with second generation Cranberry ink and I used second generation Cocoa ink for the stick wreath.  I used Barn Red Cardstock,  Cocoa Cardstock, Red Ribbon Assortment, Chocolate Waxy Flax, Mini Medley Pewter Assortment, Mocha Opaques, and Pin Clips.


Thursday, October 6, 2011

Gnome Garden Clear Card


As a child, my favorite activity was coloring.  Stamps like "Gnome Garden" take me back to those childhood days and the exhilaration that coloring brings.  For this clear card, I used the Elemental Paper Pack, Mini Medley Pewter Assortment, and Mocha Opaque Gems.  The Gnome is shaded with our watercolor pencils and a blending pen.

*Tip - when coloring an image with a blending pen or water brush pen, you need to use StazOn Ink or Archival Ink to prevent running/smearing.  I used Brown StazOn Ink to stamp the Gnome and the butterfly.