Showing posts with label Bling Assortment. Show all posts

Sunday, April 15, 2012

Cricut French Fry Box - Cricut Class Project

Wow, it has been a busy time of year in my world. I have missed not blogging the past few weeks and I am hoping to have a little more time to post inspiring projects for you!


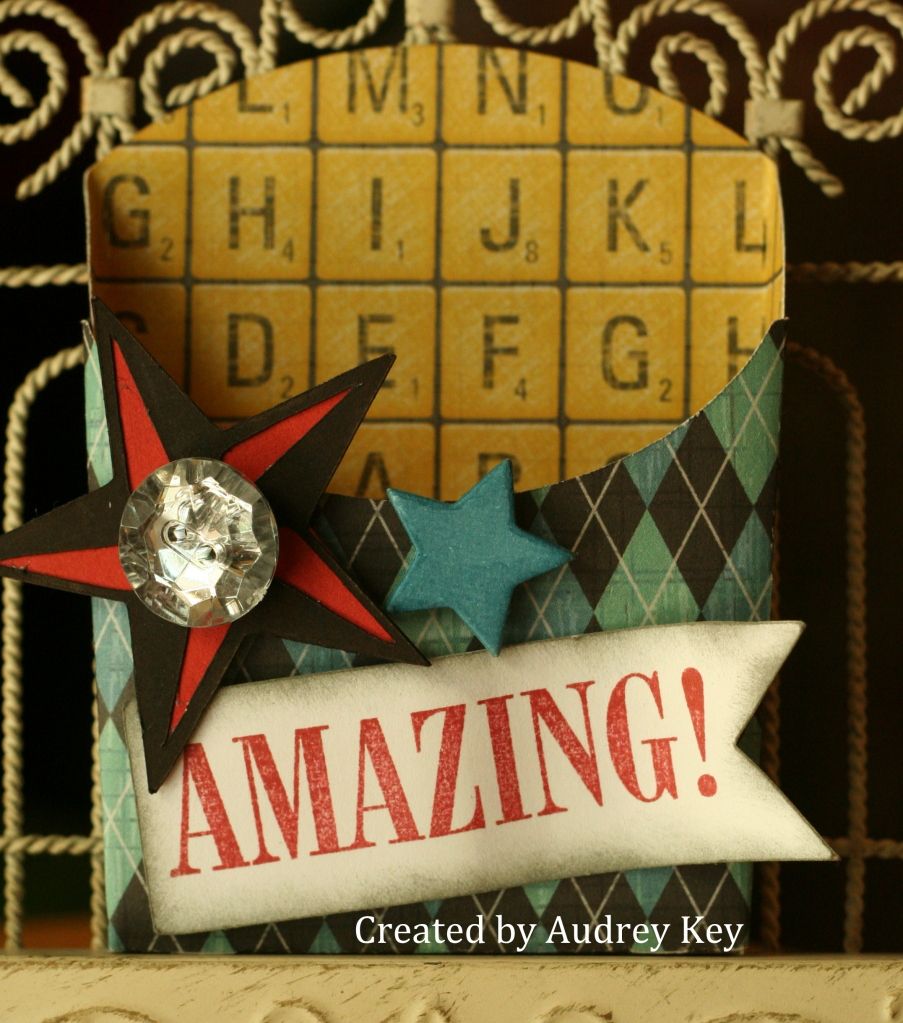
Here is a cute little French Fry Box made with the Cricut AP Cartridge (font layer; shift; <shape6>) .  The french fry box is made from the Cruisin' paper packet and I cut the box 7".  The red and black stars and the banner were cut with the AP cartridge as well. 

I used a small star out of our Dimensional Elements Stars package and I colored over the star with the brush tip of a Twilight Marker.  The word "Amazing" is from the April Stamp of the Month called "You Are...".    A bling button adds dazzle to this project.


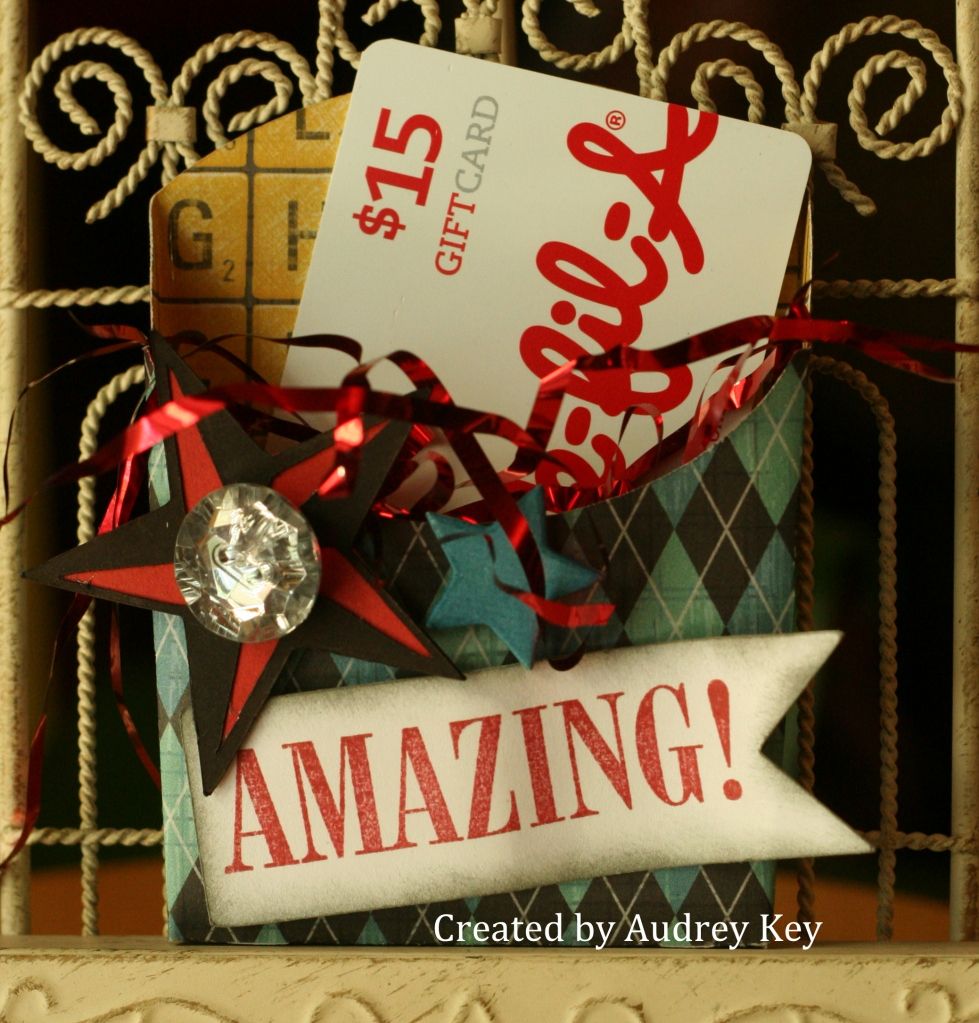
This little box could be used for lots of purposes.  I think this is perfect for a gift card holder like the above picture shows (stuff with gift shred and put a gift card in).  A few ideas are:  graduation, a new baby, birthday, etc.  The class participants said they thought it would be fun stuff with candy, or other small treats too.


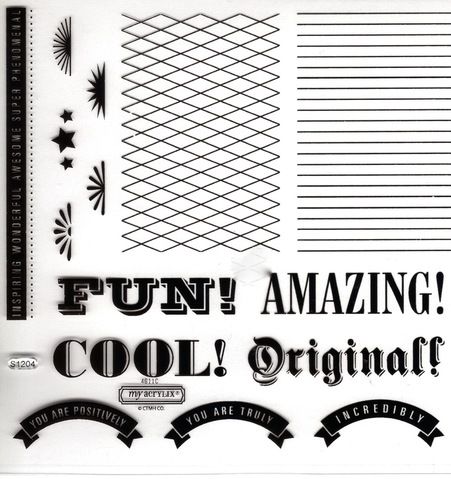
Above is the April Stamp of the Month, "You Are..."   It is $17.95 or $5 with your purchase of $50 or more.  I would be happy to order it for you, or you can shop on my website http://ctmh.com/stampingaudrey from the comfort of your home.
 

Wednesday, January 25, 2012

A Week of Stamp Camp Projects - #3 - Thankful


This elegantly simple card was a fan favorite!  This card features Elemental Paper, Creme' Brulee Cardstock and Chocolate Cardstock.  We embellished the card with Just Blooms Paper Shapes, Seam Binding,
Opaques, and a Bling pin.

*We embossed the Creme' Brulee Cardstock.  We sanded it which shows the white core of CTMH's cardstock (it is a beautiful thing).

*We spritzed the seam binding/ribbon lightly with water; crumpled it up; and set it aside to dry.

*We sponged the Just Blooms Paper Shapes butterflies with Creme Brulee ink.  We added Mocha Opaques to create their bodies.

Stay tuned tomorrow for another fab Stamp Camp project!

Monday, January 23, 2012

A Week of Stamp Camp Projects - #1 - Tailor Made Thinking of You


Stamp Camp is an event that I hold annually and this year was the 9th year.  The purpose of Stamp Camp is to learn new techniques.   We used the Elemental Paper Packet, paired with cardstock, for each of the projects!  You will see the versatility of Elemental with each project,
as the week goes on.

*For this card we rubbed the stamp pads on wax paper; laid the tag on the ink and pressed it a little.  Then we spritzed water over the wax paper  (which re-activated the ink) and laid the tag back on it and pressed it again.  When you lift it up it has a really cool watercolor looking image.  We set it aside to dry as we worked on the other steps. 
*We used crumpled seam binding as our ribbon - we spritzed it with water and crumpled it up and let it dry.  To get the fluffy bow, we tied three bows with the one length of ribbon securing it with a glue dot to hold it when we finished (you just keep tying bows until you run out of ribbon).
*The stamps that were used were:  Tailor Made, Love Life, and Childhood Portrait (for the sentiment). 
*We used Pin Clips, a large sparkle, and a large bling button to finish this beautiful card off!

I hope you visit tomorrow to see the next project!

Monday, January 16, 2012

Wonderland Snowflake Card


This card screams "Winter"!  (Although it is supposed to be 70 degrees today and we are expecting 55 mph wind and a dust storm - remember...the weather man is never wrong about wind and dust!)

I used the Snowflakes stamp set which is Cricut AP compatible.  I cut both snowflakes on the Cricut and then stamped them with the coordinating stamps.  I embellished them with Martha Stewart glitter to make them sparkle and shine.  I also used our Designer Rhinestone Brads, sparkles, Bling Assortment Pins and ribbon from my stash.

Thursday, January 12, 2012

Winter Joy Snowman Card


The Winter Joy stamp set was used to create this winter scene.  We don't get much snow in our part of the world, but we love it when we get snow.  The kids beg to build a snowman and we rarely get enough to roll one up!  When the weather men forecast snow, we start praying for lots of it (like 3" or more).  Everyone around here says the forecast is usually wrong unless they forecast WIND!  They are never wrong about wind!  On that note - please pray for West Texas - we have been in a drought for about a year now and we really need snow, rain, something!

My favorite things about the Winter Joy stamp set are these kids building a snowman, the large word "JOY", and a sentiment that says "Laugh until your heart overflows." 

I embossed the background with the Swiss Dot Cuttlebug template and then sanded it so that it would appear to be snow falling.  The paper is Wonderland and I used the Bling Assortment, Pearl Opaques, and the flower is from the Bliss Level 2 Assortment. 

PS - Wonderland Paper and the Bliss Assortment are being retired as of January 31

Wednesday, December 7, 2011

Roxie Workshop on the Go Cards


I created these cards for the Roxie Workshop on the Go - Cards Workshop.  The pattern is from the Wishes book and is called "File Pocket." 


The Roxie WOTG kit includes:  Roxie Level 2 Paper, Roxie My Acrylix Stamp Set, Bling Assortment, Black Hemp and the Roxie Workshop Guide.  The kit is $35 (which includes tax and shipping). 


When you purchase the Roxie WOTG kit, I will include the card instructions to complete these cards.

Saturday, December 3, 2011

You're Sweet


This card was also inspired by my friend, Karen Pedersen.  This card features the December Stamp of the Month "Mad About You."  The flowers are made from 5 hearts for the lower layer and 5 hearts for the top layer - all of the hearts were cut on the Cricut and then stamped with the coordinating stamp.   Silver Glitz Glitter Gel adds that special sparkle to the border along with a bling button that I added to the center of the flower.  The flourish is from the Instant Memories stamp set.

Wednesday, November 30, 2011

Christmas Tree Clear Card


This is one of the first projects I made using the Cricut Art Philosophy Cartridge and the stamps in the bundle.  I cut the trees with the cricut and used the stamp set in the bundle to stamp them.  This card is a clear card from our specialty card line.  I used Believe paper, Green Ribbon Assortment, Bling Buttons,  Cricut AP Cartridge and stamps, and Red Glitz Glitter Gel.

Tuesday, November 29, 2011

Christmas Joy Layout


I can't wait until Christmas gets here and I have photos to add to this cute layout!  This 2-page layout features Believe Level 2 Paper, Dimensional Elements Monograms, Bling Buttons, our cute new Holiday Pockets and Prisma Glitter.


I used one of the Reindeer Zip Strips in the paper packet as "ribbon" across the layouts.  I also used the Love Life stamp set to add the flourishes. 


**Tip - To embellish the "JOY"  Dimensional Elements Monograms I sponged them with Sweet Leaf Ink;  I stamped a patterned stamp from the Love Life stamp set with Topiary Ink; I let the ink absorb into the chipboard a few minutes and then I covered them with Bonding Memories glue and sprinkled Prisma Glitter over them. 

I cut the scalloped banner with the Cricut AP Cartridge and added bonding memories glue to the edges and sprinkled Prisma Glitter over that piece as well.  I think it adds just the right amount of glitz.


Saturday, November 19, 2011

Over the Moon In Love Card


I couldn't wait to make this card!  I dreamed about it last week and knew that when we returned home I HAD to make it.  I used Roxie Level 2 paper, Red Ribbon Assortment, Black Ribbon, Bling Assortment, and the December Stamp of the Month called "Mad About You."  The ticket and the heart were cut on the Cricut!  Imagine that - the December Stamp of the Month is Cricut compatible!   This stamp set is great for wedding, Valentine's Day, or love cards and/or scrapbook pages.  In my opinion, it is a must have!

Tuesday, November 15, 2011

Roxie Rolodex


I have missed not posting (for a week now).  We were out-of-town and so I want you to know that I am happy to be back in the "saddle".  I started this little project last week before we left but ran out of time to complete it.  I have had this Rolodex for at least a year and had been meaning to decorate it.  This isn't your typical Rolodex as it is a place for those endless passwords that we all have.  It is a pet-peeve of mine that every website makes you use different cases, numeric characters, etc.  I can never remember them all!


Since we have reds and animal prints in our house I thought it fitting to use the Roxie Level 2 Paper packet.  I also included lots of black ribbon, Bling Assortment, Pearl Opaques, Sparkles, and the Cricut Art Philosophy flowers. 

Saturday, October 29, 2011

Roxie - 10 Things I Cherish Board Book


This darling book started out as a white chipboard book and ended up as a work of art!  In it are 10 Things that I Cherish - 1) Family; 2) Home; 3) Dean; 4) Stephanie; 5) Connor; 6) Brayden; 7) Holidays; 8) Summer Fun; 9) Birthday Celebrations; and 10) Vacations.  Yes, I know there are many more things that could be included but, I only had 10 pages! 

I used the 10 Things My Acrylix Stamp Set and Instant Memories Stamp Set as well as Roxie Level 2 Paper, Bling Assortment, Just Blooms Paper Shapes, 10 Things Pocket (tags), Cricut Art Philosophy Cartridge, and sparkles.


Saturday, October 15, 2011

Believe It - 50 Christmas Cards in a Day

You may not "Believe It" but you CAN make 50 cards in one day!  The way that  this task is completed is to spend an hour and a half and complete 10 cards  at each station (we rotate 5 times).  The main objective is to follow the directions for cutting the paper, stamping the pieces, and finally, assembling the cards.   It is a great workshop, and it is even more fun to leave the workshop with your Christmas cards ready to sign and address! 

As you are reading this post, there are 17 lovely ladies participating in this workshop today.  Their kit included: Believe Lev 2 Paper, White Daisy Cards and Envelopes, Cranberry Ribbon, Clear Buttons, Bling Buttons, and Red Glitz Glitter Gel.

 I used Remarkable Wreath for this card.
(Does this stamp look familiar?)


 I used Christmas Cheer on this cute tree card.  The tree was stamped with StazOn ink and I waterbrushed it with Topiary ink.  Red Glitz Glitter Gel was used to decorate it.


Holiday Magic is an awesome Stamp of the Month (available during October) to use for your holiday card making!


Holiday Cheer and A Holiday were used on this adorable Happy Holidays card!  Of course the name plate and holly leaves were cut from the Cricut Art Philosophy Cartridge!


And last, but certainly not least, the buttoned up tree from  Happy Clusters finishes our 50 cards off in grand style!


I hope you enjoyed a sneak peak at what we are making at our 50 Christmas Cards in a Day Workshop.  I also hope that these cards inspire you to start making your Christmas Cards early!  Have a wonderful weekend!


Wednesday, October 5, 2011

Holiday Magic Christmas Card


This cute card was inspired from my friend, Jan, who lives in South Texas!  It is an easel card and it was a lot of fun to create.  I used CTMH Believe paper, Bling Button, Silver Glitz Glitter Gel, and Pearl Paint.  I used the CTMH black stubble tool and the Pearl Paint to create the snowy effect on the red plaid paper behind the tree.  The stamp set is our October Stamp of the Month, "Holiday Magic." 

It is easier to see how it "props" up with this side view.


During the month of October, this fabulous stamp set is only $5 with a $50 purchase (or you can buy it for $17.95 plus tax and shipping).


Thanks to Jan for the inspiration!

Monday, September 26, 2011

Roxie Post-It Note Stand

Today's project is a Post-It Note Stand created from a 5x7 Acrylic Frame (thanks to Anna R. for the idea).  It is a very inexpensive gift/item to create.  I  used CTMH's Roxie Level 2 Paper pack for the insert and for the flowers that were cut on the Cricut Art Philosophy cartridge.   I also used Just Blooms Paper Shapes, Bling Assortment, and Sparkles.  The ribbon was some that I had in my huge ribbon stash (can you say ribbon hoarder?!).


This is a close up of the awesome flowers that you can create on the Art Philosophy Cartridge!  I sponged the edges with black ink for a more finished look.


I made this Post-It Note Stand for my daughter, Stephanie, when she moved into the new salon she is working at.  The decor at Michelle's Salon is French Country with zebra accents so this matches perfectly!  I used a different style flower her's and lots of bling because she is a blingy girl!